* A Lot of Pictures Alert!
 |
| Front of Book - Closed With Metal Clasp |
I have been wanting to work more with collage and mixed media using fabrics and papers. It occurred to me that one of the best ways for me to learn How to do this, was to Do this. So I decided to make a book out of fabric and chipboard and go from there.
 |
| Back of Book |
Today's post is about the construction of the book. This is a long post with lots of pictures. The inside of the book will be posted at a later date.
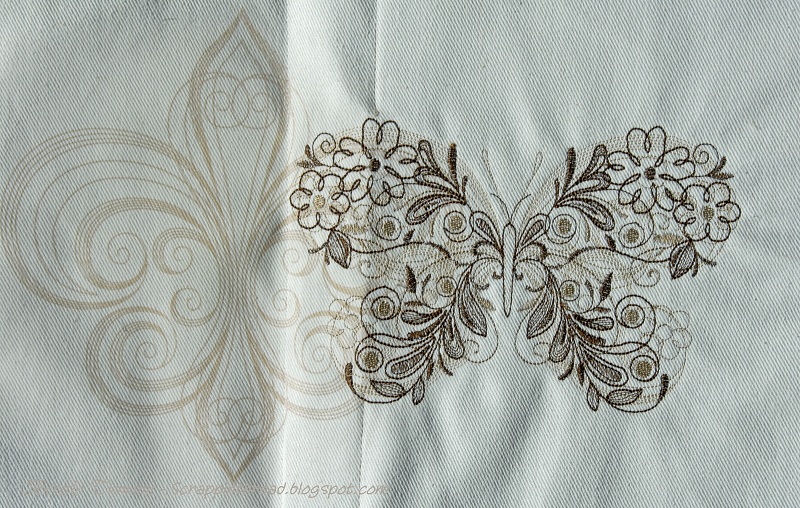
The cover and all of the pages are made from 10 oz. winter white denim. I used transfer artist paper on the cover for the fleur de lis and then embroidered the butterfly over part of it.
 |
| Transfer Artist Paper Used for Sepia Petal's Fleur De Lis Image from OESD/Bernina |
The back cover wraps around the front and stays closed with a clasp purchased in the button department at Joanns. The embroidery designs are from OESD's Sepia Petals. The stabilizer is large enough to be completely hooped, the fabric is hooped on the sides.
The book is about 9 1/2" wide by about 11" tall finished.
 |
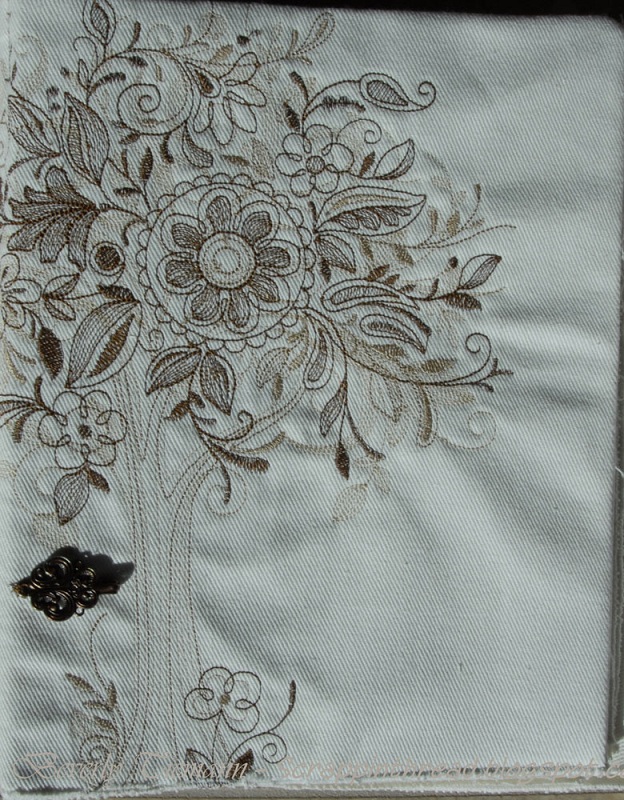
| Machine Embroidered Tree On Front Cover |
After embroidering the outside cover, I sewed the inside cover to the front on three sides. The clasp was sewn to the back (wrap-around) cover using elastic sewn into the seam. Initially, I serged the three sides, thinking that I was going to do a raw/serged outer seam. As I continued working on it, I decided to sew rights sides together and turn it out. I knew the bottom edge would be serged once the chipboard pieces were in place. The somewhat rough edge that the serging makes is the look I wanted for the bottom. All of the pages of the book are also serged around the edges.
 |
| Ready for Chipboard |
I hand sewed the other part of the clasp to the front and then calculated where the chipboard inserts should go. To make slots for the chipboard I sewed straight lines down the length of the book wherever seemed like it would make sense to have the book bend. The pages of the book were to be sewn in After assembling the cover.
 |
| Inside of Book Cover with Chipboard Inserts |
Once all the pieces of the chipboard were in place, I serged the bottom of the book. I worked on the inside cover prior to assembling the other pages. Because it was to be embroidered, it was easier to do it this way. The interior of this art journal is still a work in progress and not quite done yet.
 |
| Front Cover With Back Cover Pulled Open |
 |
| Copic Colored Fastener |
The clasp was a pewter color which did not match the embroidery threads at all. I colored it with an alcohol based marker and it looks much better.
After the outside was finished, I sewed the pages into the book on either side of the chipboard-stabilized spine.
Please come back to see some of the pages as I complete them. I experimented with different ways to adhere paper to the fabric, used different image transfer techniques and stamped, inked, painted, and spritzed fabric and paper as I layered and collaged it together. It has been a fun learning experience!
Thank you for visiting today!
Beverly


No comments:
Post a Comment