Paper and Fiber Arts


Welcome to my mixed media blog. Thanks for stopping by.
Showing posts with label Machine Embroidery. Show all posts

Sunday, July 30, 2023

Improvisational Surface Design


Very rarely do I abandon other projects to work on something new. Recently, an opportunity presented itself that caused me to work on something unexpected. This recently happened because of a challenge posed by the Improv group of the Portland Modern Quilt Guild. The July prompt was 'Surface Design'. My piece incorporated both improvisational quilting and surface design. This piece is mainly green because I am also working in a series with color as the focus. It felt like green should be used this time. 


This project inspired me to try a bunch of different things in one piece. For me, this is part of the fun. What starts as an experiment with materials to learn how they work together becomes an exploration of techniques and outcomes.


The first step was to see how a variety of media would work with this stencil on a piece of PFD Kona cotton. The Stabilo chunky pencils and the Derwent Inktense pencils worked as expected with no bleeding. Once the Inktense pencils and Inktense blocks were activated with GAC 100 the color did move. The Crayola Fabric, Marvy, Sharpie Stained, and Jacquard Tee Juice markers bled slightly but were easy to control. The Dye-na Flow is more challenging to control. I use water brushes filled with the dye and this can saturate the fabric quickly.


Next, after digging in my scrap box, I found several strips to sew together. Then, Pellon fusible web was applied to the back and a circle was cut using an Accuquilt die. This process was repeated on the stenciled piece. In order to have some variety with the circle sizes and fabrics, I used a set of smaller circle dies (Hero Arts) that are usually used with paper. They worked great. Both the large pieces and the additional smaller ones were attached to a larger piece of solid white fabric. Additional stenciling of circles and partial circles offers visual continuity. Adding stitched circles to the piece continued the theme. These circles were made with an embroidery sewing module using a wide range of thread colors.


I got a little carried away with adding circles and the finished quilt was too busy for my liking. It measures about 16 x 17 inches. The picture above shows it on my design wall.


Close up

The busy little quilt needed to be mounted onto a solid background to give it some space. After auditioning a number of options, I decided to use a previously painted wood panel, measuring 24" square. The sides are now painted black. I layered a piece of batting and black fabric together and quilted it enough to hold it together. The edges were turned prior to quilting. Then I attached the small art quilt to it and glued the entire thing onto the wooden frame.
The finished piece on a blue wall in my kitchen


Next month's prompt is "Sunshine". I am excited to try something with Tyvek for this challenge. What encourages you to work outside your normal process?


THIS POST MAY CONTAIN AFFILIATE LINKS. BY CLICKING ON THEM AND PURCHASING PRODUCTS THROUGH MY LINKS, I RECEIVE A SMALL COMMISSION FOR THE REFERRAL. THE ITEM WILL NOT COST YOU ANY MORE BY GOING THROUGH THIS LINK.

Wednesday, July 1, 2020

Lawn Fawn Interactive Card and Machine Embroidered Gifts

.
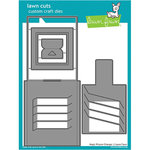
Lawn Fawn Magic Picture Changer Card


My sweet grandbaby recently turned two-years-old. These pictures show some of the things that I made to send to her. It was fun to make the Lawn Fawn Interactive Card. This is the first time I used this die and it was very easy to assemble.  The machine embroidered things were also easy to make. I love machine embroidery for lots of reasons but my favorite is that because while the machine is humming along, I can work on other things, for example, coloring the pieces for this card.

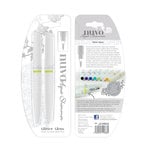
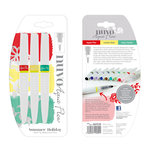
Copic and Tonic Aqua Shimmer and Flow Markers


Tips for interactive cards

  • Use sturdy cardstock. 
  • Anti-static powder will make the paper move easier
  • Try to assemble as much as possible before using adhesive to check if it works properly
  • If you make a sample, label and keep the pieces to help for future assemblies

Gifts for Toddlers

The following designs are from Scissortail Stitches, which is an offshoot of OESD.  The puzzle is done completely in the hoop. I used some scraps to make a little bag to store the eight pieces of the puzzle.

Scissortail Stitches Machine Embroidered Puzzle
Both of the towels are made with a bath and a hand towel, each. The designs are machine embroidered applique on the hand towel. After the design is done sewing out then the hand towel is sewn to the bath towel. It is a very simple and useful project.

Bathtime Buddies Hooded Towels
Thank you for stopping by today!
Beverly

Supplies:


Nuvo Deluxe Adhesive

Thursday, October 31, 2019

Happy Halloween! Trick or Treat Idea for a Toddler

For some of us, Halloween is all about candy.  For others, it is about the costumes, parties, decorations, cooler weather, walking the neighborhood and seeing neighbors. The candy is kind of a bonus as you get a little exercise. When you are small, you do not have the chops to be able to even eat candy and you do not understand the rest of the hoopla, either.
Nor do you have long enough legs to do the marathon walking for which veteran trick or treaters pride themselves. And since you have to be in bed by 7:30, you aren't going out to get candy anyway. But, if you have a Gigi (or someone else who sews) who wants you to begin to learn about Trick or Treating, you may get a little Halloween game to play at home. This was designed for a 16-month-old to use until she gets bored.  Or about 3 or 4 minutes at a time.

 Yesterday, I posted about some machine embroidery that I had been doing. That post is here.  While working on those projects I came up with some In-the-Hoop projects of my own design.


These are simple shapes that I embroidered in the hoop. After making the faces in my embroidery software and stitching them out, I put the back piece of fabric on and embroidered most of the way around leaving a gap to add stuffing. Pictured below is the chocolate candy bar.  These are made from felt.  It is a very inexpensive fabric that holds the designs quite well. 


The game is to practice Trick or Treating, so she needed a bag to hold her little play candies.  Here is the design that I stitched on the small tote bag that I made for her.  I hope she will be able to use the bag next year, even if the candies are no longer of interest to her.


This next picture is just because it makes me laugh every time I see it.  Amelia has been into yoga since she could stand.  She is visiting me next week and I can not wait to see what new poses she has mastered!
Lastly, I decided that I need something else to do to keep me busy so I have started a new venture and a new blog.  More to follow in the next day or two.


 Wishing you all a safe and Happy Halloween!
Beverly


Wednesday, October 30, 2019

Machine Embroidery Projects Make Great Gifts

My sweet little granddaughter is now back home in Arizona with her parents. Her extended stay with us was so much fun!  It was hard getting used to the quiet after she left but I revved up my sewing machine and got to work making some gifts. The noise of the embroidery unit doesn't bring me as much joy as dear, little Amelia - but it was productive, at least!

Embroidery design from Embroidery Library
 First up, is a book bag. We have a wonderful public library just a short drive from home and I thought my daughter might like a new bag in which to carry her haul. We go there almost every week and usually check out a movie, also.  These designs are ones that I purchased from Embroidery Library and Urban Threads. The bag I sewed from two heavy denim fabrics that were leftover from other projects. I didn't have enough black for an entire bag so I sewed it to the off-white denim and cut it out using an Accuquilt die for a tote bag. I purchased the die a long time ago to make Christmas presents for people and never got a chance to use it.  I absolutely love it! It is so easy!
Embroidery design from Urban Threads

Next up is this adorable little penguin.  He is an In-the-Hoop design from Urban Threads. I made one for Amelia before she left and my 14-year old daughter wanted one, too!  I learned a lot about embroidering on Minkee and fur fabrics with this little guy and a couple of other stuffed critters from Urban Threads. Unfortunately, I do not have a photo of the pink hedgehog or the big stuffed sloth because they moved to Arizona with Amelia.
 If you aren't familiar with in the hoop embroidery designs and you have an embroidery machine, I would recommend giving them a try!  They are very satisfying to make because they are so quick! The instant gratification factor is huge with this type of embroidery.

 The designs stitch out a placement line for your fabric. Urban Threads gives you a pattern to pre-cut the fabric to the correct shape.  After it sews the line, you put the shape on top and sew a tacking stitch. Then follow the directions until you have your completed project. Easy!

Minky Embroidered Penguin Body
Topping Stabilizer on top of Minky Fabric
One of the main things that I learned in embroidering on top of fur or Minky fabric is that it is really important to use a topper so that your stitches don't get lost in all of that snuggly fabric.  This particular kind uses heat to get rid of the tiny pieces that you can not cut-away. If you use this, make sure that the fabric you are applying it on can take the heat.


Last up is this apron with an Urban Threads design on it.  I bought a bunch of aprons last year for Christmas presents and sewed different designs on each.  This design was still on my USB stick and I had not embroidered on it yet.  I think it is perfect for most of the introverts that I know!

Tomorrow, I will post a few more pictures of some additional embroidery that I did with my own designs for Amelia.

I hope all is well wherever you are and you are getting some crafting time in to keep your heart singing.
Beverly


Friday, June 7, 2019

Playmat Quilt For Amelia's Car

Last summer, I bought an adorable handmade wood car for my newborn granddaughter at an art fair. I've had nearly a year to plan a quilted playmat for her. It is embarrassing to say that I didn't actually start it until last week. In my defense, my sewing machine and most of my other crafty stuff have been inaccessible up until very recently. So here it finally is, in time for her first birthday! A playmat quilt for Amelia's car:


Let me apologize for not having a fabulous picture. It is hard to photograph something that is 5 1/2 feet by 5 feet and get all of the detail. In order to make up for quality pictures, I have opted for quantity. 


When I saw Accuquilt's Go! Cute Car die, I hoped it would be close enough in scale to work with the wood car.  Then I saw that they sold digitized designs to make the applique even cuter and more versatile. That was what sold me on getting the die for this project.  It would save me an incredible amount of time!
There are more digitized designs available that are not on the quilt. I bought nine of the embroidery designs and added one extra Star Wars themed car made from scraps leftover from another project.
In lieu of attaching a  quilt label, I sewed directly onto the backing fabric. This was very easy using the built-in alphabet stitches on my sewing machine. 

This quilt was made entirely with scraps from my stash. Including the batting! I pieced the batting together by zigzag stitching four smaller pieces. This quilt will hopefully get thrown on the floor and used. If it gets taken on picnics or to the beach, all the better. It didn't make sense to purchase new fabric for something that I hope shows a lot of wear in a few years.

Playmat Quilt for Amelia's Car with a Star Wars Tie-in
The cute pink traffic cones came from Target. If she brings her quilted playmat to my house, we will make buildings out of boxes or other things from around the house.
This isn't the type of thing I usually make, but it was fun to do. I sketched it on graph paper and then drew it up in EQ8.  And then revised it as I was making it. Tonight, I am flying to Tucson for the birthday party. Hopefully, we will get to play with her new car before I have to come back home.

Have a wonderful weekend!
Beverly


Accuquilt Dynamic Promo