Paper and Fiber Arts


Welcome to my mixed media blog. Thanks for stopping by.

Friday, May 5, 2023

10+ Cards Made with the Same Stamp/Die Set


Hello! This is a recap, with many pictures of the cards I created for Level 2 of the Altenew Educator Certification Program. My personal challenge was to use one stamp set for all ten courses. Here they are, and my shiny new badge which shows that I passed Level 1.


Original Post here


Original Post Here


Original Post Here

Original Post Here


Original Post Here


Original Post Here


Original Post Here


Original Post Here


Original Post Here


Original Post Here


Original Post Here

It always feels great to be able to use items several times over. It is very satisfying to stretch stamps and dies with different techniques. This makes the part of me that wants to be a mindful spender very happy.

Thursday, May 4, 2023

Craft My Stash: Reinker Marbling with Altenew, Pinkfresh, CTMH, Gina K., Ranger Inks

All of the re-inkers were used with photo paper and glossy cardstock. The colors are listed below with their respective photos. For the faux marbling technique, please watch the video tutorial. The paper was sprayed with water prior to applying the inks and additional water. The gold pigment ink pad is no longer available but other metallic pigment inks should work in a very similar manner. 

Glossy Cardstock is on the left-hand side of each picture posted below. The photo paper is on the right.

Altenew Reinkers

  1. Citrus Burst
  2. Snapdragon
  3. Grass Field


Paper after placed in an embossing folder

Archival Reinkers

  1. Manganese Blue
  2. Viridian

CTMH

  1. Thistle
  2. Crystal Blue
  3. Spring Iris


Tim Holtz Distress Ink

  1. Mustard Seed
  2. Tattered Rose
  3. Broken China


Distress Oxide

  1. Salvaged Patina
  2. Kitsch Flamingo

Gina K Designs

  1. Tangerine Twist
  2. Barely There
  3. Soft Stone


Pinkfresh Studio

  1. Persimmon
  2. Marigold
  3. Sky Blue


THIS POST MAY CONTAIN AFFILIATE LINKS. BY CLICKING ON THEM AND PURCHASING PRODUCTS THROUGH MY LINKS, I RECEIVE A SMALL COMMISSION FOR THE REFERRAL. THE ITEM WILL NOT COST YOU ANY MORE BY GOING THROUGH THIS LINK.


Products Used:


Wednesday, May 3, 2023

Craft My Stash: Marbling With Altenew Ink Pads

Marbled Paper Made With Ink Pads

One of my 2023 goals is to work through my craft stash and use the things I have or to let them go if they no longer serve my needs. For the past few days, I have been playing with ink pads and glossy papers to make marbled paper. Marbling is a very fun, unpredictable way to create card backgrounds, art journal or junk journal pages, or to add unique pops of color to scrapbook layouts. This post is mainly about my results when marbling with Altenew ink pads. It is also my submission for the AECP Level 2 course, With A Twist. The twist is that I have not heard of anyone using regular (not Distress) dye-ink pads for marbling. And the bonus twist is the addition of the pigment ink pad, Aqua Bronze Gold, and Gilding Flakes, too!


Card Made From Marbled Paper Using Altenew Ink Pads

Originally, my intention was to only use an old-nearly-dried gold pigment ink pad to add some metallic elements with the Altenew inks. But I found some other fun things to try as well. The video below explains the process and the pitfalls of my experimentation. 

The card pictured below is made with one of the pages that I said, in the video, was going to end up in the trash. Using a die to cut out the circled 'hello' brought life to the paper and popping it up on another not-very-interesting piece of marbled paper made a successful pairing. The glossy cardstock came from my stash. (Yay!)


The following two pictures show more detail of the marbling done on photo paper. It is Epson Premium Photo Paper Glossy, which I purchased at Target. The paper is 4" x 6". That means the card base size will either need to be modified, the piece will need to be cut down, or there will be uneven borders. All of these options are a great way to explore your creativity and see what is pleasing to your eye.


Altenew Crisp Dye Ink with Gold Pigment Ink on Epson Photo Paper

The sparkle that the gold adds to the paper is an unexpected treat. However, the blue-purple piece without any metallic highlights, pictured below, is also beautiful.


Altenew Crisp Dye Ink on Epson Photo Paper

Lastly, this card is an example of a smaller-size card. It is a mini-slimline, measuring 6.25" x 3.25". It is top folding with the base cut at 6.25 x 6.5" and folded in half at the 3.25" mark. The popped-up shaker element is 6" x 3". The floral images for the shaker windows and the embellishment blossom are from the Build-A-Flower: Primrose Layering stamp and die set. The sentiment was cut using a Silhouette electronic die cutter.


Mini-Slimline Shaker Card


THIS POST MAY CONTAIN AFFILIATE LINKS. BY CLICKING ON THEM AND PURCHASING PRODUCTS THROUGH MY LINKS, I RECEIVE A SMALL COMMISSION FOR THE REFERRAL. THE ITEM WILL NOT COST YOU ANY MORE BY GOING THROUGH THIS LINK.

Polychromatic Watercolor Layers on Cards


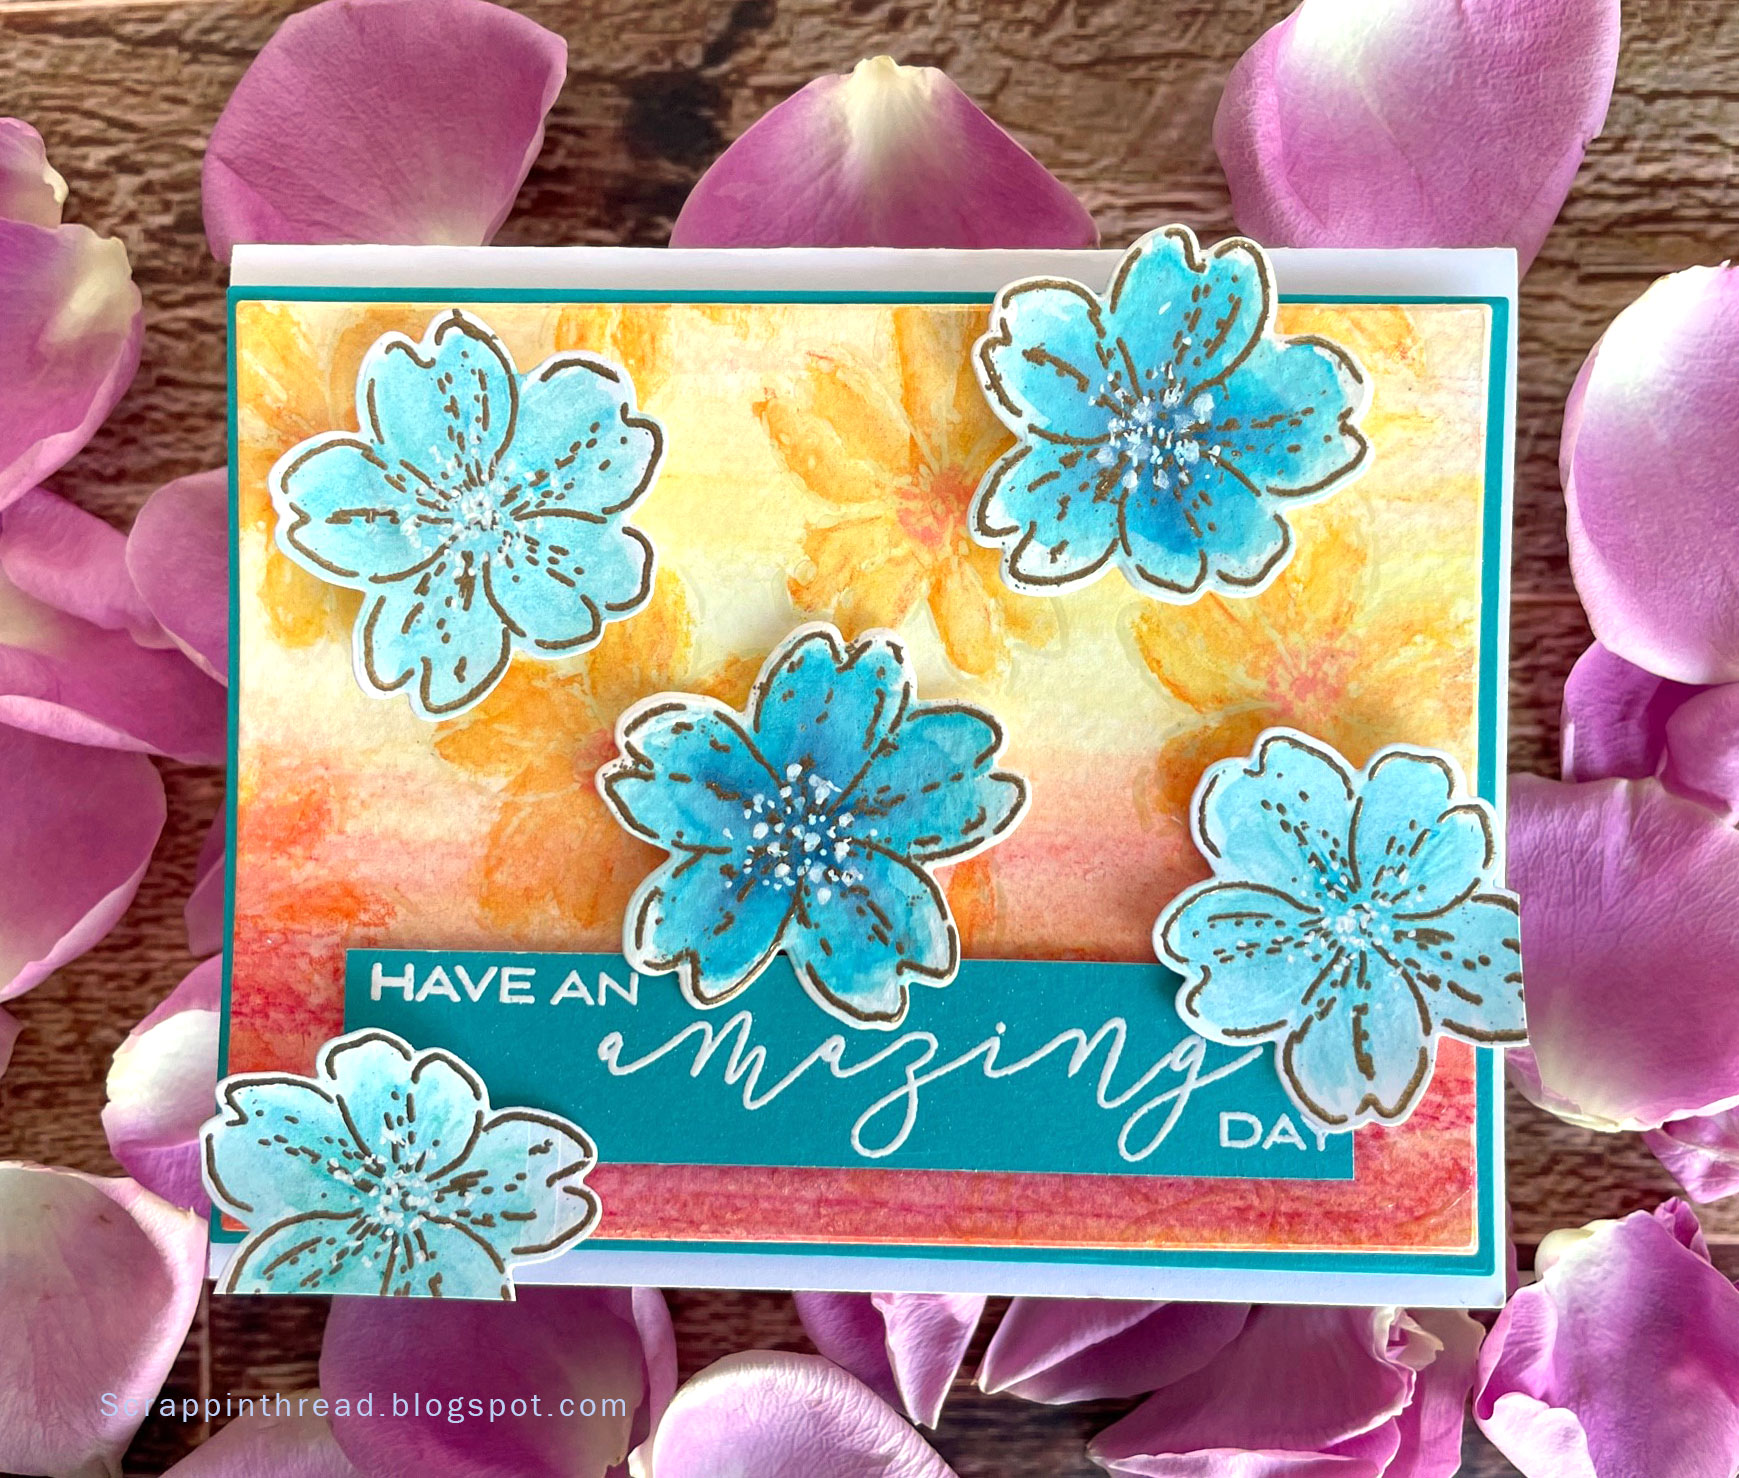
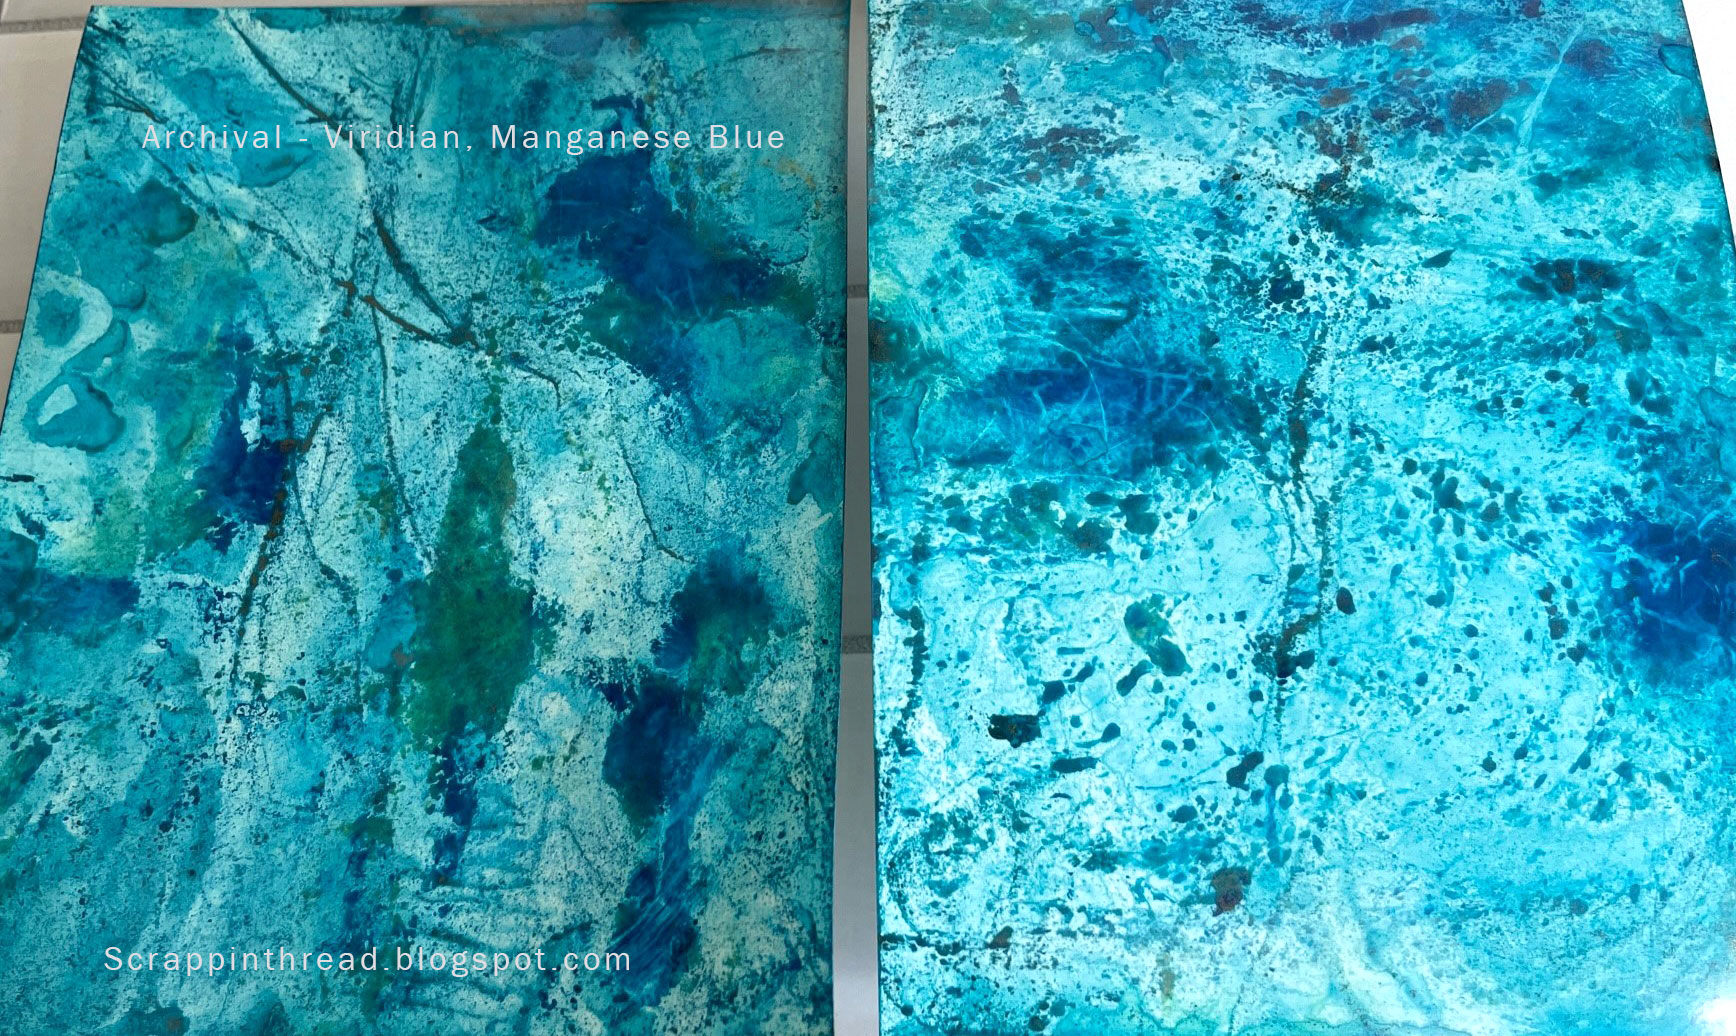
There have been many blog posts here about watercolors and cardmaking. However, they usually discuss specific media and techniques to achieve pleasing results. Today's post is a little different because the focus is on polychromatic watercolor layers on cards. Polychromatic means multiple colors. The inspiration for this card and a variation of this technique is from the Altenew Academy course: Polychromatic. 

Steps for background:

Scribble watercolor pencils on watercolor paper
Spritz with water
Move paint and water with a paintbrush
Let Dry
Scribble a little more watercolor pencil onto paper
Spritz with water
Move paint and water with a paintbrush
Let Dry
Randomly stamp floral outline image from Altenew's Build-a-Flower: Primrose set with Versamark
Heat emboss with a thick, clear embossing powder such as Amazing Glaze
Roughly color the stamped/embossed images with watercolor pencils
Wet the images with a thin watercolor brush or refillable watercolor brush
Let Dry
Touch up the images with additional color if needed
Cut panel with the smaller rectangle of the Master Layouts die cutting set from Gina K. Designs
Glue to a piece of teal blue cardstock that was cut with the larger rectangle die from the same Master Layouts set
Glue fun foam to the back of the layered panel and adhere to a top-folding A4 card base


Steps for Sentiment Strip:

Cut a piece of cardstock at least 4" x 13/16"  or cut it to that size after stamping and embossing
Treat with anti-static powder
Stamp sentiment - this is three separate stamps from the same Primrose set
Heat emboss with white embossing powder
Adhere foam tape to the back and pop it up onto the background piece which has already been attached to the card base

Steps for Blue Floral Images:

Stamp floral outline image from Altenew's Build-a-Flower: Primrose set with Versamark onto watercolor paper
Heat emboss with gold embossing powder
Roughly color the stamped/embossed images with watercolor pencils
Wet the images with a thin watercolor brush or refillable watercolor brush
Let Dry
Touch up the images with additional color if needed
Let Dry
Die cut images
Pop-up flowers with foam tape, one or two layers depending on the desired depth
Dot the centers of the flowers with a white gel pen or white paint

I like that there is a lot of depth and texture to the water coloring on this card. It also works well because of the high contrast in colors on the card. Please let me know if you enjoy using watercolors, too. Have a wonderful day!

THIS POST MAY CONTAIN AFFILIATE LINKS. BY CLICKING ON THEM AND PURCHASING PRODUCTS THROUGH MY LINKS, I RECEIVE A SMALL COMMISSION FOR THE REFERRAL. THE ITEM WILL NOT COST YOU ANY MORE BY GOING THROUGH THIS LINK.

Tuesday, May 2, 2023

Masking Unleashed on Card Making


Have you made masks for stamping images on your projects? It is a fun technique that allows for adding the illusion of depth while stamping on one layer. Today's post shows two cards made from one stamped surface and then die-cut using all of the pieces. The inspiration comes from the Masking Unleashed class through the Altenew Academy. My personal goal throughout Level 2 of the Altenew Educator Certification Program has been to use the same stamp set throughout all of the card-making projects. Once again, these cards are made with the Build-A-Flower: Primrose set.


The first step is to make the masks. I stamped the three floral outline images on Altenew's masking paper and fussy cut them. There is a die for each of the images, but it leaves a nice white border around the perimeter. That is great for certain applications, but not when you want the images to appear layered on top of one another.  
 

The next step is to randomly stamp the images on a 6.5" x 4.5" piece of white cardstock switching out the ink colors and images. I was going for a rainbow color spectrum.


Though this looks a little messy while working through the process, it is very easy to do. The fun part is pulling off the masks and seeing the finished piece.

This card front panel was planned for a 5 x 7 card base. I eyeballed the Mega Love die onto the center of the stamped piece and saved the negative off-cuts. To create dimension to the card, I also cut it three additional times out of white cardstock. The die-cut 'love' and the tiny pieces were glued and stacked together. The large stamped card front piece is raised on foam tape and placed onto a 6.75" x 4.75" piece of green cardstock. It is important to add foam tape near all of the edges so that the card doesn't sag in the middle. The small pieces are glued into place to create the letters. This panel is raised with fun foam onto the white top-folding card base.
To add some sparkle and reinforce the rainbow color scheme, I added Pinkfresh Studios Crystals with iCraft Mixed Media adhesive. And because my Stardust Gelly Roll pen was sitting nearby, I outlined the stamped panel to add a subtle sparkle-shade line. The last step was to add a die-cut, stamped image over another die-cut, inked image. This provides some extra interest, balance, and color to the card.


Bonus Card

The original die-cut 'love' piece, from above, is glued atop a 5.25" x 4" rainbow washi tape background with the same 'love' die cut from it. The washi card front is glued to a black piece of cardstock with the same measurements and then glued, a bit askew, onto a standard A2 card base.


It makes the card a little more interesting when the front is placed at a bit of an angle. Using a plain white piece for the die-cut sentiment seemed too stark. The random stamping adds some color but still lets the white offer up the necessary contrast to make this work well.

This last photo shows a close-up view of the die and washi background. 


THIS POST MAY CONTAIN AFFILIATE LINKS. BY CLICKING ON THEM AND PURCHASING PRODUCTS THROUGH MY LINKS, I RECEIVE A SMALL COMMISSION FOR THE REFERRAL. THE ITEM WILL NOT COST YOU ANY MORE BY GOING THROUGH THIS LINK.