Paper and Fiber Arts


Welcome to my mixed media blog. Thanks for stopping by.

Tuesday, July 30, 2019

Second Interactive Countdown to Christmas Advent Calendar Card


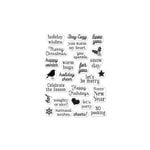
I had so much fun with the card that I posted here, that I thought I'd make another one.  This second interactive Countdown to Christmas Advent Calendar Card took a little less time because the numbers were cut from washi. Instead of stamping a greeting under each door I thought it would be fun to use the card for a lift-the-flap scavenger hunt. I am going to write a clue under each door so that my daughter can seek out a small treat or gift hidden somewhere in the house.  She will be 15 years old when we do this in December.  Hopefully, she won't think it is too corny!

The other difference on this card from yesterday's is that the numbers were made from washi tape instead of die cuts.  Stickers would work well, too! This is a standard A2 size 4.25 x 5.5 inch card. That means it is easy to mail!

If you have made anything for Christmas, I would love to see it!
Thanks for stopping by today!

As always, if you are in the market for any new goodies, listed below are the currently available supplies from Scrapbook.com. You are not charged anything extra for shopping with them and I make a small commission if you purchase something.  Thank you for supporting a fellow crafter!
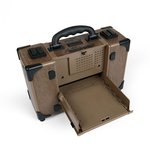


Monday, July 29, 2019

Christmas in July - Countdown to Christmas Advent Card

Hero Arts Presents Background Stamp with Peek A Boo Doors Die to create an Advent Calendar Card

On the one hand, I love Christmas so I think it is great to get a headstart on crafting for the holidays as soon as Christmas is over. On the other hand, I feel a bit overwhelmed if I haven't started crafting holiday gifts and cards by this time of the year. Bearing that in mind, I just made my first Christmas item for this year.  It is a Countdown to Christmas Advent Card.

The idea behind this card was actually my 14-year old's as she was watching me stamp, emboss and die cut. She suggested turning the card into an Advent Calendar.  I've made many Advent Calendars over the years and here are some posts with a variety of different kinds of creations, here, here, here, and here. The last post has a list of activities that a child or family could do on each day as they count their way to Christmas.

Tim Holtz Sizzix die for numbers and Christmas Greetings Stamps from Hero Arts

This card was considerably more complicated than most of the ones I have been making this month. However, it was fun! And it really did not take a huge amount of time... just some searching for numbers to die-cut that were the right size.  It would have been easy to use the Cricut or Silhouette, but I had my Vagabond out and wanted to use that if I could.  It turns out the Sizzix Tim Holtz Thinlet Mixed Media set pictured above was a perfect match.  Adhering 4" wide strips of double-sided adhesive to cardstock made it very easy to cut, peel, and stick the numbers to each of the little doors.
Please let me know if you have any questions.

Today is the last day of both Sizzix and Scrapbook.com's Christmas in July sale. I am posting the links to Scrapbook.com for the current products I used in case you are in the market for any of these things and want to hit up a good sale!  Hero Arts Stamps just released their Winter Catalog. You might want to check out their site for inspiration. Here is the list of items that I used:


Sunday, July 28, 2019

Quick & Easy, Clean and Simple Die Cut Cards

Hero Arts Die-Cut Butterflies from Glitter Paper

Are you a fan of Clean and Simple (CAS) cards?  I love that they can be impactful in their beautiful simplicity. These quick and easy die-cut cards did not take very much time to make. However, I don't think they suffered for their ease.

Penny Black Die-Cut Framed Thanks Layered on Vellum
It has been a long time since I have used vellum paper. This is mainly because I sort of forgot about it! The Penny Black Framed Thanks die seems like the perfect cut image to layer over vellum.  I wanted to keep this card all white, but it still needed something a little extra.  The edge-cut lace die from Pinkfresh Studios added the perfect step-up.


This last card took the longest amount of time because I cut tiny pieces of Scotch tape to adhere the lattice looking die-cut onto the red cardstock card base. The dies were cut out of gold glitter paper using a Hero Arts Confetti Die and black cardstock from the Penny Black Love and Miss You set.


Sunday, July 21, 2019

Smile!

Penny Black Timeless Stars and Circles Die with Pinkfresh Studio Smile Die

Just popping in with a new card made with two dies. There is no stamping on this very fast and easy card. My grandbaby moved in with us a couple of weeks ago. This means that I have been having too much fun with her to do any crafting of substance! I am so lucky to have this time with her and it makes me smile!  That is why I made a card with that sentiment. I think it sums up all of the best days of this summer!

Thinking Baby
I hope you are having a lovely summer and making happy memories.
All the best,
Beverly