 |
| Disappearing 9-Patch Quilt Block Before and After |
Disappearing 9-Patch
A disappearing 9-Patch block is a traditional 9-patch that has been cut apart, the pieces rearranged, and then sewn back together to make a block that appears different than the original. There are numerous ways to make a disappearing 9-patch. This tutorial shows how to sew three different easy disappearing 9-patches. The focus here is on the easy part. The end result for these blocks will be to turn them into improv quilt blocks with inset strips. I don't want the blocks to look too complicated to begin with so it is preferable that they be simple to do.
 |
| Disappearing 9-Patch Starting With Two Cuts |
The Easiest Disappearing 9-Patch To Make
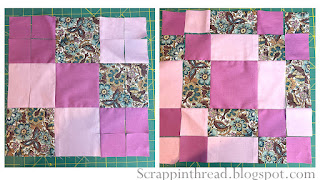
This 9-patch block is very simple. Start with a traditional 9- patch and then cut it in half lengthwise and crosswise. Rearrange the 4 pieces by turning and flipping them until you find a design you like. I started with 5" squares using 4 dark/medium and 5 light colored squares. Here are several of the different variations after cutting and rearranging the pieces. It is difficult to keep track of all of the configurations. I would recommend taking pictures as you work so that you can look at your favorites before sewing them. Use a 1/4" seam for all sewing.
Another Easy Disappearing 9-Patch
This one is a little more complicated because there are a few more cuts. This means that more sewing is involved. Once again start with a traditional 9-patch block. The cut dimensions are dependent upon the size of the squares with which you begin. These are 5" squares. I like to cut whatever the square finishes at divided by two. So in this instance the inside square is now 4.5". I cut 2.25" away from the inside square's seams. That means there is a cut along the left, right, top, and bottom 2.25" away from the middle square. You can choose any measurement you want. Consistency is key in getting the pieces to fit back together nicely. If that is what you want.
 |
| Disappearing 9-Patch with Four Cuts |
Combining The Two Easy Techniques Into A Third Option
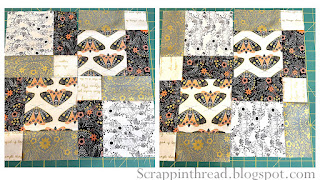
This last, still easy option, starts with making two vertical cuts as just discussed in the previous paragraph. That is to say: 5" squares = cut the strips 2.25" away from center square on the left and righthand sides of the center. Flip the center section around 180 degrees. Sew the three pieces back together using a 1/4" seam. The block is now about a 1/2" shorter in one direction.
Now make two cuts as described for the easiest option, above. One cut goes through the middle vertically. The other is through the middle horizontally. Rearrange the pieces and sew back together.
Depending on your placement, you may end up with some pieces protruding out from the other pieces. It is ok. In the end, you'll square up the block anyway.
Bonus!
By starting with something that can be kind of boring, you can make some great discoveries. It is fun to see what happens when the fabric is shuffled around. Some of the designs lend themselves to wonderful secondary designs. This is only a very small number of variations that you can try. For example, cutting the 9-patch into quarter square triangles is another fun way to explore manipulating this traditional block.
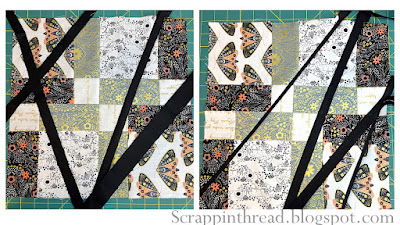
As mentioned above, these blocks were used for inserting strips of fabric to make a type of improvisational block. For more information on how to do that please see this blog post.


No comments:
Post a Comment