Paper and Fiber Arts


Welcome to my mixed media blog. Thanks for stopping by.
Showing posts with label modern quilting. Show all posts

Sunday, July 30, 2023

Improvisational Surface Design


Very rarely do I abandon other projects to work on something new. Recently, an opportunity presented itself that caused me to work on something unexpected. This recently happened because of a challenge posed by the Improv group of the Portland Modern Quilt Guild. The July prompt was 'Surface Design'. My piece incorporated both improvisational quilting and surface design. This piece is mainly green because I am also working in a series with color as the focus. It felt like green should be used this time. 


This project inspired me to try a bunch of different things in one piece. For me, this is part of the fun. What starts as an experiment with materials to learn how they work together becomes an exploration of techniques and outcomes.


The first step was to see how a variety of media would work with this stencil on a piece of PFD Kona cotton. The Stabilo chunky pencils and the Derwent Inktense pencils worked as expected with no bleeding. Once the Inktense pencils and Inktense blocks were activated with GAC 100 the color did move. The Crayola Fabric, Marvy, Sharpie Stained, and Jacquard Tee Juice markers bled slightly but were easy to control. The Dye-na Flow is more challenging to control. I use water brushes filled with the dye and this can saturate the fabric quickly.


Next, after digging in my scrap box, I found several strips to sew together. Then, Pellon fusible web was applied to the back and a circle was cut using an Accuquilt die. This process was repeated on the stenciled piece. In order to have some variety with the circle sizes and fabrics, I used a set of smaller circle dies (Hero Arts) that are usually used with paper. They worked great. Both the large pieces and the additional smaller ones were attached to a larger piece of solid white fabric. Additional stenciling of circles and partial circles offers visual continuity. Adding stitched circles to the piece continued the theme. These circles were made with an embroidery sewing module using a wide range of thread colors.


I got a little carried away with adding circles and the finished quilt was too busy for my liking. It measures about 16 x 17 inches. The picture above shows it on my design wall.


Close up

The busy little quilt needed to be mounted onto a solid background to give it some space. After auditioning a number of options, I decided to use a previously painted wood panel, measuring 24" square. The sides are now painted black. I layered a piece of batting and black fabric together and quilted it enough to hold it together. The edges were turned prior to quilting. Then I attached the small art quilt to it and glued the entire thing onto the wooden frame.
The finished piece on a blue wall in my kitchen


Next month's prompt is "Sunshine". I am excited to try something with Tyvek for this challenge. What encourages you to work outside your normal process?


THIS POST MAY CONTAIN AFFILIATE LINKS. BY CLICKING ON THEM AND PURCHASING PRODUCTS THROUGH MY LINKS, I RECEIVE A SMALL COMMISSION FOR THE REFERRAL. THE ITEM WILL NOT COST YOU ANY MORE BY GOING THROUGH THIS LINK.

Friday, May 20, 2022

How to Sew Three Different Easy Disappearing 9-Patchs

Disappearing 9-Patch Quilt Block Before and After


Disappearing 9-Patch

A disappearing 9-Patch block is a traditional 9-patch that has been cut apart, the pieces rearranged, and then sewn back together to make a block that appears different than the original. There are numerous ways to make a disappearing 9-patch. This tutorial shows how to sew three different easy disappearing 9-patches. The focus here is on the easy part. The end result for these blocks will be to turn them into improv quilt blocks with inset strips. I don't want the blocks to look too complicated to begin with so it is preferable that they be simple to do.
Disappearing 9-Patch Starting With Two Cuts

The Easiest Disappearing 9-Patch To Make

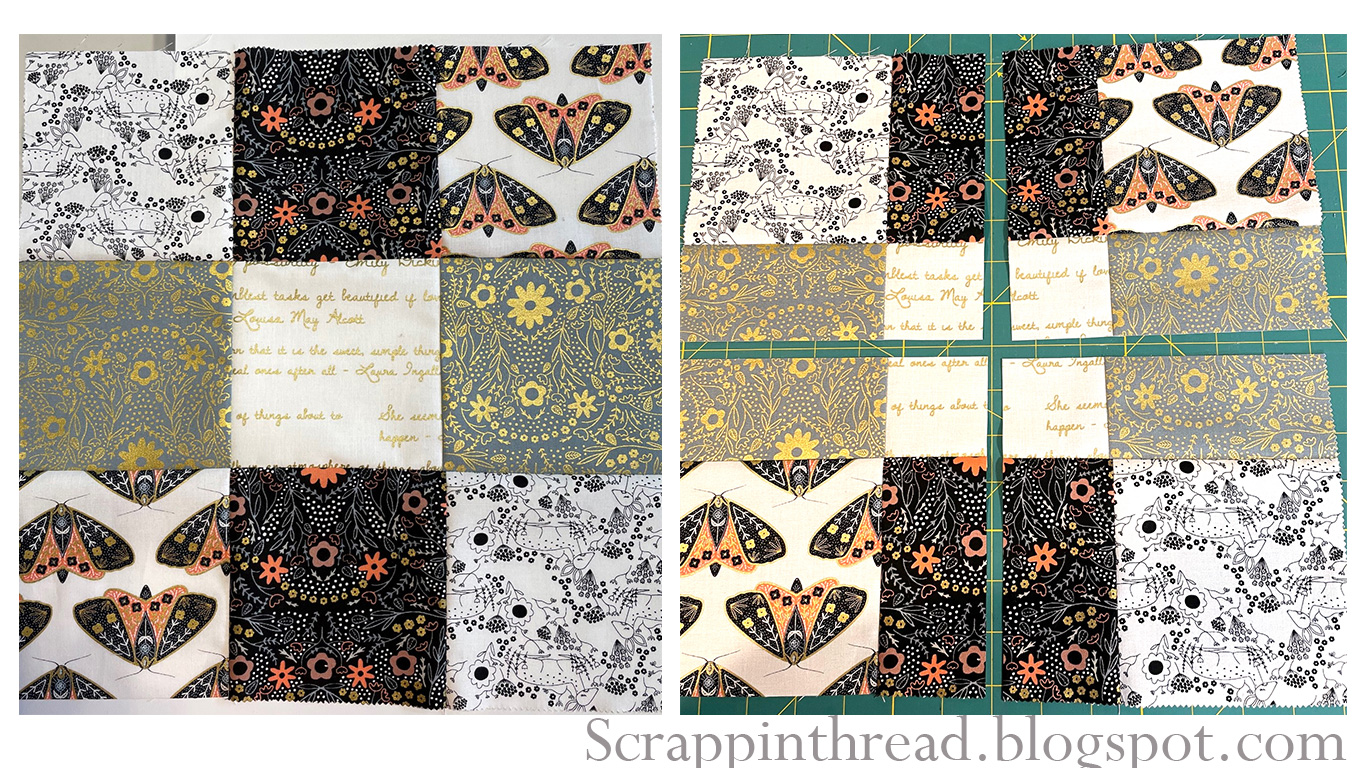
This 9-patch block is very simple. Start with a traditional 9- patch and then cut it in half lengthwise and crosswise. Rearrange the 4 pieces by turning and flipping them until you find a design you like. I started with 5" squares using 4 dark/medium and 5 light colored squares.  Here are several of the different variations after cutting and rearranging the pieces. It is difficult to keep track of all of the configurations. I would recommend taking pictures as you work so that you can look at your favorites before sewing them. Use a 1/4" seam for all sewing.


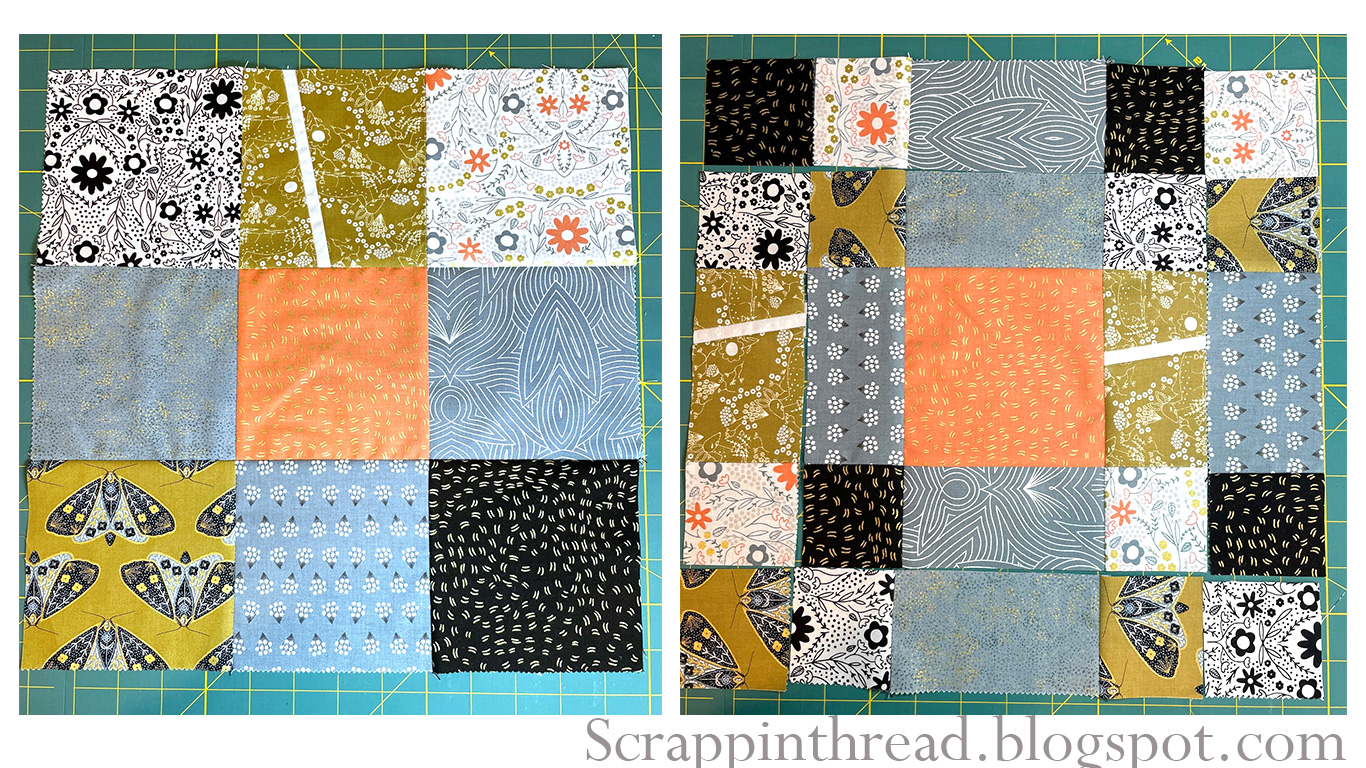
Another Easy Disappearing 9-Patch

This one is a little more complicated because there are a few more cuts. This means that more sewing is involved. Once again start with a traditional 9-patch block. The cut dimensions are dependent upon the size of the squares with which you begin. These are 5" squares. I like to cut whatever the square finishes at divided by two. So in this instance the inside square is now 4.5". I cut 2.25" away from the inside square's seams. That means there is a cut along the left, right, top, and bottom 2.25" away from the middle square. You can choose any measurement you want. Consistency is key in getting the pieces to fit back together nicely. If that is what you want.

Disappearing 9-Patch with Four Cuts

Combining The Two Easy Techniques Into A Third Option

This last, still easy option, starts with making two vertical cuts as just discussed in the previous paragraph. That is to say: 5" squares = cut the strips 2.25" away from center square on the left and righthand sides of the center.  Flip the center section around 180 degrees. Sew the three pieces back together using a 1/4" seam. The block is now about a 1/2" shorter in one direction. 
Now make two cuts as described for the easiest option, above. One cut goes through the middle vertically. The other is through the middle horizontally. Rearrange the pieces and sew back together.
Depending on your placement, you may end up with some pieces protruding out from the other pieces. It is ok. In the end, you'll square up the block anyway.

Bonus!

By starting with something that can be kind of boring, you can make some great discoveries.  It is fun to see what happens when the fabric is shuffled around. Some of the designs lend themselves to wonderful secondary designs. This is only a very small number of variations that you can try. For example, cutting the 9-patch into quarter square triangles is another fun way to explore manipulating this traditional block. 

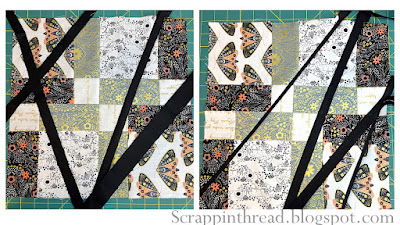
Disappearing 9-Patch with Inset Strips In Progress

As mentioned above, these blocks were used for inserting strips of fabric to make a type of improvisational block. For more information on how to do that please see this blog post.


Please let me know if you have any questions. In a few days, there will be a video that shows how to sew these three different easy disappearing 9-patches.   Thank you for visiting today!