Paper and Fiber Arts


Welcome to my mixed media blog. Thanks for stopping by.
Showing posts with label stencils. Show all posts

Sunday, July 30, 2023

Improvisational Surface Design


Very rarely do I abandon other projects to work on something new. Recently, an opportunity presented itself that caused me to work on something unexpected. This recently happened because of a challenge posed by the Improv group of the Portland Modern Quilt Guild. The July prompt was 'Surface Design'. My piece incorporated both improvisational quilting and surface design. This piece is mainly green because I am also working in a series with color as the focus. It felt like green should be used this time. 


This project inspired me to try a bunch of different things in one piece. For me, this is part of the fun. What starts as an experiment with materials to learn how they work together becomes an exploration of techniques and outcomes.


The first step was to see how a variety of media would work with this stencil on a piece of PFD Kona cotton. The Stabilo chunky pencils and the Derwent Inktense pencils worked as expected with no bleeding. Once the Inktense pencils and Inktense blocks were activated with GAC 100 the color did move. The Crayola Fabric, Marvy, Sharpie Stained, and Jacquard Tee Juice markers bled slightly but were easy to control. The Dye-na Flow is more challenging to control. I use water brushes filled with the dye and this can saturate the fabric quickly.


Next, after digging in my scrap box, I found several strips to sew together. Then, Pellon fusible web was applied to the back and a circle was cut using an Accuquilt die. This process was repeated on the stenciled piece. In order to have some variety with the circle sizes and fabrics, I used a set of smaller circle dies (Hero Arts) that are usually used with paper. They worked great. Both the large pieces and the additional smaller ones were attached to a larger piece of solid white fabric. Additional stenciling of circles and partial circles offers visual continuity. Adding stitched circles to the piece continued the theme. These circles were made with an embroidery sewing module using a wide range of thread colors.


I got a little carried away with adding circles and the finished quilt was too busy for my liking. It measures about 16 x 17 inches. The picture above shows it on my design wall.


Close up

The busy little quilt needed to be mounted onto a solid background to give it some space. After auditioning a number of options, I decided to use a previously painted wood panel, measuring 24" square. The sides are now painted black. I layered a piece of batting and black fabric together and quilted it enough to hold it together. The edges were turned prior to quilting. Then I attached the small art quilt to it and glued the entire thing onto the wooden frame.
The finished piece on a blue wall in my kitchen


Next month's prompt is "Sunshine". I am excited to try something with Tyvek for this challenge. What encourages you to work outside your normal process?


THIS POST MAY CONTAIN AFFILIATE LINKS. BY CLICKING ON THEM AND PURCHASING PRODUCTS THROUGH MY LINKS, I RECEIVE A SMALL COMMISSION FOR THE REFERRAL. THE ITEM WILL NOT COST YOU ANY MORE BY GOING THROUGH THIS LINK.

Sunday, July 23, 2023

Stacked Stencils for Clean and Simple Cards

Have you layered stand-alone stencils to achieve a new look? That is what today's post is about. I used two stencils to create a different effect on three clean and simple cards. The idea is from Nicole Watt in her Altenew Academy class titled "Advanced Stencil Techniques". Her class is filled with a lot of fun techniques. This one particularly appeals to me because it looks great and is very fun to do. Also, I love that there is a bit of a surprise element to what you create that is shown upon the reveal. 

On the first two cards, I used the grid stencil after using an open stencil or mask for the first layer. The card pictured above is the maze stencil with Silver Sage ink blended onto a 4.25" x 5.5" piece of cardstock. Leaving the stencil in place, the grid stencil is aligned on top, and Pool and Navy inks are blended over the original design. The photo above shows the ink blending after that step with the grid stencil removed.
Clean and Simple Card with Stacked Stenciling

These next two cards use a reverse mask from the Wonderland set. The one above shows it with the grid stencil and the one below is with a discontinued geometric stencil. Also, the one below uses navy ink after the geometric design was complete. Each of the cards has a stamped sentiment from the Wonderland stamp set. 

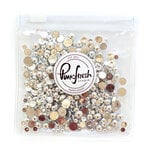
All three cards are layered onto standard 4.25" x 5.5" card bases after die-cutting the stencil background and a frame using Gina K's Master Cuts Set 1 dies. A little bling was added to all of the cards using Pinkfresh Studio Metallic Pearls or Essential Jewels. 
The large die-cut sentiment is popped up with foam tape. It covers some of the card, but not enough to be distracting from the cool-looking background. I hope you give this technique a try! It is kind of addictive, though.


THIS POST MAY CONTAIN AFFILIATE LINKS. BY CLICKING ON THEM AND PURCHASING PRODUCTS THROUGH MY LINKS, I RECEIVE A SMALL COMMISSION FOR THE REFERRAL. THE ITEM WILL NOT COST YOU ANY MORE BY GOING THROUGH THIS LINK.


Products Used:

Thursday, July 13, 2023

Stenciling Two Ways For Beautiful Card Backgrounds


Both of the cards shown today are made using the same stencil and ink colors. By stenciling them two different ways, you can create interesting and beautiful card backgrounds. The first card is ink blended by holding the stencil in place and overlapping the ink. Because the colors are on the cool side of the color wheel, it almost makes an ombre effect. For true ombre you would just blend a little more to have more subtle gradation. 

After stenciling the 4.25" x 5.5" cardstock piece, I Zentangled the closed circles with a variety of shapes. This is a really fun technique. If you'd like to see another card made this way, visit here.

Even though it looks really cool as it is, I decided to use the negative cuts from the next card to create a circle around the black 'hello'. 

The sentiment is an inset circle shape that I cut out of the surrounding circle with scissors. This is then inset into the negative cutaway pieces of the other stenciled card which is shown below.

The last picture shows how I used the leftover ink on the ink blending brushes and the stencil which was turned 90 degrees after ink blending over the top of the cardstock as done on the first background. It made a great background for another card and there was no additional mess to clean afterwards!


Both card fronts were cut and layered using the two large dies from Gina K's Master Layouts 1 set. On the second card, the black piece is the smaller cut shape and layered under the stenciled piece to let the 'hello' be the focus. I used two nesting circle dies to make the black frame around the circle. The finishing touch is the little silver half pearls glued to the black cardstock under the 'hello' sentiment die cut.

THIS POST MAY CONTAIN AFFILIATE LINKS. BY CLICKING ON THEM AND PURCHASING PRODUCTS THROUGH MY LINKS, I RECEIVE A SMALL COMMISSION FOR THE REFERRAL. THE ITEM WILL NOT COST YOU ANY MORE BY GOING THROUGH THIS LINK.


Friday, July 7, 2023

Zentangling on Cards

Amber Davis teaches a class for Altenew Academy titled, Zentangle for Cardmakers. It has many ideas about incorporating doodles or Zentangle designs onto card fronts. If you enjoy doodling or Zentangling, add this fun, personal touch to your next project. Here are the steps for Zentangling on the card pictured above.


First, choose an open stencil design and ink blend onto a 4.25" x 5.5" card front. These two colors mixed together in the middle of the card front netted an additional orangey-coral color. Next, add Zentangles or your own doodle designs onto as many white areas as you like. I used the 005 and 01 pens from the Fine Liner Pen Set for the designs. The picture, below, shows the designs prior to shading with graphite pencils.

After adding shading with pencils and a blending stump on the Zentangled areas, I ink-blended the hugs die-cut and the circle that surrounded it. These are the same ink colors as the stenciled card front and are then cut apart. The hugs die is designed as an inset into a card front. By using the Hero Arts circle die, it can be cut out with a frame. Auditioning the circle with the word attached, led me to decide to separate the word and cut the circle into pieces. The circle segments are glued to the front and the sentiment is popped up with foam tape.

I love the bold look of the stencil with the Zentangling, the bright colors, and the way the card came together. If you make any doodled or Zentangled projects, I'd love to hear about them.

THIS POST MAY CONTAIN AFFILIATE LINKS. BY CLICKING ON THEM AND PURCHASING PRODUCTS THROUGH MY LINKS, I RECEIVE A SMALL COMMISSION FOR THE REFERRAL. THE ITEM WILL NOT COST YOU ANY MORE BY GOING THROUGH THIS LINK.

Tuesday, July 4, 2023

Stenciling With Markers


Here are two cards made with the same stencil and dies. The stenciling was done with two different types of markers. 

First, the card with the negative piece of the 'hugs' die cut was colored with Karin pigment brush markers. These are non-pumping, meaning you shake them and they are ready for painting onto the cardstock.
The Decobrush markers contain opaque acrylic, non-toxic organic pigment-based paint. I wanted to use them as line art, rather than fill in the shapes. This worked great for all except the purple, which leaked under the stencil. That is an operator error issue and had I dabbed off the paint onto scrap paper, it wouldn't have occurred. 

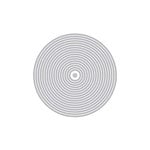
Hero Arts Stacked Circle Stencil With Karin Paint Pen Marker


Cute circle embellishments were used to cover up the ink blobs and to add interest.  Using small white circle off-cuts from my stash, clear dots, and colored sprinkles elevate the fun and color on this card.
The second card is made with the same stencil. This time the shapes are colored in with Zig Clean Color Real Brush markers. These are waterbased and provide a concentrated pop of color.
Initially, I was going to assemble the card as pictured above. To cut the Altenew 'hugs' out as a circular piece, one needs to use a circle die that is large enough to go around the perimeter of the word. You can make the circular frame as large as your largest circle. However, I like to make it about as narrow as the lettering. Having a set of nesting dies helps so you can audition the sizes before actually cutting. In the end, the black piece was cut using the nesting circle and the 'hugs' die, and a white piece with just the sentiment, as pictured below. I like the color peeking out from under the clean and simple top piece.


Thank you for stopping by. Have a colorful day!

THIS POST MAY CONTAIN AFFILIATE LINKS. BY CLICKING ON THEM AND PURCHASING PRODUCTS THROUGH MY LINKS, I RECEIVE A SMALL COMMISSION FOR THE REFERRAL. THE ITEM WILL NOT COST YOU ANY MORE BY GOING THROUGH THIS LINK.