Paper and Fiber Arts


Welcome to my mixed media blog. Thanks for stopping by.
Showing posts with label Zentangle. Show all posts

Thursday, July 13, 2023

Stenciling Two Ways For Beautiful Card Backgrounds


Both of the cards shown today are made using the same stencil and ink colors. By stenciling them two different ways, you can create interesting and beautiful card backgrounds. The first card is ink blended by holding the stencil in place and overlapping the ink. Because the colors are on the cool side of the color wheel, it almost makes an ombre effect. For true ombre you would just blend a little more to have more subtle gradation. 

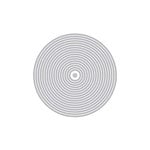
After stenciling the 4.25" x 5.5" cardstock piece, I Zentangled the closed circles with a variety of shapes. This is a really fun technique. If you'd like to see another card made this way, visit here.

Even though it looks really cool as it is, I decided to use the negative cuts from the next card to create a circle around the black 'hello'. 

The sentiment is an inset circle shape that I cut out of the surrounding circle with scissors. This is then inset into the negative cutaway pieces of the other stenciled card which is shown below.

The last picture shows how I used the leftover ink on the ink blending brushes and the stencil which was turned 90 degrees after ink blending over the top of the cardstock as done on the first background. It made a great background for another card and there was no additional mess to clean afterwards!


Both card fronts were cut and layered using the two large dies from Gina K's Master Layouts 1 set. On the second card, the black piece is the smaller cut shape and layered under the stenciled piece to let the 'hello' be the focus. I used two nesting circle dies to make the black frame around the circle. The finishing touch is the little silver half pearls glued to the black cardstock under the 'hello' sentiment die cut.

THIS POST MAY CONTAIN AFFILIATE LINKS. BY CLICKING ON THEM AND PURCHASING PRODUCTS THROUGH MY LINKS, I RECEIVE A SMALL COMMISSION FOR THE REFERRAL. THE ITEM WILL NOT COST YOU ANY MORE BY GOING THROUGH THIS LINK.


Friday, July 7, 2023

Zentangling on Cards

Amber Davis teaches a class for Altenew Academy titled, Zentangle for Cardmakers. It has many ideas about incorporating doodles or Zentangle designs onto card fronts. If you enjoy doodling or Zentangling, add this fun, personal touch to your next project. Here are the steps for Zentangling on the card pictured above.


First, choose an open stencil design and ink blend onto a 4.25" x 5.5" card front. These two colors mixed together in the middle of the card front netted an additional orangey-coral color. Next, add Zentangles or your own doodle designs onto as many white areas as you like. I used the 005 and 01 pens from the Fine Liner Pen Set for the designs. The picture, below, shows the designs prior to shading with graphite pencils.

After adding shading with pencils and a blending stump on the Zentangled areas, I ink-blended the hugs die-cut and the circle that surrounded it. These are the same ink colors as the stenciled card front and are then cut apart. The hugs die is designed as an inset into a card front. By using the Hero Arts circle die, it can be cut out with a frame. Auditioning the circle with the word attached, led me to decide to separate the word and cut the circle into pieces. The circle segments are glued to the front and the sentiment is popped up with foam tape.

I love the bold look of the stencil with the Zentangling, the bright colors, and the way the card came together. If you make any doodled or Zentangled projects, I'd love to hear about them.

THIS POST MAY CONTAIN AFFILIATE LINKS. BY CLICKING ON THEM AND PURCHASING PRODUCTS THROUGH MY LINKS, I RECEIVE A SMALL COMMISSION FOR THE REFERRAL. THE ITEM WILL NOT COST YOU ANY MORE BY GOING THROUGH THIS LINK.