Having fun with stencils
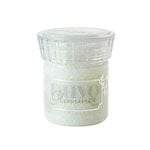
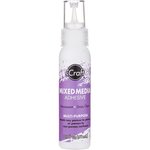
A few days ago I posted a video about using stencils to make embellishments. This post is a follow-up to it. The main purpose is to show a few still pictures of the process and provide a list of the supplies that I used. The video is posted below the photos. Just a note of warning - It is messy before it is pretty when making embellishments with Nuvo Glimmer and Glitz Glitter Gel!
Making Embellishments With Nuvo Glimmer and Glitz Glitter Gel
This photo shows both products during the plop and smooth stage. This particular stencil is from The Stamp Market. However, in the video I also used stencils from PinkFresh Studio, Lawn Fawn, and The Crafter's Workshop. Pictured below is the Glitz and Glitter immediately after lifting the stencil off the freezer paper.
The products need to dry or cure for at least 24 hours. The stenciled image should be easy to pull off the freezer paper if thick enough and given enough time to dry. If it seems that the embellishment is too fragile to peel off try cutting around the shape with sharp scissors. The paper will not be visible if you cut very close to the edge of the shape. At the bottom of this post, you will find a picture of a card that I made using the black leaves shown above. When choosing a stencil, you want one that has a lot of open space. One that reads as a solid design.
Video
Supplies
I used a variety of ink pads - most are from Altenew

The Crafter's Workshop stencil is a 12 x 12 stencil. It is available by clicking on the bird image above.
The other stencils used in the video are not currently available. I believe that the Pinkfresh Studio one is going to be released at the end of the month. Here are some suggestions for alternate stencils if you do not have any that have solid looking images. This would make a nice alternative for a large shape:
Or if you are looking for smaller birds, this is a nice 6 x 6 stencil:
Here are some very pretty leaf stencils that would work very well:
As always, please let me know if you have any questions. Thank you for visiting.
Beverly


No comments:
Post a Comment