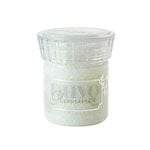
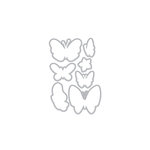
The background on this card is usually something I do on my art journal pages. This type of mixed-media layering reminds me of old-fashioned wallpaper or deep brocade fabric. It is a pretty quick project. The process starts with stamping, then layering a stencil with glimmer paste. Waiting for that layer to dry takes the longest time. Then yellow ink and metallic glimmer ink were added on top. The Nuvo glimmer paste is discontinued but the other items are still available.
The picture above shows the detail of all the wonderful layers. To add an additional layer, the black die-cut 'hello' is layered onto a white layer. It is an unusual card but in a good way!
THIS POST MAY CONTAIN AFFILIATE LINKS. BY CLICKING ON THEM AND PURCHASING PRODUCTS THROUGH MY LINKS, I RECEIVE A SMALL COMMISSION FOR THE REFERRAL. THE ITEM WILL NOT COST YOU ANY MORE BY GOING THROUGH THIS LINK.
A few days ago I posted a video about using stencils to make embellishments. This post is a follow-up to it. The main purpose is to show a few still pictures of the process and provide a list of the supplies that I used. The video is posted below the photos. Just a note of warning - It is messy before it is pretty when making embellishments with Nuvo Glimmer and Glitz Glitter Gel!
Making Embellishments With Nuvo Glimmer and Glitz Glitter Gel
This photo shows both products during the plop and smooth stage. This particular stencil is from The Stamp Market. However, in the video I also used stencils from PinkFresh Studio, Lawn Fawn, and The Crafter's Workshop. Pictured below is the Glitz and Glitter immediately after lifting the stencil off the freezer paper.
The products need to dry or cure for at least 24 hours. The stenciled image should be easy to pull off the freezer paper if thick enough and given enough time to dry. If it seems that the embellishment is too fragile to peel off try cutting around the shape with sharp scissors. The paper will not be visible if you cut very close to the edge of the shape. At the bottom of this post, you will find a picture of a card that I made using the black leaves shown above. When choosing a stencil, you want one that has a lot of open space. One that reads as a solid design.
Video
Supplies
I used a variety of ink pads - most are from Altenew
The Crafter's Workshop stencil is a 12 x 12 stencil. It is available by clicking on the bird image above.
The other stencils used in the video are not currently available. I believe that the Pinkfresh Studio one is going to be released at the end of the month. Here are some suggestions for alternate stencils if you do not have any that have solid looking images. This would make a nice alternative for a large shape:
A couple of weekends ago, I attended a virtual cardmaking workshop with Scrapbook and Cards. Initially, I wasn't going to sign up because I've been making cards for-evah and have A Lot of supplies. However, it is so much fun to learn new things; I went ahead and registered. It was well worth the money, in my opinion! Participants received a wonderful kit beforehand. This was so that we would be prepared to hit the ground running when we logged in for our weekend classes. One of the things in the kit was a layered stencil set from The Stamp Market. After the workshop, I was playing with my goodies and decided to try a fun technique with the stencils - heat embossing.
Heat Embossing Instructions
There are many good ways to achieve the same results. These instructions are based on what has worked well for me.
Suggested Supplies (with links):
Versamark or ink labeled "Watermark" or "Embossing Ink". Pigment ink is another good choice
Embossing powder. There is a variety of different colors and also clear
Medium to heavy weight cardstock. The heavier, the better, because it doesn't warp as much.
If using an anti-static pouch or cornstarch - thoroughly rub over surface. This helps to prevent embossing powder from sticking in unwanted areas.
Apply ink to cardstock (or whatever substrate you are using.) The ink can be applied with a stamp, a dauber, brush, or pen.
Sprinkle embossing powder over wet ink.
Shake off excess powder. Save the excess for future use by funneling back into container.
Heat ink/powder. Move the heat tool so that it is not in one place for too long. As soon as it starts to melt, move to next area to emboss. When all of the powder has melted, cool a bit before placing anything on the surface. Indentations can be made in the cooling powder.
If heat embossing is a new technique for you, you may want to watch the video below. (I made it over nine years ago!) It shows another technique for Heat Embossing.
Embossed 2 Step Stamping video
The stencils in the following video are layered stencils. This means that they are intended to be used together to create a more realistic look. The layering of the ink adds depth and texture to the leaves. The effect is very pretty. That is true whether using regular dye-based ink or using the Heat Embossing Technique.
The video below shows a more in-depth explanation about how to use stencils with heat embossing.
Heat Embossing with Stencils Video
Please let me know if you have any questions. I hope you enjoy embossing! It is an older technique, but still a good one!
Thank you for visiting today.
Beverly
Additional supplies used in the Fun Techniques with Stencils - Heat Embossing video:
Are you a fan of Clean and Simple (CAS) cards? I love that they can be impactful in their beautiful simplicity. These quick and easy die-cut cards did not take very much time to make. However, I don't think they suffered for their ease.
Penny Black Die-Cut Framed Thanks Layered on Vellum
It has been a long time since I have used vellum paper. This is mainly because I sort of forgot about it! The Penny Black Framed Thanks die seems like the perfect cut image to layer over vellum. I wanted to keep this card all white, but it still needed something a little extra. The edge-cut lace die from Pinkfresh Studios added the perfect step-up.
This last card took the longest amount of time because I cut tiny pieces of Scotch tape to adhere the lattice looking die-cut onto the red cardstock card base. The dies were cut out of gold glitter paper using a Hero Arts Confetti Die and black cardstock from the Penny Black Love and Miss You set.
Penny Black Timeless Stars and Circles Die with Pinkfresh Studio Smile Die
Just popping in with a new card made with two dies. There is no stamping on this very fast and easy card. My grandbaby moved in with us a couple of weeks ago. This means that I have been having too much fun with her to do any crafting of substance! I am so lucky to have this time with her and it makes me smile! That is why I made a card with that sentiment. I think it sums up all of the best days of this summer!
Thinking Baby
I hope you are having a lovely summer and making happy memories.
All the best,
Beverly
If you are anything like me, you want to maximize your supplies and tools by getting as much use out of them as you can. I love stencils because of their versatility. Mainly, I use them for art journaling. They are fun for scrapbooking, too. Some stencils are scaled specifically for use on cards. However, those that are smaller or larger can, of course, be used for card fronts, too! There are thousands of stencils commercially available. You can also make your own! Whatever your style and color palette, you can choose what speaks to you when stenciling card fronts.
Altenew Weave Builder Stencil with Distress Inks on the card front
These cards use the same stencil with two different colorways and styles. It is fun to see what you can create by changing the colors. Do you have favorite products to use with stencils? Inking is probably the easiest way to apply color to paper. For color and texture, Tonic Studios Nuvo Mousse is very easy to use - and to clean up. Glitter paste is another fun and easy way to add both color and texture. Spraying ink, mica mist, flowable paint, and anything else that can go through a spray bottle are all great mediums to try. Acrylic or watercolor paint can be applied directly to paper or applied over other media. Watercolor paper is a great base for wet media. I use washi tape to hold down the stencil. Painters tape will work to hold the stencil in place, too. If you have a bit of time, it is a relaxing activity to doodle with markers in the open areas of the stencil. For example, use the spaces to Zentangle.
Some of my favorite things
In case you are in the market for any new goodies in the Nuvo line, Tonic Studios is part of Scrapbook.com's 7 days of summer sale.