Paper and Fiber Arts


Welcome to my mixed media blog. Thanks for stopping by.
Showing posts with label ink distressing. Show all posts

Sunday, April 30, 2023

Elizabeth Craft Designs: Getting Started With Planners Part One

Elizabeth Craft Designs Planners

This will be a two-part post because there is a lot of information to cover! This first post will mainly focus on the A5 standard slim planner.  In addition to discussing Elizabeth Craft Designs and getting started with planners, the posts will cover
 what is needed, what are compatible companies, and so much more! But first, why invest time and money into crafting a planner for yourself?
Click on the image to enlarge the Suggested Uses infographic

What do you do with a paper planner?

Many people keep a planner for the calendar. It is a great way to keep your day, week, month, and year organized. Some people use it to keep track of appointments, school holidays, trips, practice schedules, work commitments, and general obligations. Other people use planners for aspirational purposes, such as goal setting, meal planning, weight, and exercise tracking, budgeting/spending tracking, self-care, or hobby scheduling, etc. And then there are people like me. We keep track of many of the above items and also lots of other fun things, such as art journaling, memory keeping, mini-travelogues, favorite quotes, gratitude journals, etc. Yes, there are apps for many of these things - but some of us like the feel of a pen in hand, the texture of the paper, and the ability to create something specifically for our own needs.

Getting Started - Materials

It may be worthwhile to evaluate your intended purpose. But, sometimes, as I create something I think of new ideas for using an item. Having a plan is not necessary when making a planner. That being said, some decisions will need to be made at the start. Are you making inserts for an existing planner? Are you creating a mini-book, cover-to-cover? How much do you want to create from scratch versus using ready-made materials? Do you want it to be clean and simple or filled with lots of bits and bobs?
We will delve into more details in the next post. But for purposes of getting started, let us assume you are all-in on the idea of crafting something from start to finish. Take the pieces that pertain to your needs from this information to make something that works specifically for you!
Choose the planner size. As previously mentioned, this post is geared toward an A5 planner. The TN (travelers notebook) sizes will be addressed in a future post. The photos and text that follow show the components and sizes of the die cuts from good beginner die sets with which to get started. The measurements are rounded to the nearest sixteenth of an inch for each individual cut item.

All of the cuts made from Elizabeth Craft Designs Planner Essentials 1

Planner Essentials - 1 

11 DIES

PAGE DIE SIZE: 5” X 8.25” (12.7CM X 20.9CM) 

Large Rounded Frame 3" also cuts interior mat 2 5/8"

Small Rounded Frame 2 1/4" also cuts interior mat 1 15/16"

Rectangle 1 1/4" x 5/8"

Tag Label (like on drawer fronts) 2" x 3/4"

Folding Round Tab - open 1 3/4" x 1", closed 7/8" x 1"

Stitched Circle - 1 1/2"

Scalloped TODAY - Scallop Frame Circle 1 9/16" also cuts circle with TODAY 1 5/16"

LOVE THIS Circle - 1 5/16"

YES Circle - 1 5/16", also cuts thin round frame 1 3/8"

Page Reinforcers - cuts 6 circles, approximately 1/2" each


All of the cuts made from Elizabeth Craft Designs Planner Essentials 2
Planner Essentials - 2

9 Dies - package says 8 dies

PAGE DIE SIZE: 5” X 8.25” (12.7CM X 20.9CM) 

Large Tag 2 1/2" x 4"

Small Tag  2 3/8" x 2 15/16"

Pocket with 3 Slots 2 13/16" x 2 1/4" Pocket width - 2 1/2", 3/16" between pockets, offcuts 2 1/2" x 3/16"

Thin round frame 1 7/16"

NOTED Circle - 1 5/16"

Arrow - 2 3/8" x 3/8"

date tab - 2 5/8" x 1/2"

details tab - 3 7/8" x 1/2"


All of the cuts made from Elizabeth Craft Designs Planner Essentials 10


Planner Essentials - 10

11 Dies - Package says 7

PAGE DIE SIZE: 4.7” x 8.25” (11.9 cm x 20.9 cm

Perforated Postage Stamps - four attached 1 3/8" x 5 3/8"

Smile Square Frame - 1 13/16"

Staff/Stave - 3" x 3/4", offcuts 2 13/16" x 1/8"

Round Swirly Design - 3 3/8" x 2 1/8"

Large Treble Clef - 11/16" x 1 13/16"

Small Treble Clef - 1/2" x 1 5/16"

Large Eighth Note - 5/8" x 1"

Small Eighth Note - 7/16" x 3/4"

Large Beamed Sixteenth Note- 13/16" x 7/8"

Small Beamed Sixteenth Note- 5/8" x 11/16"


All of the cuts made from Elizabeth Craft Designs Planner Essentials 41
Planner Essentials - 41 Rounded Corners Page

8 Dies

PAGE DIE SIZE: 4.7" x 8.27" (11.9 cm x 21 cm)

Stitched panel -3 13/16" x 7 3/4" 

Double Frame - 2 3/4" x 7 5/16", also cuts one stitched tag and one stitched mat each measuring - 2 5/16" x 3 1/8"

Vertical Numbers - 7/16" x 6 1/4"

Arrow Clip - 1 7/16" x 1 3/8"

Short Tab - 1 13/16" x 3/4"

Two longer Tabs each measuring - 2 1/16 x 11/16"


Planner Binder - Blank Canvas

This is a canvas color planner on both the inside and outside. It isn't made from canvas but can still be altered with paint, ink, or ephemera.  This A5 size planner binder comes with 6 binder rings, interior pockets, a tab for a pen or pencil, and a band closure. It measures 9" x 6.25". 

In a future post, we will talk about ways to alter planners and some of the coordinating products that are available for them.

THIS POST MAY CONTAIN AFFILIATE LINKS. BY CLICKING ON THEM AND PURCHASING PRODUCTS THROUGH MY LINKS, I RECEIVE A SMALL COMMISSION FOR THE REFERRAL. THE ITEM WILL NOT COST YOU ANY MORE BY GOING THROUGH THIS LINK.


Sunday, April 16, 2023

Potted Plants Card Set - Challenge 1 Altenew Part One

Scroll for the Potted Plants :)

Masculine Card Set

Hello! The Altenew challenge consists of two card sets but because of the length of the posts, I am separating the AECP Level One Final Challenge into two parts. This part of the assignment is to complete a set of 'masculine' cards and packaging for the set. The colors used in the set are more traditionally used for masculine cards. However, this set of cards is suitable for gifting to anyone. Please be aware that there are many photos because, in addition to showing each of the eight cards, there are some process photos.  Here is the Potted Plants Card Set:

Eight Thematically Based Cards

Though there are similar characteristics, each card is different from the others. For specific tasks, it was easiest to work with a mass production goal. For example, to make clean-up easier I heat embossed all of the pieces at the same time. This included doing the leafy part, pictured below as a tag on the gift bag.


Ink Techniques

Working with inks and paper and watching them transform into something different always brings me joy! Using the AECP courses as a guide to choosing paper crafting techniques to showcase, I selected some fun and easy ones to implement. As already mentioned, heat embossing was used for many of the cards. Another Wow! technique is to apply ink directly to paper. Sliding the ink pad onto the paper in straight lines can create a woodgrain effect. The picture below shows Almond Butter ink applied to a light-colored kraft cardstock (on the left) and the original paper on the right-hand side.

Woodgrain Effect with Direct-to-Paper Inking

Ink Pad Types

The direct-to-paper technique pictured above uses dye ink. It is fast-drying and not as messy as stickier inks. Why use messier inks? Using pigment ink will oftentimes result in more intense colors. And some colors, such as metallics, are not available as dye inks. Watermark inks and pigment inks are usually the recommended ink types for heat embossing. The heat-embossed plant/tag was stamped with a combination of dye ink and Versamark, then embossed with clear powder. This was used as the base for an ink resist technique. Rather than get out another ink, I used leftover blue ink on the blending brush to fill in the background. 

Gold Pigment Ink Applied to Paper Edges

More Ink-to-Paper Techniques

Pigment ink is slower to dry. It does not need to be embossed, but a heat tool will speed up the process.  I used the gold ink pad to bring some extra depth to the edge of the paper by running the ink pad around each of the sides. Because the overall effect is grungy, it is very forgiving and you do not need to worry about a crisp application. It is ok to mix inks. The picture below shows the same pigment-edged paper after dye ink was applied with an ink blending tool. Notice that ink wasn't deliberately applied in the middle as that part will be covered with patterned paper.


Ink blending along the perimeter of the page

Continuing in an assembly-line manner, everything was stamped and embossed or colored and then die-cut as needed.  My process is to sort out backgrounds first and then assemble cards based on the elements being used. It helps me to have a big picture so I sometimes will lay out everything to see what components might be missing. The photo below shows this step.

Stamping and Coloring

All of the pots were colored with either woodless colored pencils or alcohol markers. I used either an alcohol blender marker or a paper stump dipped in alcohol to blend the media on the pots. It is easiest for me to color and then die-cut the images. Die cuts allow the various components to be raised above the background or card base. It adds another wonderful layer of dimension and depth to the card. Additional postage may be required for mailing, though.

Most of the cards have the potted plants raised off the base with foam tape. The plants are inserted into a small slit on many of the pots. This was achieved using a handheld craft knife.

Plants inserted into a slit cut into the pot

Plants are not always green. And in card making, any color can be used!


Using different sentiments, whether stamped or die cut, allows for many options in card sending.


The cards don't have to all have plants to still be a part of the set. Using enough of the other components ties this clean and simple card together with the rest of the set. The very first card at the top of the post is also a CAS card made for the set.

Clean and Simple Card


Recycling A Shopping Bag

Packaging a gift does not need to be fancy. When I was unpacking from a family trip last week, I found this polka-dot bag from a souvenir purchase. Even though the colors are different, it seemed like a great tie-in to the dots on the cards. Brown paper packaging with twine wrapping is one of my favorites for gift-giving. The use of a recycled bag complements the card set. After punching two small holes in it, the embossed tag worked well as a way to hold the twine in place.


THIS POST MAY CONTAIN AFFILIATE LINKS. BY CLICKING ON THEM AND PURCHASING PRODUCTS THROUGH MY LINKS, I RECEIVE A SMALL COMMISSION FOR THE REFERRAL. THE ITEM WILL NOT COST YOU ANY MORE BY GOING THROUGH THIS LINK.

Saturday, May 11, 2019

Vintage Photos Used in Cardmaking

Grandma as a young woman
When sorting through water-damaged books I was reminded of a few things about life and stuff in general.  One, never take anyone or anything for granted. Two, you never know what you may find when sorting things headed for the trash bin. Three, even though my grandmother lived with us for a short time, I didn't really know her very well. Four, I wanted to make this vintage photo into a card for my mother for Mother's Day. Five, how could it already be time for Mother's Day?! And that is how my grandmother became the focus of my mother's card.

A little Photoshopping to repair and lighten the 100-year-old photo
I scanned Grandma and printed out several copies of her onto cardstock made for printers. Our scanner/ copier is a laser printer. I used Hammermill 80lb cover weight paper purchased from Costco.com. There are many options when it comes to printing photographs. Because this picture was going to be altered with a glaze medium, I wanted a smooth surface that would not bleed.  If you do not have access to a laser printer, you can take a copy of your picture to a copy center and have it printed there. Or, if you do not intend to put anything moist on the printout, it won't smear and become a big mess!


The photo on the left shows the colored Creative Medium that I used on the photo.  On the righthand side is the dried and cropped photo. To make the photograph look like it was in a gold-gild picture frame I made a border with tissue tape. Washi tape or Post-it notes would work, also.  It is important that whatever is used doesn't damage the photograph and makes a nice clean line, too.
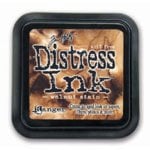
Embossing paste used to frame photograph

Embossing paste dries a pretty antique gold color
The heart shape took on a leather-like look after distressed with ink.  The lace ribbon was also inked a little bit to tone down the harshness of the white.


There are many layers to this card and also layers of flowers.  
The very bottom of the flower is a paper doily which was distressed with ink and folded.  Glued on top of that is a piece of ribbon formed into a hoop.  More distressed paper flowers were glued on top and finished with a resin flower center.

Ribbon base for paper flowers to rest upon
Below is the side view of the big flower embellishment.  There are also two different types of lace ribbon layered with the patterned paper.

Lots of layers make this flower embellishment
And finally, here is the finished card with all of the embellishments and distressing completed.
Vintage Photo used on Greeting Card
This card is to go with a set of greeting cards that I made for my mom to be able to mail out to whomever she wants.  All eight of the cards are posted on this post if you would like to see them.

Packet of cards for giving away
Thank you for visiting!

Supplies: