Paper and Fiber Arts


Welcome to my mixed media blog. Thanks for stopping by.
Showing posts with label clean and simple. Show all posts

Saturday, July 29, 2023

Elements of Floral Composition


One of the Altenew Academy classes that I recently completed has to do with the elements of design. The class is taught by Jaycee Gaspar. He is an Altenew Design Team Member, as well as an Altenew educator. Jaycee makes beautiful cards using watercolor with stamped floral images. His work is gorgeous! I took this class because I admire his work and wanted to know more about his process. These two clean and simple cards reflect some of what I learned in this class.  The first card showcases the use of line as a design element. 

Line

The heavier weight of a brush marker line as a frame around the circle gives additional emphasis to what is included in the flat frame. Even though nothing on the card front is popped off the surface, the thicker line also helps to make the circle seem three-dimensional. The only dimension on the card front is the use of sequins and pearls. Once the card front was complete, it was popped off the 4.25" x 5.5" base with a black die-cut frame underneath. The front and frame were cut with Gina K Designs Master Layouts 1 set. 

The petals of the flower almost cradle the sentiment. Perceived lines in linear composition help with the placement of elements, such as sentiments, on a card. All images are stamped from the Build-A-Flower: Laelia set. First, the card panel was ink blended with Pool ink using a circle mask. This created a focal point for the black outline stamp to rest. One of the layering stamps was used to add a little bit of color, also using Pool ink. There are additional layering stamps in the set. However, I like the graphic look of limiting how much color is on this card. The next card uses the same inks, masks, and stamp set but in a different way.


Shape

Both cards use the circle as a design element but in a reverse way. There is no actual dimension on this card. The leaves are contained within the circle. The images are stamped on the A2 card base after ink-blending the center section of the masked card. Perceived depth and dimension are achieved by the use of the dark center color. This is especially useful in creating flat cards for mailing. Additional interest is added with ink splatters of the Pool ink mixed with a bit of water.
THIS POST MAY CONTAIN AFFILIATE LINKS. BY CLICKING ON THEM AND PURCHASING PRODUCTS THROUGH MY LINKS, I RECEIVE A SMALL COMMISSION FOR THE REFERRAL. THE ITEM WILL NOT COST YOU ANY MORE BY GOING THROUGH THIS LINK.


Sunday, July 23, 2023

Stacked Stencils for Clean and Simple Cards

Have you layered stand-alone stencils to achieve a new look? That is what today's post is about. I used two stencils to create a different effect on three clean and simple cards. The idea is from Nicole Watt in her Altenew Academy class titled "Advanced Stencil Techniques". Her class is filled with a lot of fun techniques. This one particularly appeals to me because it looks great and is very fun to do. Also, I love that there is a bit of a surprise element to what you create that is shown upon the reveal. 

On the first two cards, I used the grid stencil after using an open stencil or mask for the first layer. The card pictured above is the maze stencil with Silver Sage ink blended onto a 4.25" x 5.5" piece of cardstock. Leaving the stencil in place, the grid stencil is aligned on top, and Pool and Navy inks are blended over the original design. The photo above shows the ink blending after that step with the grid stencil removed.
Clean and Simple Card with Stacked Stenciling

These next two cards use a reverse mask from the Wonderland set. The one above shows it with the grid stencil and the one below is with a discontinued geometric stencil. Also, the one below uses navy ink after the geometric design was complete. Each of the cards has a stamped sentiment from the Wonderland stamp set. 

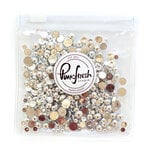
All three cards are layered onto standard 4.25" x 5.5" card bases after die-cutting the stencil background and a frame using Gina K's Master Cuts Set 1 dies. A little bling was added to all of the cards using Pinkfresh Studio Metallic Pearls or Essential Jewels. 
The large die-cut sentiment is popped up with foam tape. It covers some of the card, but not enough to be distracting from the cool-looking background. I hope you give this technique a try! It is kind of addictive, though.


THIS POST MAY CONTAIN AFFILIATE LINKS. BY CLICKING ON THEM AND PURCHASING PRODUCTS THROUGH MY LINKS, I RECEIVE A SMALL COMMISSION FOR THE REFERRAL. THE ITEM WILL NOT COST YOU ANY MORE BY GOING THROUGH THIS LINK.


Products Used:

Friday, July 14, 2023

Kraft, Black, and White Medallion Card


Kraft, black, and white are a gorgeous combination. It is gender-neutral, striking, and fun to use for card-making. Actually, I also used it when scrapbooking and still use it in my journaling and mixed media projects. It is a good go-to combination. Adding a pop of color takes it up a notch - see the green die-cut sentiment on the card at the bottom of the post for an example.

The medallion is sold with a suggested illustration of layering the three die cuts. I did that but added additional layers and turned the die a bit for a more robust, stacked design. The card above has a stamped and heat-embossed sentiment from the Altenew Tranquility Rose set.

When determining the layout of a card I audition the components prior to adhering them. I think this configuration works well because there are three sections to the card front. The heaviness of the two medallion shapes is balanced by a large sentiment, even though the lettering is thin.  I love this modern font. Unfortunately, "sending hugs" is a retired CTMH die. Do you have a favorite die?


THIS POST MAY CONTAIN AFFILIATE LINKS. BY CLICKING ON THEM AND PURCHASING PRODUCTS THROUGH MY LINKS, I RECEIVE A SMALL COMMISSION FOR THE REFERRAL. THE ITEM WILL NOT COST YOU ANY MORE BY GOING THROUGH THIS LINK.

Scrapbook.com

Altenew - Clear Photopolymer Stamps - Tranquility Rose
Scrapbook.com

Master Layouts Dies - Gina K. Website


Monday, July 10, 2023

Stained Glass Medallion Cards

This card came about because I wanted to make the medallion from the Stained Glass Medallion die set look as close to stained glass as possible. Using a high gloss glue over the ink-blended cardstock gives a shiny, almost glass-like look.
 
Ink blending within the parameters of the shapes keeps the focus on the pretty die-cut design. Two layers of die-cuts are adhered together to form a well for the shiny glue to be poured into. 
The final touch was to add some of the shrink plastic die cuts as embellishments. The photo, below, is an auditioned cardstock background color. It is as good a choice as the green pictured above. Color is a personal choice, there is no right or wrong.

The second card is the same process without a die-cut sentiment or additional embellishments. Using black cardstock for the die-cuts to be framed upon makes for a bold card front. It looks almost like wall art.


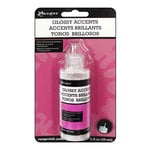
Both the Glossy Accents from Ranger and Spellbinders Glaze 'N Glue work equally well in creating the shiny stained glass look. They also work well for adhering the die-cut pieces in place once the surface is dry.


THIS POST MAY CONTAIN AFFILIATE LINKS. BY CLICKING ON THEM AND PURCHASING PRODUCTS THROUGH MY LINKS, I RECEIVE A SMALL COMMISSION FOR THE REFERRAL. THE ITEM WILL NOT COST YOU ANY MORE BY GOING THROUGH THIS LINK.


Products Used:


Sunday, July 9, 2023

Red and White Hugs Card


This card is easy and very quick to make because it is just layering/stacking die-cuts. Using two high-contrast colors makes a bold statement in a clean and simple way. Red and white are always a good combination. Do you have two favorite colors to try this technique?


THIS POST MAY CONTAIN AFFILIATE LINKS. BY CLICKING ON THEM AND PURCHASING PRODUCTS THROUGH MY LINKS, I RECEIVE A SMALL COMMISSION FOR THE REFERRAL. THE ITEM WILL NOT COST YOU ANY MORE BY GOING THROUGH THIS LINK.


Tuesday, July 4, 2023

Stenciling With Markers


Here are two cards made with the same stencil and dies. The stenciling was done with two different types of markers. 

First, the card with the negative piece of the 'hugs' die cut was colored with Karin pigment brush markers. These are non-pumping, meaning you shake them and they are ready for painting onto the cardstock.
The Decobrush markers contain opaque acrylic, non-toxic organic pigment-based paint. I wanted to use them as line art, rather than fill in the shapes. This worked great for all except the purple, which leaked under the stencil. That is an operator error issue and had I dabbed off the paint onto scrap paper, it wouldn't have occurred. 

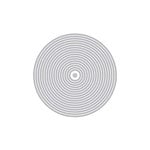
Hero Arts Stacked Circle Stencil With Karin Paint Pen Marker


Cute circle embellishments were used to cover up the ink blobs and to add interest.  Using small white circle off-cuts from my stash, clear dots, and colored sprinkles elevate the fun and color on this card.
The second card is made with the same stencil. This time the shapes are colored in with Zig Clean Color Real Brush markers. These are waterbased and provide a concentrated pop of color.
Initially, I was going to assemble the card as pictured above. To cut the Altenew 'hugs' out as a circular piece, one needs to use a circle die that is large enough to go around the perimeter of the word. You can make the circular frame as large as your largest circle. However, I like to make it about as narrow as the lettering. Having a set of nesting dies helps so you can audition the sizes before actually cutting. In the end, the black piece was cut using the nesting circle and the 'hugs' die, and a white piece with just the sentiment, as pictured below. I like the color peeking out from under the clean and simple top piece.


Thank you for stopping by. Have a colorful day!

THIS POST MAY CONTAIN AFFILIATE LINKS. BY CLICKING ON THEM AND PURCHASING PRODUCTS THROUGH MY LINKS, I RECEIVE A SMALL COMMISSION FOR THE REFERRAL. THE ITEM WILL NOT COST YOU ANY MORE BY GOING THROUGH THIS LINK.