Paper and Fiber Arts


Welcome to my mixed media blog. Thanks for stopping by.
Showing posts with label EK Success Edger Punches. Show all posts

Tuesday, May 29, 2012

A Note For You Card With SEI 6 x 6 Paper Stack

Fiskars Threading Water and EK Success Scrolls and Dots Edge Punches Add Detail
Maybe I should call this "Edge Punch Week" as everyday, so far, the cards have been made using different punches!  This is a simple card with baker's twine and another piece of fiber to offer some additional texture.  There is a scrap of linen behind the sentiment, which is from CTMH's Just For You set.

I love the embossed telephone/chair paper in this stack from SEI.  The striped paper came from the same pad.  It is from the Promise Me collection.

Just a quick post today.  I hope you are having a fabulous day!
Thank you for visiting!
Beverly

Monday, May 28, 2012

Everything You Can Imagine Card

Patterned papers are from the Prima Pixie Glen 6 x 6 Paper Stack
The rest of the quote from Pablo Picasso:
"Everything you can imagine is real"

He had such an imagination and artistic vision.  Who can argue with that thought?  When I saw the pretty Prima papers, I knew that I wanted to use this CTMH stamp with them.  I threw on a little lace to sort of make it look like a window.  And of course, any time I can add some pearls, I do! Three of the layers - across the bottom of the papers - were all cut using the EK Success Bracket Punch.

Thank you for visiting!
Beverly

Sunday, March 25, 2012

Making Paper Doilies With Punches

EK Success Corner Punch In Action
Create your own doilies for scrapbook layouts and cardmaking out of any paper in your stash!

Here is a tutorial video showing a variety of corner punches and the results of punching the same size circle with the various punches that are pictured below. The Martha Stewart Topiary Corner Punch is the one used for the instructional part of the video.


If you prefer written instructions, instead of videos, please scroll down to the bottom of the post to see some suggestions about this technique.

Posted below are the various Martha Stewart Punch Around the Page Corner Punches that I have used and their corresponding doilies:
Martha Stewart Double Arches

MS Doily Lace Corner Punch

MS Double Loops Corner Punch

MS Flower Shower Punch

MS Heart Chain Corner Punch

MS Loops Edge Corner Punch

MS Spider Web Punch Around The Page Corner Punch
MS Topiary Corner Punch

 I don't have the SU! Corner Punches posted here because I am uncertain of their names. I have had them for many years and do not know whether or not they are still available.  Please leave me a comment to let me know if you try this.  :-)  If you try this technique with any corner punches that are not posted here, I would love to see your results!

Here is an example of how I used the Spider Web doily.  The center of it was cut out using the MS Large Circle cutter after punching the shape around the perimeter of the circle.
From this:
Plain CTMH White Daisy Cardstock
To this:
Kraft Base, Black Painted Burlap, Spider Web Doily, Flip Flap to see Original Writing on Back of Photo 
There are more pictures of this layout here.

And here is the Loops Doily with the center removed:
Mister Huey Clay and Blue On Cutout Doily Shape
Original post for this layout is here.

Written instructions:
Flip the corner punch over to see where to line up the punch. The picture at the very top of the post shows the back side lined up near the edge of the paper. Punch around the edge of the circle slightly overlapping the previous punched area.  If your punching doesn't end up exactly matched up, you can place an embellishment at that spot. :-)
If you are mathematically inclined, you could measure the perimeter of the circle and figure out whether the punch is the correct size to end up exactly evenly given the circumference to punch size ratio.  Punches vary in size and everyone punches a little differently, so I have no specific guidelines for this.  Just a little observation though, the smaller the circle, the more noticeable a gap may be.

Thank you so much for stopping by today!
Beverly

Saturday, March 10, 2012

Shabby Chic Layout / Painting With Reinkers To Create Vintage-Like Weathered Papers

Edited on 6/21/2012 - Reposted after having been removed for publication. 
12 x 12 Painting/Painted Layout
 As time goes by, I find myself becoming more eclectic in my tastes.  Somedays I am in a clean and simple (CAS) mood and others.... well, it is good the kitchen sink is bolted in - otherwise with my "more is more" attitude, anything is fair game. :-)
This layout uses a lot of stuff.  The hardest part for me is to commit to using up my stuff.  Hoarder, maybe?  For some reason it is easier for me to use plain cardstock and pretty it up rather than use a lot of patterned paper.  Here is how I transformed the Twilight cardstock, and to a lesser extent the Colonial White cardstock, into the gussied up paper in the layout.
"Altered" Cardstock used for  Flowers and Labels
 There are different types of reinkers.  The kind I used to 'paint' the cardstock is a pigment ink.  This is thicker than dye ink and needs to have a long drying time or can be heat set with a heat gun.
CTMH Colonial White Pigment Reinker on Twilight Cardstock
 After applying a small amount of ink to the cs, sponge it around and smooth it out with the sponge as you go.
Adding a faux texture to the cardstock with reinker
 The paper does not having any bumps, it just looks like it has some texture to it.  Sort of like a suede look.  After heat setting it or allowing it to dry a LONG time, it can be stamped or distressed in a multitude of other ways.  I used background stamps and other single image stamps to create a background-effect.  Some were stamped with 2nd and 3rd generation stamping to give a progressively more subtle effect.
Original Twilight CS and Altered CS to Show Contrast in Coloring
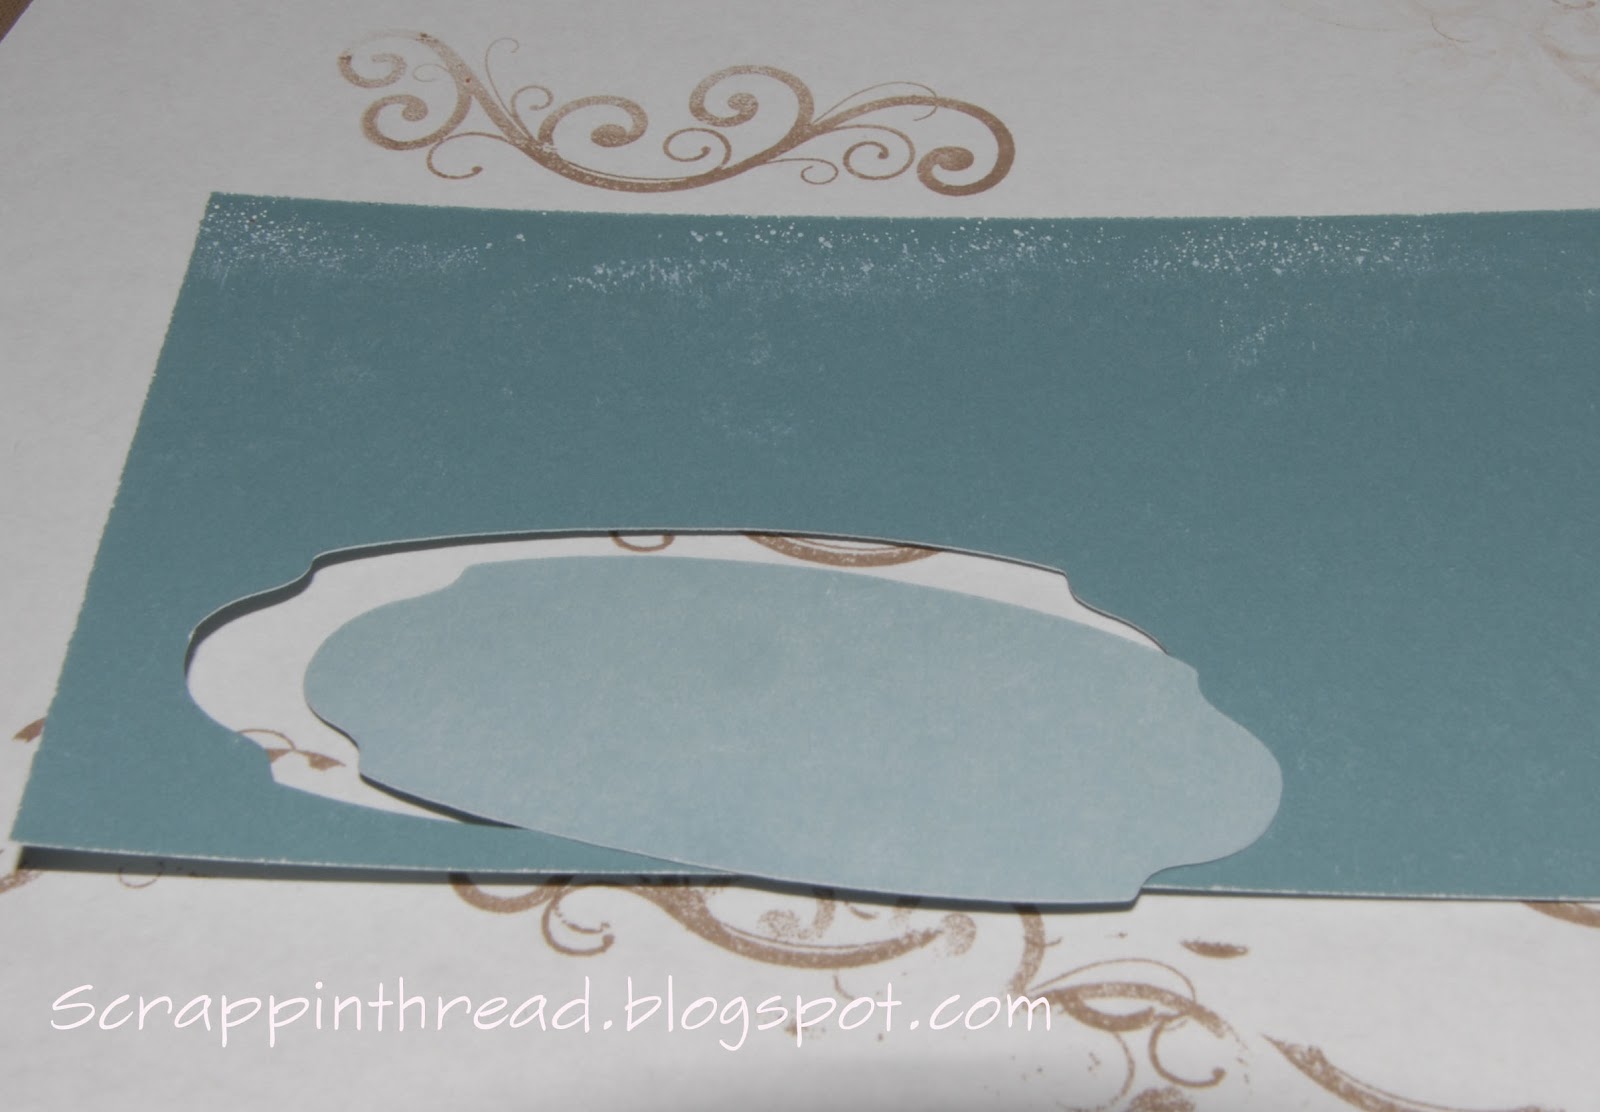
 Several of the pieces I decided to cut with the Cricut and then further alter the individual pieces once they had been cut.  The larger piece pictured above is the mat for the photo in the layout.  It was adhered under a piece of Colonial White cardstock that was ink distressed and edge distressed after using a border bunch on one side and cutting a circle from the center. Then it was spritzed with a little bit of Mister Huey's Color Mist.
Art Philosophy Cricut Label Cut Out After Ink Painted
 The picture above shows the back of the cardstock along with the front of the painted piece after it was cut.  The inking did not cause any problems with getting a good, sharp cut with the Cricut.
CTMH Chocolate Ink with AE Stamp Used on "Painted" Label Layered on top of Linen Fabric
 The great thing about this technique is that you can continue to add ink through sponging, stamping or direct to paper as much as you like.  It is a forgiving type of inky fun. More is ok in this type of creating!
Retired CTMH B & T Paper for Journaling Tag and Base
 The photograph that I used is an original picture of me from (I believe) 1966.  I love this picture because it shows me intent on painting.  It reminds me of how I am now when I am working on projects.  I also love it because my dad took it and I don't have very many things that connect me to him.  Now that I have written that, I think I'll add that to a little hidden journaling under the Bo Bunny diecut journal paper, which is immediately under the photo.
Happy Painting!
Supplies:
Paper: Cardstock and B & T are all CTMH, Bo Bunny Noteworth Journal Diecut
Stamps: CTMH - Potential March 2012 SOTM, Universal Backgrounds, The Best Things. Ali Edwards - Favorite Memories
Ink: CTMH - Colonial White Pigment, (and reinker) Chocolate, Twilight, Bamboo, White Daisy Pigment
Embellishments:  Linen fabric,Mulberry Paper, Prima Wood Tickets, Making Memories off white flower, (in right hand corner) May Arts ribbon,  All other items are from Close to My Heart - Bitty Buds Assortment, Flutter Paper Shape, Foundry Binder Clip, Durables Round Pewter Studs, Sparkles Flourish, Sparkles, some Sparkles and retired hat pin colored with Copic Markers, Kraft Border
Supplies: Sewing Machine and thread, EK Success Scrolls and Dots Edge Punch, MS Doily Lace Edge Punch, Mister Huey's Classic Calico and Bonny Blue

Thanks for visiting and making it through such a long post!
Have an amazing day!
Hugs,
Beverly

Friday, February 24, 2012

Rainbow Flower Rosette Card

Edited on 6/21/2012 - Reposted after having been removed for publication. 
Rosettes Made From EK Success Parisian Edge Punch
Flowers are one of my all time favorite embellishments to use on, well, just about everything!  The accordion folded rosettes are very simple to make and with this particular punch they fall into the super fast category as well.  Because of how the punch is designed, no scoring board is necessary.  It is easy to align the holes up and fold them free hand.

Stamped Sentiment From CTMH's Art Philosophy Collection
The sentiment is layered on a 2" scallop punch black circle. The rosettes would also look pretty layered on a scallop circle. All of the flowers have CTMH Pearl Opaques Adhesive Gems. Two of the smaller sized pearls were added as accents to the sentiment flower.  I love these little pearls.  The stems and leaves were cut freehand from CTMH Sonoma paper.  That cute little felt bird has been in my stash for over a year, it was with the Valentine's stuff on clearance at Michael's.

Close To My Heart Cardstock 3-d Flowers
Thank you for visiting my blog today on the last day of "Rainbow Week"! I hope you enjoy many rainbows in your lifetime.
Beverly

Monday, February 20, 2012

Rainbow Week

Edited on 6/21/2012 - Reposted after having been removed for publication. 
EK Success Bracket Edge Punch Used For Base

Rainbows as a design element have been a favorite of mine for decades! This week I thought it would be fun to challenge myself to use scraps that have been multiplying accumulating, to make cards with rainbows as the theme. The thought started when I realized that one of my most frequently repinned pieces on Pinterest is this rainbow layout that I made last September.  Here is the original post.

I made this card using strips cut with the edge punch and then adhering them in ROY G. BIV order.  Pretty fast and easy! Click on the photo to see more detail of the punched shape.
Sentiment From CTMH Art Philosophy Collection
Cardstock is CTMH.  There is one piece of textured cs that is either CTMH or SU!.  Black ink, Stamp and Sparkles are all CTMH.

Thank you for stopping by today!
Beverly

Monday, December 19, 2011

Frosted Designs Tuesday Card Sketch #8


Welcome to another Frosted Designs Card Sketch Challenge!  This week Diana Gonzalez has a fun sketch to follow.  You can see that I flipped the sketch 90 degrees to make the label area horizontal. I exchanged the birdcage for a Christmas tree.


There are a lot of layers in Diana's sketch and I kept with that idea by using Spellbinders die cuts under a layered label from Silhouette.  On top of that I used a Hambly transparency overlay called Holiday Deer.  The final layer is the tree that I made using an EK Success edge punch and Tim Holtz tissue tape.


The top of the tree is a punched star that was covered in white embossing powder.  This beautiful sentiment is a CTMH stamp that I embellished with some Holiday Red brads. 

Merry Christmas!


Wednesday, October 19, 2011

Trees Made With Martha Stewart and EK Success Paper Edger Punches

CAS Card - Martha Stewart Doily Lace Edge Punch
Lately, I've been making a lot of Christmas cards. A few of them have trees on them created from strips that were punched with various paper punches.  I'm sharing a few of the trees here.  Some additional cards that use other punched trees were posted earlier on other days and are listed/linked at the bottom.

Side view to show the 3-dimensionality of the tree
Trees are easy shapes to cover with the strips.  However, I could see using other simple shapes for other occasions.   Also, the strips could be made from a variety of papers and punches to add a more random or vintage look.

Martha Stewart Double Loops Punch (leaning) Tree
The three trees leaning on their punches haven't been used on projects yet.  I wanted to show them with the punch used to create them in case someone has the punch, but was unsure of it's name.
These trees can work easily on scrapbook pages or cards.  Even though they have a 3-dimensional element to them, they flatten with no loss of the design.

EK Success Morocco Edge Punch Tree
An added bonus of having leaning trees is that it is easier to see the Tim Holtz Tidings Tissue Tape on each of them!
Martha Stewart Scallop 3-dot Edge Punch Tree with Tim Holtz Tissue Tape
Some of the trees are topped with embossed stars, some with buttons and some are left bare. 

If you'd like to see some of the other trees I've made, please check out these posts:
October 13, 2011 - MS Loops Punch
October 14, 2011 - MS Spider Web Punch
October 14, 2011 - MS Heart Chain Punch
October 15, 2011 - MS Loops and EK Success Parisian Punches

Thank you so much for stopping by today.
Beverly

Saturday, October 15, 2011

Country Christmas Card With Edge Punch Garland

EK Success Parisian and Martha Stewart Loops Punches Garland
Burlap reminds me of trees. As a teenager, I worked for a nursery that sold trees with their roots wrapped in burlap.  The natural beauty of this rustic fabric seemed perfect for a Christmas tree background. It is layered on top of a piece of Cranberry cardstock which is on a Colonial White card base. The base was stamped with Cranberry ink using one of the images from the Universal Backgrounds set.

Seam binding dyed with Tim Holtz Distress Stain
The trees are decorated with strips of edge punched cardstock and embossed star punches.  The strips on the left tree were run through a corrugator and then embellished with baker's twine.  The strips on the tree on the right were stamped with an image from the Holiday Cheer set.

Image from CTMH's Holiday Magic stamped on Spellbinder's Die-cut shape
Thank you for stopping by today.  I appreciate your comments.
Beverly

Supplies:
Stamps: CTMH Holiday Magic, Universal Backgrounds, Holiday Cheer
Papers: CTMH Colonial White, Cranberry, Topiary, SU! textured brown
Inks: CTMH Cranberry and black, Versamark
Embellishments: Silver embossing powder, cranberry brads, burlap, baker's twine, Tim Holtz Distress Stain, button
Tools: Emaginations star punch, MS Loops edge punch, EK Success Parisian edge punch, Spellbinders

This card is submitted for the following challenges:

CASE Study Challenge #61 - October Muse Niki Estes with fabric 
Speedy the Cat's Friends Challenge Week 77 Seeing Double 


Wednesday, September 14, 2011

EK Success Parisian Edger Punch used for Handmade Paper Rosette

CTMH Wonderland Paper used for both Rosettes
 The EK Success punches are easy to use.  I love how nicely the punched holes always line up with the guides and how cleanly it cuts.
Seam binding ribbon was misted with Perfect Pearls Forever Blue
 The embellishment in the center of the larger rosette is a retired ribbon slide from CTMH.  After running two pieces of ribbon through it, I covered the center with Pearl Opaques Adhesive Gems (CTMH.)

CTMH Shimmer brad is the center embellishment
 These rosettes were made from 12 inch long strips.  The larger rosette is made from a 1 1/2" strip.  The smaller one is a 1 inch strip.

Rosettes can be used on any type of project
These aren't too bulky and would look beautiful on scrapbook pages or cards. I had planned on using the larger one on a specific card I was making, but ended up using a different rosette instead.

Monday, September 12, 2011

Frosted Designs First Card Sketch!

5 x7 card machine stitched around the 1st layer
 I'm so excited to be part of Frosted Designs Tuesday Card sketch team! Thanks for stopping by to see the first card challenge for our team.  Welcome to my blog, if this is your first visit here. :-)

Dreamin' is the name of the paper pack that I used for this card. I love this paper!  It seems so Autumnal and it is cheerful at the same time.  Everything just fell into place as I was making the card.  Of course it helped that it started with Debbie Burns' easy to follow sketch!  Here is the sketch:
Frosted Designs Tuesday Card Sketch Challenge #1

Flower made with Morocco paper edger from EK Success
The paper rosette is adhered to the ribbon with a 3-d glue dot.
Hand made hat pin with beads, Adirondack ink and Copics
The corrugated cardboard butterfly is from House of 3/Pink Paislee. The flourish shapes and labels are all cut with Spellbinders dies. All other materials are CTMH.  The stamp and decorator papers are from their Dreamin' Workshop on the Go Kit.

Friday, August 26, 2011

Tutorial on Making Paper Flowers From EK Success Edger Punches

EK Success Morocco Lace Edge Punch with Paper Flower

1 1/2" and 1" Strips after punching
This is some inexpensive paper from a very old paper pack from long ago.  It is printed on one side and is kind of thin.  The strips are 12 inches long.  I scored the paper in between each of the lace shapes and then accordion folded them. I glued the ends to make a circle. One big and one smaller circle, based on the size of the paper.

EK Success Bracket Edger Punch with Rosette Flower

This is the same unknown brand, thin paper.  It worked okay for this punch, but I wouldn't use it for more intricate punches.

This one I scored every 1/4" inch.  Folded back and forth, accordion fold style, then glued.
They look sort of like little lamp shades at this point.  Next I hot glued them flat into rosettes.
Lots of paper rosettes made from different punches, die cuts, and scissors
At this point, it is even more fun because the middles need to be embellished!
Double layer paper rosette flower prior to filling center with embellishment
Some of the flowers I hot glued as layered flowers and others, I glued separately and then stacked them on top of each other.
Single layer paper rosette
The embellishments on this pinwheel/rosette are from CTMH's Elemental Complements Dimensional collection.
Shorter flowers are great for scrapbook pages and cards to be mailed.  The taller ones are good for cards delivered in person or sent in boxes with gifts.  They are also really cute on home decor items.  I have a few on some mirrors, boxes and other frames that I've made.  If you click on the highlighted links you'll see a couple of examples.