Paper and Fiber Arts


Welcome to my mixed media blog. Thanks for stopping by.
Showing posts with label Interactive Card. Show all posts

Wednesday, July 12, 2023

Peek-A-Boo Bookcase Card

 Have you seen the stamps and dies that make peek-a-boo interactive cards? This post from four years ago shows the Presents Background stamp set in action here. Today's post uses the same Peek-A-Boo Doors die. The bookcase stamp set has many wonderful images on a gigantic stamp and also lots of little stamps to position behind the doors. After ink blending with Altenew's Almond Butter ink for a vintage bookshelf look, I used Prismacolor pencils to color the stamped images.


The die is placed in position over the stamped and colored 4.25" x 5.5" card front. The die creates fold lines for the doors and crisply cuts the other three sides when run through the die-cutting machine. I used most of the small stamps from the set to make hidden images or sentiments behind the doors. The images are also colored with Prismacolor pencils.
Pictured above is the stamp set next to the card front. Notice how big the set is? The small images and sentiments can be used on other cards and papercraft items. If you prefer to leave the bookshelf image intact, you do not need to use the die to make an interactive card. It is the perfect cover stamp for a book lover's card.

You can see a little bit of the peek-a-boo images with this side-angle photo. A few of the images were stamped twice - under two different doors. This gave me an opportunity to change the color choices. For example, the mice are holding different colored books.
Do you enjoy making interactive cards? People love receiving them and there are usually a lot of oohs and ahhs when they see them.

THIS POST MAY CONTAIN AFFILIATE LINKS. BY CLICKING ON THEM AND PURCHASING PRODUCTS THROUGH MY LINKS, I RECEIVE A SMALL COMMISSION FOR THE REFERRAL. THE ITEM WILL NOT COST YOU ANY MORE BY GOING THROUGH THIS LINK.

Wednesday, July 1, 2020

Lawn Fawn Interactive Card and Machine Embroidered Gifts

.
Lawn Fawn Magic Picture Changer Card


My sweet grandbaby recently turned two-years-old. These pictures show some of the things that I made to send to her. It was fun to make the Lawn Fawn Interactive Card. This is the first time I used this die and it was very easy to assemble.  The machine embroidered things were also easy to make. I love machine embroidery for lots of reasons but my favorite is that because while the machine is humming along, I can work on other things, for example, coloring the pieces for this card.

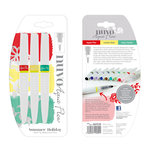
Copic and Tonic Aqua Shimmer and Flow Markers


Tips for interactive cards

  • Use sturdy cardstock. 
  • Anti-static powder will make the paper move easier
  • Try to assemble as much as possible before using adhesive to check if it works properly
  • If you make a sample, label and keep the pieces to help for future assemblies

Gifts for Toddlers

The following designs are from Scissortail Stitches, which is an offshoot of OESD.  The puzzle is done completely in the hoop. I used some scraps to make a little bag to store the eight pieces of the puzzle.

Scissortail Stitches Machine Embroidered Puzzle
Both of the towels are made with a bath and a hand towel, each. The designs are machine embroidered applique on the hand towel. After the design is done sewing out then the hand towel is sewn to the bath towel. It is a very simple and useful project.

Bathtime Buddies Hooded Towels
Thank you for stopping by today!
Beverly

Supplies:


Nuvo Deluxe Adhesive

Tuesday, July 30, 2019

Second Interactive Countdown to Christmas Advent Calendar Card


I had so much fun with the card that I posted here, that I thought I'd make another one.  This second interactive Countdown to Christmas Advent Calendar Card took a little less time because the numbers were cut from washi. Instead of stamping a greeting under each door I thought it would be fun to use the card for a lift-the-flap scavenger hunt. I am going to write a clue under each door so that my daughter can seek out a small treat or gift hidden somewhere in the house.  She will be 15 years old when we do this in December.  Hopefully, she won't think it is too corny!

The other difference on this card from yesterday's is that the numbers were made from washi tape instead of die cuts.  Stickers would work well, too! This is a standard A2 size 4.25 x 5.5 inch card. That means it is easy to mail!

If you have made anything for Christmas, I would love to see it!
Thanks for stopping by today!

As always, if you are in the market for any new goodies, listed below are the currently available supplies from Scrapbook.com. You are not charged anything extra for shopping with them and I make a small commission if you purchase something.  Thank you for supporting a fellow crafter!


Monday, July 29, 2019

Christmas in July - Countdown to Christmas Advent Card

Hero Arts Presents Background Stamp with Peek A Boo Doors Die to create an Advent Calendar Card

On the one hand, I love Christmas so I think it is great to get a headstart on crafting for the holidays as soon as Christmas is over. On the other hand, I feel a bit overwhelmed if I haven't started crafting holiday gifts and cards by this time of the year. Bearing that in mind, I just made my first Christmas item for this year.  It is a Countdown to Christmas Advent Card.

The idea behind this card was actually my 14-year old's as she was watching me stamp, emboss and die cut. She suggested turning the card into an Advent Calendar.  I've made many Advent Calendars over the years and here are some posts with a variety of different kinds of creations, here, here, here, and here. The last post has a list of activities that a child or family could do on each day as they count their way to Christmas.

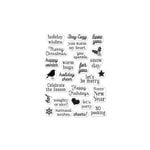
Tim Holtz Sizzix die for numbers and Christmas Greetings Stamps from Hero Arts

This card was considerably more complicated than most of the ones I have been making this month. However, it was fun! And it really did not take a huge amount of time... just some searching for numbers to die-cut that were the right size.  It would have been easy to use the Cricut or Silhouette, but I had my Vagabond out and wanted to use that if I could.  It turns out the Sizzix Tim Holtz Thinlet Mixed Media set pictured above was a perfect match.  Adhering 4" wide strips of double-sided adhesive to cardstock made it very easy to cut, peel, and stick the numbers to each of the little doors.
Please let me know if you have any questions.

Today is the last day of both Sizzix and Scrapbook.com's Christmas in July sale. I am posting the links to Scrapbook.com for the current products I used in case you are in the market for any of these things and want to hit up a good sale!  Hero Arts Stamps just released their Winter Catalog. You might want to check out their site for inspiration. Here is the list of items that I used: