Paper and Fiber Arts


Welcome to my mixed media blog. Thanks for stopping by.
Showing posts with label scrapbook layouts CTMH. Show all posts

Monday, July 21, 2014

Base & Bling - Not Just Jewelry - Video Tutorial

Hello!  I got sidetracked with the excitement of new products coming out from CTMH, so this video was set on the back burner for a bit... I am sorry if you were one of the people requesting it and had to wait!
 Here are a number of pictures from CTMH that show the Base & Bling products and how they were used by CTMH's design staff for the Idea Book.


They are lovely.  However, it is nice to be able to use up the remaining items for other projects or to come up with one's own way of personalizing things.
This video shows how to use the products in the intended way and a few not-necessarily-intended ways.


Here are a few of my projects from the video:
My Crush Book Charm

CTMH Base & Bling Storyteller on My Crush Bluebird Book

Base & Bling Filofax Charm

Base & Bling Keychain or Purse Charm
The following product information is from CTMH:

What material are the Base & Bling components made out of?
The Base & Bling bases, chains, and jump rings on the charms are made of steel. Base & Bling charms and pendants are made of zinc alloy. They are all lead-free. Item Z2034, faux antiqued gold oval cuff, and the faux antiqued gold pendants and charms contain no nickel. The faux antiqued silver pendants and charms do contain nickel, as well as items Z1940 (faux antiqued silver chain), Z1954 (faux antiqued gold chain), Z1978 (rhinestone charms), and Z2035 (faux antiqued silver oval cuff). Although the soldering is strong, intentional misuse or over-forcing joints where welded can cause the circle bases to break off.

What are the dimensions for the Base & Bling components?
Base & Bling Chain: 30" long with 2" extender and lobster claw clasp
Base & Bling Oval Pendants: 1" × 1⅜" inside dimension
Base & Bling Rectangle Pendants: 1" × 1⅜" inside dimension
Base & Bling Square Pendants: 1" inside dimension
Base & Bling Circle Pendants: 1" inside dimension
Base & Bling Oval Glass Covers: 1" × 1⅜"
Base & Bling Rectangle Glass Covers: 1" × 1⅜"
Base & Bling Square Glass Covers: 1"
Base & Bling Circle Glass Covers: 1"
Base & Bling Charms: Range in height from ⅜" to 1⅜"
Base & Bling Style Sheet stickers: 1" × 1" each
Base & Bling Oval Cuff: 1" × 1⅜" inside dimension

To purchase any of the Base & Bling products, please visit my website here.

Please let me know if you have any questions.  Thank you for visiting today.
Beverly

Saturday, July 12, 2014

How to Assemble CTMH's Post Bound Albums

Hi Scrapbookers!
Monica shows us how to assemble the My Legacy Album in the first video and the second video is about Spine Expanders.  The first video is geared towards consultants, so there is a discussion about using the album in a sales setting.  The information about assembling is worthwhile, so I am going to post it with the hope that all viewers understand why it is presented in this manner.


Please let me know if you have any questions!


Monday, February 3, 2014

The New Spring/Summer 2014 CTMH Idea Book - Top Three Favorite Items

http://scrappinthread.ctmh.com/ctmh/products/online-idea-book.aspx
Click on image to view Idea Book online
February 1, 2014, was the release date for the new CTMH Idea Book and Catalog. There are many new, exclusive products available in each new book.  Here are a few of my top picks:

http://scrappinthread.ctmh.com/ctmh/promotions/campaigns/1402-embossing-is-boss.aspx
Click on image to view Embossing Promotion details

1. Large (5 x 7) Embossing Folders!  You can receive your favorite(s) for free with a purchase of colored cardstock packs! There are five different designs: Dot, Chevron, Damask, Stripe, and Quatrefoil. The Accessories page found here lists them all.


2. Picture My Life is a new program offering from CTMH. It is sort of like Project Life, but the program kit starts you off with a Cover Sheet and 10 Memory Protectors.  There are also 122 fabulous cards to insert in your pocket scrapbooking album.  They are sized at 3 x 4 and 4 x 6 inches to coordinate beautifully with your photos. It makes it easy to share your photos with minimal work but with lots of panache! There are 8 different collections.  Please visit here to see them all. Tomorrow's post will show a video of an album that I made using the Balloon Ride kit.  I also made some flat/mailable cards with some of the leftover cards.

CTMH Believe In Yourself C1574

3. I love stamps.  There are so many wonderful new images! It is hard to choose but this is one of my favorites. And (can't help myself!) here is another one:
http://scrappinthread.ctmh.com/retail/Product.aspx?ItemID=7825&CatalogID=672
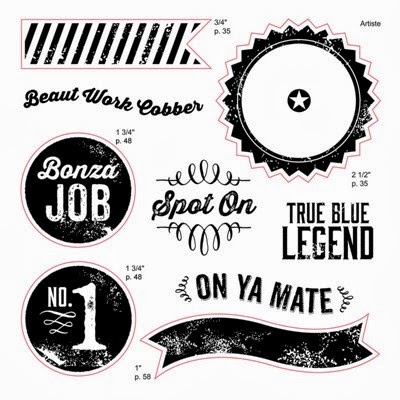
The outline in red indicates which images are Cricut Artiste compatible


Also, there are some Australian designs that are NOT in the new USA Idea Book, but are available here. The first six sets on this linked page are in the Australian/New Zealand Idea Books. Here is a sneak peak at one of them:
http://scrappinthread.ctmh.com/Retail/Product.aspx?ItemID=7871&CatalogID=1835
CTMH Aussie Praises Stamp Set

If you'd like to order a new Idea Book please visit my website here. Please let me know if you have any questions.

Thank you for visiting!
Beverly

Tuesday, April 3, 2012

The Importance of Fun

Edited on 6/21/2012 - Reposted after having been removed for publication. 
12 x 12 Layout
 One of my sisters helped me complete college by watching my dd1 on the weekends.  I worked full-time, went to school full-time and was a single parent.  I didn't have time for fun.  This was about twenty years ago. I now have some time for fun, so I am finally scrapbooking a photo from that era.

Hidden Journaling Tag
 I will always be eternally grateful to my sister for helping me.  But, I am more thankful that she taught my almost 3 year old that Fun is Important.  That fun can be a part of daily life.  She became the "Fun Aunt".  Eva loved going to see her.  My sister made time for her.  She enjoyed being with her. And Eva always knew that.

Journaling on Hidden Tag
When I graduated from college, my sister told me that she felt that the diploma sort of belonged to her, too.  I agreed.  It did. Absolutely.  Next month my sister will be traveling nearly 1,700 miles to celebrate dd1's college graduation.  I think she played a big part in this diploma, also.  If not for her, dd1 would not be the person that she is today.  I am so thankful that Eva was fortunate to have so many wonderful people in her life as she grew up.  Each one played a role that I could not fulfill.
 Brenda showed her how to have fun.  How to enjoy life and relish the simple gift of a beautiful day.
Photo Mounted on Black Velvet Paper

My dear Eva and I are so very lucky, in so many ways.  But mainly because of the people we know and who care about us.  Thank you, Brenda.  I love you.

Here is to a fun-filled day!
Beverly

Supplies:
Paper: Webster's Pages, BoBunny, black velvet, CTMH
Stamps: CTMH, Technique Tuesday Ali Edwards
Ink: CTMH black and New England Ivy, Tim Holtz Black Soot, Quick Quotes Powder Puff Mocha Mama
Embellishments: May Arts Ribbon, Prima flowers, chipboard "Remember", fairy tile, Almanac journaling tag and wood ticket, SU! journaling sticker, Pink Paisley chipboard bird
Tools: Silhouette, Spellbinder, and CTMH edge distresser

Saturday, March 24, 2012

Halloween 1982 Layout With Black Painted Burlap

This layout is totally different then the kind I normally do.  First of all there are NO flowers!  Also, it is dark and there aren't many components to it.
Stamped Images on Punched Doily Circle
However, in person it really does look pretty cool.  There is a lot of texture - real and faux.
There is only one photograph on the page and I didn't want to permanently adhere it because I wanted to  be able to see my dear friend's silly message that she wrote on the back nearly 30 years ago! It can be flipped up as it is only attached at the top.

Photograph Mounted In CTMH Flip Flap for 4 x6 Pictures
I love Martha Stewart's Around the Page Punches and used the Spider Web corner one to make a large doily for this layout.  I cut out the center of the doily to frame the picture mounted on black mulberry paper and the black painted burlap underneath.
CTMH Felt Bird From Midnight Shapes
The burlap came from JoAnn's.  I painted it with acrylic paint which helped to stiffen it a bit.  To adhere it to the page and to adhere things to it, I used a combination of CTMH Liquid Glass and the ATG tape runner.

12 x 12 Halloween Layout
Both the White Daisy doily and the CTMH Kraft paper base were spritzed with Studio Calico's Mister Huey's Classic Calico color.  All papers are from Close to My Heart.  The twine came from Hobby Lobby.

Thank you so much for visiting!
Beverly

Wednesday, March 21, 2012

Sisters

My sisters live about 1,800 miles away from where I live so we don't see each other very often.  They visit each other more frequently because they are about 300 miles apart.  I am always happy to hear about their visits with each other, but am sorry to not be able to spend more time with them. It is important to me to scrapbook the few photos I have of us together so that I can remember those precious times.

The picture in this layout was taken before my little sister (now 44 years old) was born.  My dad took this picture of my two older sisters and I in the courtyard of married student housing where we lived. I love it because it shows us getting along!
Sewing around the tag pocket
Blue is one of my favorite colors.  It seemed like it would work nicely with the old black and white photo.  Before using this original photo, I scanned it for my digital files.  I decided to go ahead and scrap it - damaged as it was, because if I wait to learn how to repair old photos in Photoshop, it will probably never get scrapped.

12 x 12 Layout with a 10 1/2" Doily Punched with MS Loops Corner Punch 
Papers are all CTMH.  The fibers and trims are retired from CTMH, except for the white baker's twine, which is a current product.  The other ribbons are from May Arts. "Smile" is from Heidi Swapp.  Cork star colored with Moonstruck marker - both CTMH.  The small doily was purchased in the cake decorating section of Hobby Lobby.  The crochet butterfly is a Martha Stewart sticker.

The large circular shape was a 10 3/4" white circle cut with a punch to make a doily.  I then removed about an 8 inch circle in the center. This was then spritzed with Studio Calico's Mister Huey Clay and Bonny Blue.  I wanted to have a 'damaged' look to the large circle to match the damaged photograph.  Weird, maybe, but that is how my mind works. :-)

On Sunday, I will have a tutorial posted on my blog showing how to make punched doilies.

Thank you for visiting today!  
Hugs, 
Beverly

Sunday, March 4, 2012

Stretched Canvas Shadow Box Made For Small Picture From The 1960's

Edited on 6/21/2012 - Reposted after having been removed for publication. 
3.5 " Square Photo From 1968
Even though this photo isn't all that spectacular, it is the only one I have from a family reunion at my grandparent's house. It was taken when I was five years old.  Traveling long distances back then was a big deal and seeing relatives that I did not really know, was a big deal to the adults in the photo.  Most of the cousins probably felt like I did at the time.  It was not that exciting.
But these are my relatives. There are not very many of us alive any longer and I now think it Is exciting to have a picture of that time and place!  So let's scrapbook it!

The picture is small.  It needed to feel more substantial, so I decided to make a shadow box out of a stretched canvas to 'bulk it up'.

Side View of Canvas
After scanning my old photographs, I am scrapbooking the originals.  I want to see the pictures the way that the person who took them saw them when they got them back from the developer.  Maybe this is weird, but I remember opening up the envelope with photos enclosed with such joyful anticipation. Did they turn out?  How many 'good ones' were there?  Did someone have their eyes closed?  Or make a funny expression right when the shutter clicked?  Sorry for the digression.  Back to the layout...
8 x 8 Canvas
To make the shadow box, I flipped the canvas over and used the back, inside opening.  I hope to make a tutorial about this later this week to show how it was assembled.  All the papers are from Close To My Heart's Florentine packet plus an extra piece of Twilight and Olive card stock. These orange-y papers seemed to fit that time period really well. Most of the papers were cut with the Art Philosophy Cricut Cartridge.  The flower was made with burlap (from Joann's) and linen (from  http://www.fabrics-store.com) and cut with Spellbinders dies.  The cute chipboard butterfly is from Studio Calico. That gorgeous ribbon is from May Arts.
Frame Shapes Cut With Art Philosophy Cricut Cartridge
This was a lot of fun to make and I think it makes the photograph look more important.  The finished layout is about 10 1/2" across from point to point.  It will hang in our "hall of fame" in the basement with other family photographs.

Thank you so much for stopping by today!  I appreciate you taking the time to visit!
Hugs,
Beverly

Saturday, March 3, 2012

Real Life Scrapbooking

The Layout That Took Three and a Half Years to Complete
This post is about real life. It is a kind of a sad, rambling, soul-searching post. I decided to post it because maybe other people also struggle with scrapbooking their 'real lives'.

 It is easy to scrapbook events.  There are papers, stickers and all kinds of amazing embellishments designed for special, happy events in our lives.  Manufacturers of scrapbooking supplies know that we want to remember those beautiful days with the panache that they deserve.  But what about the "real life" days?  The ones with bumps, bruises and tears?  With children facing chronic illness, the days of special occasions are joy-filled, but so are the days where you can simply say, "She had a good day today."  Meaning, she got some rest or wasn't feeling as sick as she had been.

I am not trying to be Debbie Downer here, I am trying to explain... mainly to myself.... why it took me over three years to scrapbook photos that have been printed and stored with the papers that I had selected so long ago.  It seemed awkward to want to honor this memory as much as the happy-go-lucky ones.  But there those pictures sat on my desk.  Getting moved from pile to pile, from storage box, back to desk.  Until finally I had to face my own qualms about calling attention to what was a huge part of our lives, but one I hadn't had the strength to address.  Ongoing illness.  Doctors saying she will always be sick. She'll have "good days" but she will always need to be medicated.  She'll need to stay indoors. And the list goes on.

Does this make me a bad mother because I could not bring myself to do a layout that calls attention to the fact that my child was sick for months at a time?  Please know it was only because it made me sad to know that I could not make her better.

The Hidden Journaling Tag

Thank you for visiting my blog today.  I promise the next post will be my regular, happy missive.  :-)
And, as an additional bit of happy news, my dd2 is actually relatively healthy now and has far more 'good days' then bad.  She can be outside (most days) now and acts and looks like a 'normal' seven year old.

Hugs,
Beverly

Wednesday, February 15, 2012

Maracas Turned Into Barbells - aka - A Three Year Old Invents Exercise Equipment

12 x 12 Traditional Layout
I recently found these photos in a box that had hurriedly been packed when our basement flooded a couple of years ago.  It had a bunch of different and somewhat non-related items in it. Most of the things were to be scanned.  I hate scanning, so when I came across these, I quickly switched gears to scrapbook instead!

Silhouette Cameo Title Using Print and Cut Features
Die-cuts are so much fun to use!  On this layout, I used a variety of different sources for die-cutting.  The flowers are a combination of purchased flowers from Close To My Heart, (now retired) some Silhouette Cameo cuts, (embossed with Sizzix folders) and a Stampin' Up! punch.

Stamping the date on the layout in Sunflower ink
There is one small strip of patterned paper with four words on it from Prima Marketing's Pixie Glen collection and one 1/4" by 12" piece of patterned paper (Elemental by CTMH) on the layout. Everything else is plain cardstock. The inks match the cardstock colors of Heavenly Blue and Sunflower. I also used black ink and white cardstock.
Working Hard!
The die-cuts and title were all sprayed with a Create-a-Shade pearl paint and water mixture. The big flower in the bottom left corner was also sprayed with Perfect Pearls.

Thanks so much for visiting today!  Please let me know if you have any questions.  And don't forget to scroll down to learn how to be eligible for my Frosted Designs Love is in the Air Blog Hop prize drawing. Or click here.

Beverly

Thursday, February 9, 2012

Love Is In The Air Blog Hop! Prizes!

12 x 12 Traditional Scrapbook Page
Whoo Hoo!  It is finally here!  I am so excited about Frosted Design's Blog Hop, which runs through Thursday noon Central Standard Time.
If you arrived here from Melissa's awesome blog, then you are hopping along in order. My blog is the last stop on the hop.  Make sure you have collected the 'secret word' from each stop so that you can email the magic phrase to Diana.  Her addy is danica4us@yahoo.com
There are two prizes up for grabs for the blog hop!  The first one is from Vintage Street Market for sending in the phrase to Diana. However, there is another prize for completing this weeks challenge! Here is a picture of the second prize, which is from Boys Rule Kits. Remember to link up your creation at Frosted Designs for a chance to win!


In case you missed any of the stops, here is the list of blogs to visit so you can  collect the magic words to create the potentially prize winning phrase:
Barb                                 
Debbie                
Ann 
Joanne                                    
Lydia
Angela 
Teresa
Erin R.                        
Kelly
Erin B         
Boys Rule Scrapbook    
Melissa                                      
Beverly - You Are Here 

Wait! There is more! Here is the prize that I am giving away to one lucky winner:
CTMH Life Delights

Just Rite Cling Stamp
Please leave me a comment and become a follower of my blog if you would like a chance to win the prize that I am giving away. If you are already a follower, then let me know in your comment. The prize will be awarded next Friday. All comments received before noon, CST on Thursday, February 16, 2012 will be included in the drawing. This package consists of a Close To My Heart 9" x 9" paper pack with stickers and an accessory packet (which includes ribbon, brads and clips) AND the Vintage Wallpaper Background Stamp from Just Rite Stamps!

Journaling on layout printed on cardstock
Here are some close-up pictures of my project using the theme of Love, which totally fits with my secret phrase word: Romance! My parents were married in 1964 and my father died in 1988. This is a simple layout honoring their time together.

Love to faults is always blind, always is to joy inclined. Lawless, winged, and unconfined, and breaks all chains from every mind.    William Shakespeare
This quote was printed on my regular printer using the 'legal size' paper setting onto a 12" strip of paper. 

Thank you for visiting my blog today!  All the best to you.
 Hugs, Beverly

Joy =

12 x 12 Traditional Layout
 Joy means many things to me.  But the first thing that ALWAYS comes to my mind when I think of how Joy FEELS is this:
My blessings are plentiful!
 Joy = Receiving a hug from a child I was told I could never have.  My two children are 15 years apart in age.  When I was 42, I found out that I was going to have another chance at being a mom again.  It was a high risk pregnancy and my dd2 suffered from many medical issues after a normal birth.  The first few years of her life were not easy for her.  Maybe that is why her frequent and enthusiastic hugs are so cherished?  No, all hugs are cherished no matter what your child has been through.

Silhouette Cameo Cute Bird
 This happy page is all about the special hugs I am fortunate to receive every single day.  When there are more than just two of us at home, she asks for a "Family Hug".  The uninitiated may find that a little bit odd, but they soon realize that for dd2, everyone becomes family fairly quickly.  She loves group - "Family Hugs".

Hugs to you and may your life be filled with Joy!
Beverly

Saturday, September 12, 2009

6 x 6 Pages Upsized

One of my favorite stamping techniques is Random Stamping. I used a stamp from Beware on CTMH's Posterboard Alphabet stamps. The frame was stamped with a Spot On Background stamp. It is so much fun to be able to make a background paper that fits the project perfectly!
This is the 6 x 6 made into an (unfinished) 9 x 9 format
Here is the same 6 x 6 on it's way to becoming part of a 12 x 12 page. The one below has two 6 x 6 pages made into a 12 x 12 layout.