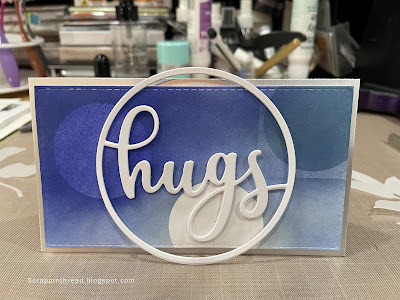
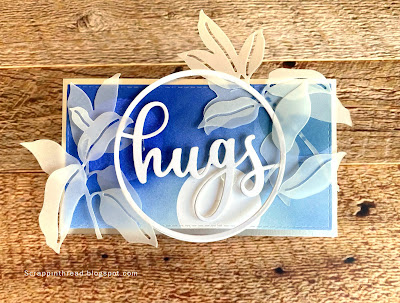
This first card combines ink blending and masking. In order to get extra dimension, you can remove the mask and add an additional layer of ink. It is fun to mix different ink colors for intense backgrounds.

If your recipient is a clean and simple lover, stop here. The card looks nice this way, but adding the die-cut leaves as shown in the photo at the top of the post adds even more pizzaz.
One of the easiest backgrounds to make for a card is to emboss or deboss a piece of cardstock. Or, as in the example above, a piece of mirrored cardstock. The depth and dimension achieved by such a simple technique are always impressive. This cardstock from, Spellbinders, embosses really well.
 |
| Altenew's Flowers and Leaves 3D Embossing Folder |
The frame and sentiment are from Spellbinder's Four Petal Collection. Layering the silver with black nets a classy look achieved with little effort. The same sentiment set is used on the "love you" kraft card, pictured below.
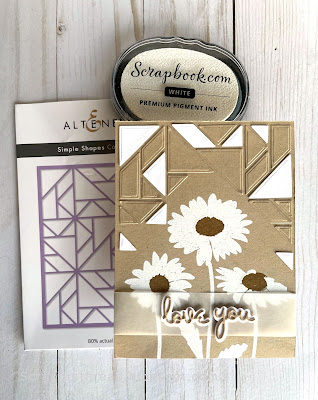
One of my favorite color combinations is kraft cardstock with white. The addition of vellum adds another layer without obscuring the stamping on the background. This card uses heat embossing for the stamped daisies, layering the die-cut sentiment, and using negative die-cut pieces from a cover die to create an interesting background.
In order to have stamped/embossed images without little flakes of embossing powder all over, use an anti-static powder tool prior to stamping. This helps create a polished finished project.

When my daughter saw this card, she said it reminded her of toasted marshmallows. I love that it conveys a warm, sweet, feeling. Plus, it was fun to get out the modeling paste and mix in some re-inker to create that very lightly colored marshmallow-looking texture. The bottom layer of the card is gold mirrored cardstock which adds an extra layer to tie in the warm colors of the inks and stenciled medium.
 |
| Mega Love Die Cut Out of Marbled Background |
After mixing a few drops of Pastel Sunrise re-inker into the Light Molding Paste Gel Medium, I used an old gift card to swipe it through the Grid Stencil. The stencil was turned 45 degrees so it would sit on the card on-point. Using light molding paste doesn't add much weight to the card yet it holds up very well, once dry. The corners of the background were ink blended with the Pastel Sunrise ink pad and whatever yellow ink was leftover on my ink blender sponge. The XOXO, from Sentiment Strips - Set 1, was stamped with Permanent Black Crisp Ink and also ink blended with the leftover yellow. For instructions on how to make the marbled glossy background, please visit here.
 |
| Mixed Media in Progress |
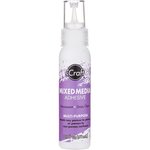
There are a couple of things to keep in mind when working with gel mediums. One is that the drying time will be influenced by environmental factors. I don't like to dry molding paste with a heat tool because it seems more prone to cracking. When I lived in Arizona, things dried far faster than where I live now - which is in Portland, Oregon. Except in the summertime, when it is quite dry. Additionally, if you are going to color the medium, and consistency of color is important, try to make enough of the paste at one time. It is difficult to replicate an exact match. This isn't usually a problem because 'close enough' is usually good enough, but it will depend on your project and the effect you are after. Also, the best adhesive for adhering items to the dried paste is one that offers good adhesion without breaking down the textured surface. I find that iCraft Mixed Media Adhesive works well.
This last card uses the same grid stencil and Mega Love die cut from another marbled background. But because ink blending was used to make the background, it gave a very different look. To achieve the rainbow effect, I used pink, yellow, and blue ink and overlapped them to create secondary orange and green colors. This is super easy to do. Mixing colors on paper is a fast and effective way to achieve more interest when ink blending.
If making cards for others is something that brings you joy, I hope that you consider trying one of these techniques on your next project. Cheers.


No comments:
Post a Comment