Paper and Fiber Arts


Welcome to my mixed media blog. Thanks for stopping by.
Showing posts with label inlaid die cutting. Show all posts

Saturday, June 3, 2023

Gender Neutral Cards - Several Techniques

Life has been busy! This past month I've been enjoying sunny weather, a bit of travel, and doing things out of doors. Because of that, I'm combining several cards and techniques into one post. Today's post has five different cards that do not really fit into a specific theme - other than they are part of the Altenew Educator Certification Program's Level 2 Challenge. The cards are supposed to be masculine, but gender-neutral is a better description. There are many photos because there are several techniques used on the cards.

This first card combines ink blending and masking. In order to get extra dimension, you can remove the mask and add an additional layer of ink. It is fun to mix different ink colors for intense backgrounds.

If your recipient is a clean and simple lover, stop here. The card looks nice this way, but adding the die-cut leaves as shown in the photo at the top of the post adds even more pizzaz. 

One of the easiest backgrounds to make for a card is to emboss or deboss a piece of cardstock. Or, as in the example above, a piece of mirrored cardstock. The depth and dimension achieved by such a simple technique are always impressive. This cardstock from, Spellbinders, embosses really well.

Altenew's Flowers and Leaves 3D Embossing Folder

Spellbinder's Mirror Cardstock is Two-sided

The frame and sentiment are from Spellbinder's Four Petal Collection. Layering the silver with black nets a classy look achieved with little effort. The same sentiment set is used on the "love you" kraft card, pictured below.


One of my favorite color combinations is kraft cardstock with white. The addition of vellum adds another layer without obscuring the stamping on the background. This card uses heat embossing for the stamped daisies, layering the die-cut sentiment, and using negative die-cut pieces from a cover die to create an interesting background. 

In order to have stamped/embossed images without little flakes of embossing powder all over, use an anti-static powder tool prior to stamping. This helps create a polished finished project. 


The flowers are from a retired set, Beloved Daisy. You can try this with many different stamps, though. When looking to heat emboss a stamped image, you want one that is defined enough to not need details added to the image afterward because it can be difficult to stamp onto the slick surface of the heated embossing powder. To increase the opacity of the white embossing powder, use white pigment ink instead of clear embossing ink. 

When my daughter saw this card, she said it reminded her of toasted marshmallows. I love that it conveys a warm, sweet, feeling. Plus, it was fun to get out the modeling paste and mix in some re-inker to create that very lightly colored marshmallow-looking texture. The bottom layer of the card is gold mirrored cardstock which adds an extra layer to tie in the warm colors of the inks and stenciled medium. 
Mega Love Die Cut Out of Marbled Background

After mixing a few drops of Pastel Sunrise re-inker into the Light Molding Paste Gel Medium, I used an old gift card to swipe it through the Grid Stencil. The stencil was turned 45 degrees so it would sit on the card on-point. Using light molding paste doesn't add much weight to the card yet it holds up very well, once dry. The corners of the background were ink blended with the Pastel Sunrise ink pad and whatever yellow ink was leftover on my ink blender sponge. The XOXO, from Sentiment Strips - Set 1, was stamped with Permanent Black Crisp Ink and also ink blended with the leftover yellow. For instructions on how to make the marbled glossy background, please visit here.

Mixed Media in Progress

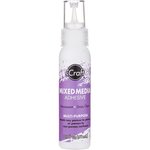
There are a couple of things to keep in mind when working with gel mediums. One is that the drying time will be influenced by environmental factors. I don't like to dry molding paste with a heat tool because it seems more prone to cracking. When I lived in Arizona, things dried far faster than where I live now - which is in Portland, Oregon. Except in the summertime, when it is quite dry. Additionally, if you are going to color the medium, and consistency of color is important, try to make enough of the paste at one time. It is difficult to replicate an exact match. This isn't usually a problem because 'close enough' is usually good enough, but it will depend on your project and the effect you are after. Also, the best adhesive for adhering items to the dried paste is one that offers good adhesion without breaking down the textured surface. I find that iCraft Mixed Media Adhesive works well.


This last card uses the same grid stencil and Mega Love die cut from another marbled background. But because ink blending was used to make the background, it gave a very different look. To achieve the rainbow effect, I used pink, yellow, and blue ink and overlapped them to create secondary orange and green colors. This is super easy to do. Mixing colors on paper is a fast and effective way to achieve more interest when ink blending.

If making cards for others is something that brings you joy, I hope that you consider trying one of these techniques on your next project. Cheers.

THIS POST MAY CONTAIN AFFILIATE LINKS. BY CLICKING ON THEM AND PURCHASING PRODUCTS THROUGH MY LINKS, I RECEIVE A SMALL COMMISSION FOR THE REFERRAL. THE ITEM WILL NOT COST YOU ANY MORE BY GOING THROUGH THIS LINK.

Tuesday, March 21, 2023

AECP - Let It Shine


Carissa Wiley teaches the AECP Let It Shine class for the Altenew Academy. It was a class filled with many different techniques for adding sparkle to cards. This class is one of the ten required classes for the Altenew Education Certification Level One Program. It has been my favorite thus far because it is all about adding shine and sparkle to cards from a teacher who really loves adding some glam to her projects. 


Inlaid Die Cutting
This card was inspired by Carissa's use of specialty papers to add shine to her cards. I enjoy doing inlaid die cutting and wanted to use some of Altenew's glitter cardstock in some of the cut-outs of the Simple Shapes cover die. I also wanted to use some bright colors to help showcase the 'hello' sentiment. Coloring individual pieces is very quick and easy.


Random pieces were colored with the following Copic colors: RV06, R27, YR09, Y08, YG07, B04, and B28. B28 is darker than the other hues so it was only used once. A piece of vellum placed over it helped tone it down and also gave a nice backdrop to the sentiment. Ink blending would also achieve a similar effect. However, I am a messy ink blender and the tiny pieces seemed like a recipe for inky fingers. Alternatively, I could have ink blended the cardstock prior to die cutting. My Copics have been neglected for awhile so it was nice to get them out for a bit to play.


A note about the Circled Greetings die - it is intended to be used as a cut-out rather than a stand-alone die cut. In order to cut it out as I have used it, I used the Hero Arts Nesting Circle Infinity die set. The third largest die is what gave a thicker border around the hello.

THIS POST MAY CONTAIN AFFILIATE LINKS. BY CLICKING ON THEM AND PURCHASING PRODUCTS THROUGH MY LINKS, I RECEIVE A SMALL COMMISSION FOR THE REFERRAL. THE ITEM WILL NOT COST YOU ANY MORE BY GOING THROUGH THIS LINK.


Products Used:

Copic Markers are available here:


Thursday, March 16, 2023

AECP Easy Die Cutting Techniques


Hello! Today's post is inspired by the Altenew Academy's Easy Die Cutting Techniques course taught by Yana Smakula. The last two blog posts also included die-cutting elements but this one will show an additional way to use die cuts. 


Inlaid die cut and popped up die cut in white

Inlaid Die Cuts

This is a fun way to expand your die cuts, especially background or cover plate dies. You can vary the inlay depth by choosing to pop up the negative cuts or inlay them like tilework. 


The first card is watercolor paper painted with reinkers. I have a lot of reinkers! And this is another way to use products from my stash. The colors used are mainly discontinued Close To My Heart colors and a couple of PinkFresh Studio ones, as well. The white cube pieces are glued on top of the watercolored pieces and reinserted into the cover die-cut piece. I wanted the 'love' to show up well, so underneath the word are the original pieces placed back into the die.
Radial Hearts Cover Die Inlaid Technique

The base layer of this card is die-cut with all of the pieces replaced. After adhering them into place, I ink-blended the base.  Cutting the teal paper with the die allowed a lot of flexibility in how many pieces to use to adhere on top of the base. It also allowed for three of the hearts to be glued onto the top of the circle around the sentiment. The card base could have been made by embossing the die cut instead of cutting out the base layer. I rarely pre-plan my cards and layouts so that did not occur to me until the card was almost completed.


Inlaid die-cutting
The "love" circle is part of a set from Taylored Expressions. The circle part is cut from the word on the liquid watercolor/reinker card.


THIS POST MAY CONTAIN AFFILIATE LINKS. BY CLICKING ON THEM AND PURCHASING PRODUCTS THROUGH MY LINKS, I RECEIVE A SMALL COMMISSION FOR THE REFERRAL. THE ITEM WILL NOT COST YOU ANY MORE BY GOING THROUGH THIS LINK.


Products Used: