Paper and Fiber Arts


Welcome to my mixed media blog. Thanks for stopping by.
Showing posts with label Masking technique. Show all posts

Saturday, July 29, 2023

Elements of Floral Composition


One of the Altenew Academy classes that I recently completed has to do with the elements of design. The class is taught by Jaycee Gaspar. He is an Altenew Design Team Member, as well as an Altenew educator. Jaycee makes beautiful cards using watercolor with stamped floral images. His work is gorgeous! I took this class because I admire his work and wanted to know more about his process. These two clean and simple cards reflect some of what I learned in this class.  The first card showcases the use of line as a design element. 

Line

The heavier weight of a brush marker line as a frame around the circle gives additional emphasis to what is included in the flat frame. Even though nothing on the card front is popped off the surface, the thicker line also helps to make the circle seem three-dimensional. The only dimension on the card front is the use of sequins and pearls. Once the card front was complete, it was popped off the 4.25" x 5.5" base with a black die-cut frame underneath. The front and frame were cut with Gina K Designs Master Layouts 1 set. 

The petals of the flower almost cradle the sentiment. Perceived lines in linear composition help with the placement of elements, such as sentiments, on a card. All images are stamped from the Build-A-Flower: Laelia set. First, the card panel was ink blended with Pool ink using a circle mask. This created a focal point for the black outline stamp to rest. One of the layering stamps was used to add a little bit of color, also using Pool ink. There are additional layering stamps in the set. However, I like the graphic look of limiting how much color is on this card. The next card uses the same inks, masks, and stamp set but in a different way.


Shape

Both cards use the circle as a design element but in a reverse way. There is no actual dimension on this card. The leaves are contained within the circle. The images are stamped on the A2 card base after ink-blending the center section of the masked card. Perceived depth and dimension are achieved by the use of the dark center color. This is especially useful in creating flat cards for mailing. Additional interest is added with ink splatters of the Pool ink mixed with a bit of water.

THIS POST MAY CONTAIN AFFILIATE LINKS. BY CLICKING ON THEM AND PURCHASING PRODUCTS THROUGH MY LINKS, I RECEIVE A SMALL COMMISSION FOR THE REFERRAL. THE ITEM WILL NOT COST YOU ANY MORE BY GOING THROUGH THIS LINK.


Tuesday, May 2, 2023

Masking Unleashed on Card Making


Have you made masks for stamping images on your projects? It is a fun technique that allows for adding the illusion of depth while stamping on one layer. Today's post shows two cards made from one stamped surface and then die-cut using all of the pieces. The inspiration comes from the Masking Unleashed class through the Altenew Academy. My personal goal throughout Level 2 of the Altenew Educator Certification Program has been to use the same stamp set throughout all of the card-making projects. Once again, these cards are made with the Build-A-Flower: Primrose set.


The first step is to make the masks. I stamped the three floral outline images on Altenew's masking paper and fussy cut them. There is a die for each of the images, but it leaves a nice white border around the perimeter. That is great for certain applications, but not when you want the images to appear layered on top of one another.  
 

The next step is to randomly stamp the images on a 6.5" x 4.5" piece of white cardstock switching out the ink colors and images. I was going for a rainbow color spectrum.


Though this looks a little messy while working through the process, it is very easy to do. The fun part is pulling off the masks and seeing the finished piece.

This card front panel was planned for a 5 x 7 card base. I eyeballed the Mega Love die onto the center of the stamped piece and saved the negative off-cuts. To create dimension to the card, I also cut it three additional times out of white cardstock. The die-cut 'love' and the tiny pieces were glued and stacked together. The large stamped card front piece is raised on foam tape and placed onto a 6.75" x 4.75" piece of green cardstock. It is important to add foam tape near all of the edges so that the card doesn't sag in the middle. The small pieces are glued into place to create the letters. This panel is raised with fun foam onto the white top-folding card base.
To add some sparkle and reinforce the rainbow color scheme, I added Pinkfresh Studios Crystals with iCraft Mixed Media adhesive. And because my Stardust Gelly Roll pen was sitting nearby, I outlined the stamped panel to add a subtle sparkle-shade line. The last step was to add a die-cut, stamped image over another die-cut, inked image. This provides some extra interest, balance, and color to the card.


Bonus Card

The original die-cut 'love' piece, from above, is glued atop a 5.25" x 4" rainbow washi tape background with the same 'love' die cut from it. The washi card front is glued to a black piece of cardstock with the same measurements and then glued, a bit askew, onto a standard A2 card base.


It makes the card a little more interesting when the front is placed at a bit of an angle. Using a plain white piece for the die-cut sentiment seemed too stark. The random stamping adds some color but still lets the white offer up the necessary contrast to make this work well.

This last photo shows a close-up view of the die and washi background. 


THIS POST MAY CONTAIN AFFILIATE LINKS. BY CLICKING ON THEM AND PURCHASING PRODUCTS THROUGH MY LINKS, I RECEIVE A SMALL COMMISSION FOR THE REFERRAL. THE ITEM WILL NOT COST YOU ANY MORE BY GOING THROUGH THIS LINK.

Wednesday, March 22, 2023

AECP - Irresistible Inking Techniques


The latest class projects are inspired by Altenew Academy's AECP - Irresistible Inking Techniques course taught by Sara Naumann. The two cards shown here have center panels that use the masking technique to ink a background.

Masking Technique

Taylored Expressions makes a Mini Slim Masking Stencil with an inside and outer part to isolate either a solid rectangle in the center or to create an outside border. I used the mask that looks like a border to add color to only the inside part of the die-cut panel. The panel was cut with Taylored Expressions Stitched Mini Slim Stacklets.


Ink Blending

With the mask taped over the die-cut panel, I used Almond Butter Crisp dye ink for the card which has a kraft cardstock base. The light blue panel was colored with Misty Morning Crisp dye ink. Both cards used a blending brush for applying the ink directly from the ink pads. I also applied ink to the sentiment strip which has the word 'sending' stamped upon it.


Stamping Techniques

The Blooming Branches stamp set has an elegant branch with an additional layering stamp to create blooms. The branch can be used alone as shown stamped on the kraft background with Almond Butter ink. The pop of color that the blooms offer can be customized to whatever color palette you prefer. For both cards, the focus panel uses Milk Chocolate for the branch and Burnt Red for the blooms. It is very easy to align the blooms up with the branch to achieve a pretty layered stamped image. These were then die-cut using the coordinating die. The "sending love" sentiment comes from the same stamp set. The sentiment on the kraft card is from the Life is Beautiful stamp set.


THIS POST MAY CONTAIN AFFILIATE LINKS. BY CLICKING ON THEM AND PURCHASING PRODUCTS THROUGH MY LINKS, I RECEIVE A SMALL COMMISSION FOR THE REFERRAL. THE ITEM WILL NOT COST YOU ANY MORE BY GOING THROUGH THIS LINK.


Products Used:
Life is Beautiful Stamp Set

Thursday, May 9, 2019

8 One-Layer Cards with Altenew's Multi-Layering Stamps

A lot of pictures in this post!
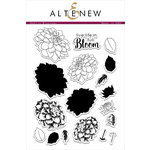
Have you used stamps that are designed to be layered on top of another?  These sets create interest, depth, and color in a quick and easy manner. I bought a few Altenew stamp sets a couple of years ago that I was never able to use. That is because shortly after they arrived, my crafting stuff went into storage for our move and subsequent remodel.  Yesterday was the first time I have been able to stamp (I KNOW!) in over a year and a half!  I chose Altenew's Dahlia Blossoms set to break the stamping-drought. It is such a lovely set and I wanted to create interesting, mailable cards to give to my mother. The 8 one-layer cards are as flat as can be and yet still offer visual interest through Altenew's multi-layered designs.
Altenew Green Fields Ink Set with Dahlia Blossoms


One of the questions I had about using these stamps was, "Would the ink I already own work with these stamps?"  Obviously, Altenew's ink would be great, but I only had one set of their ink pads. I didn't want all of the flowers to be shades of green, which is the set I bought a long time ago.  The other concern was how well they would have held up to storage in Arizona's heat and subsequently in all of the seasons in Oregon. I don't have the re-inkers for the 4 colors in the set. With a little trepidation, I opened the pads.  They were in good shape!

CTMH and Distress Inks with Altenew Stamps
The exact colors and inks are listed below for the products that are still available.  Some of the Close To My Heart inks are retired, so they are not listed. The non-Altenew sentiments are from retired CTMH stamp sets.
Distress Ink, CTMH, and Altenew Inks

Tim Holtz Distress Ink with Altenew Stamps
The card above has two types of silver tape on it.  This will not cost any additional postage because it doesn't add bulk or noticeable weight to the card.  After blending Weathered Wood ink around the edges, I splattered it with water droplets.
Layered stamping without the solid layer for Dahlias

3-layers of stamping surrounded by outline stamped images

CTMH inks with Sakura Glaze penned frame
The card above has a 3/4" white border around the stamped flowers.  This was masked with post-it notes prior to stamping.
Black ink is Altenew with watercolor pencils and Sakura ink on top
 The sentiment, "Sending hugs and happy thoughts" is from Altenew's Beautiful Day stamp set
Yellows are Distress Inks with Sakura Black Glaze pen outlined over the stamped image

All of the inks worked with the stamps. However, the solid images had some bubbling/pitting with all of the inks except for the Altenew. On the list for another day of study/play will be to try the solid images with some other types of ink.  I used Stampin Up! inks to start with and didn't love the results, so I moved on to the CTMH and Distress Inks.
Gelly Roll over stamped text
The one thing that gives some of the cards a little bit of pop and sparkle is Sakura's clear Stardust Gelly Roll pen. It is the easiest thing to use to add a bit of ooh la la to any project.
Gelly Roll randomly highlighting stamped image

This stamp set has a coordinating thin-die set.  Since the cards are all flat, I didn't need to cut any stamped images for them. But, using the dies to cut out masks from Post-It notes made it an easy and fast way to create lots of masks.  I store the leftover masks in the package with the stamps.
Use dies to cut on the sticky part for masks

Store leftover masks with stamps
It was great to get back to crafting!  Next time, I hope to have located my acrylic blocks or MISTI. It would have made things a wee bit easier!  But, as the saying goes, "When there is a will, there is a way." It was time to get back to doing something I love and, more importantly, make something from my heart for my mom.  Thanks for stopping by today!
Supplies: