Paper and Fiber Arts


Welcome to my mixed media blog. Thanks for stopping by.
Showing posts with label Mailable Cards. Show all posts

Saturday, July 29, 2023

Elements of Floral Composition


One of the Altenew Academy classes that I recently completed has to do with the elements of design. The class is taught by Jaycee Gaspar. He is an Altenew Design Team Member, as well as an Altenew educator. Jaycee makes beautiful cards using watercolor with stamped floral images. His work is gorgeous! I took this class because I admire his work and wanted to know more about his process. These two clean and simple cards reflect some of what I learned in this class.  The first card showcases the use of line as a design element. 

Line

The heavier weight of a brush marker line as a frame around the circle gives additional emphasis to what is included in the flat frame. Even though nothing on the card front is popped off the surface, the thicker line also helps to make the circle seem three-dimensional. The only dimension on the card front is the use of sequins and pearls. Once the card front was complete, it was popped off the 4.25" x 5.5" base with a black die-cut frame underneath. The front and frame were cut with Gina K Designs Master Layouts 1 set. 

The petals of the flower almost cradle the sentiment. Perceived lines in linear composition help with the placement of elements, such as sentiments, on a card. All images are stamped from the Build-A-Flower: Laelia set. First, the card panel was ink blended with Pool ink using a circle mask. This created a focal point for the black outline stamp to rest. One of the layering stamps was used to add a little bit of color, also using Pool ink. There are additional layering stamps in the set. However, I like the graphic look of limiting how much color is on this card. The next card uses the same inks, masks, and stamp set but in a different way.


Shape

Both cards use the circle as a design element but in a reverse way. There is no actual dimension on this card. The leaves are contained within the circle. The images are stamped on the A2 card base after ink-blending the center section of the masked card. Perceived depth and dimension are achieved by the use of the dark center color. This is especially useful in creating flat cards for mailing. Additional interest is added with ink splatters of the Pool ink mixed with a bit of water.

THIS POST MAY CONTAIN AFFILIATE LINKS. BY CLICKING ON THEM AND PURCHASING PRODUCTS THROUGH MY LINKS, I RECEIVE A SMALL COMMISSION FOR THE REFERRAL. THE ITEM WILL NOT COST YOU ANY MORE BY GOING THROUGH THIS LINK.


Thursday, June 29, 2023

Venetian Neighborhood Using Three Different Coloring Techniques


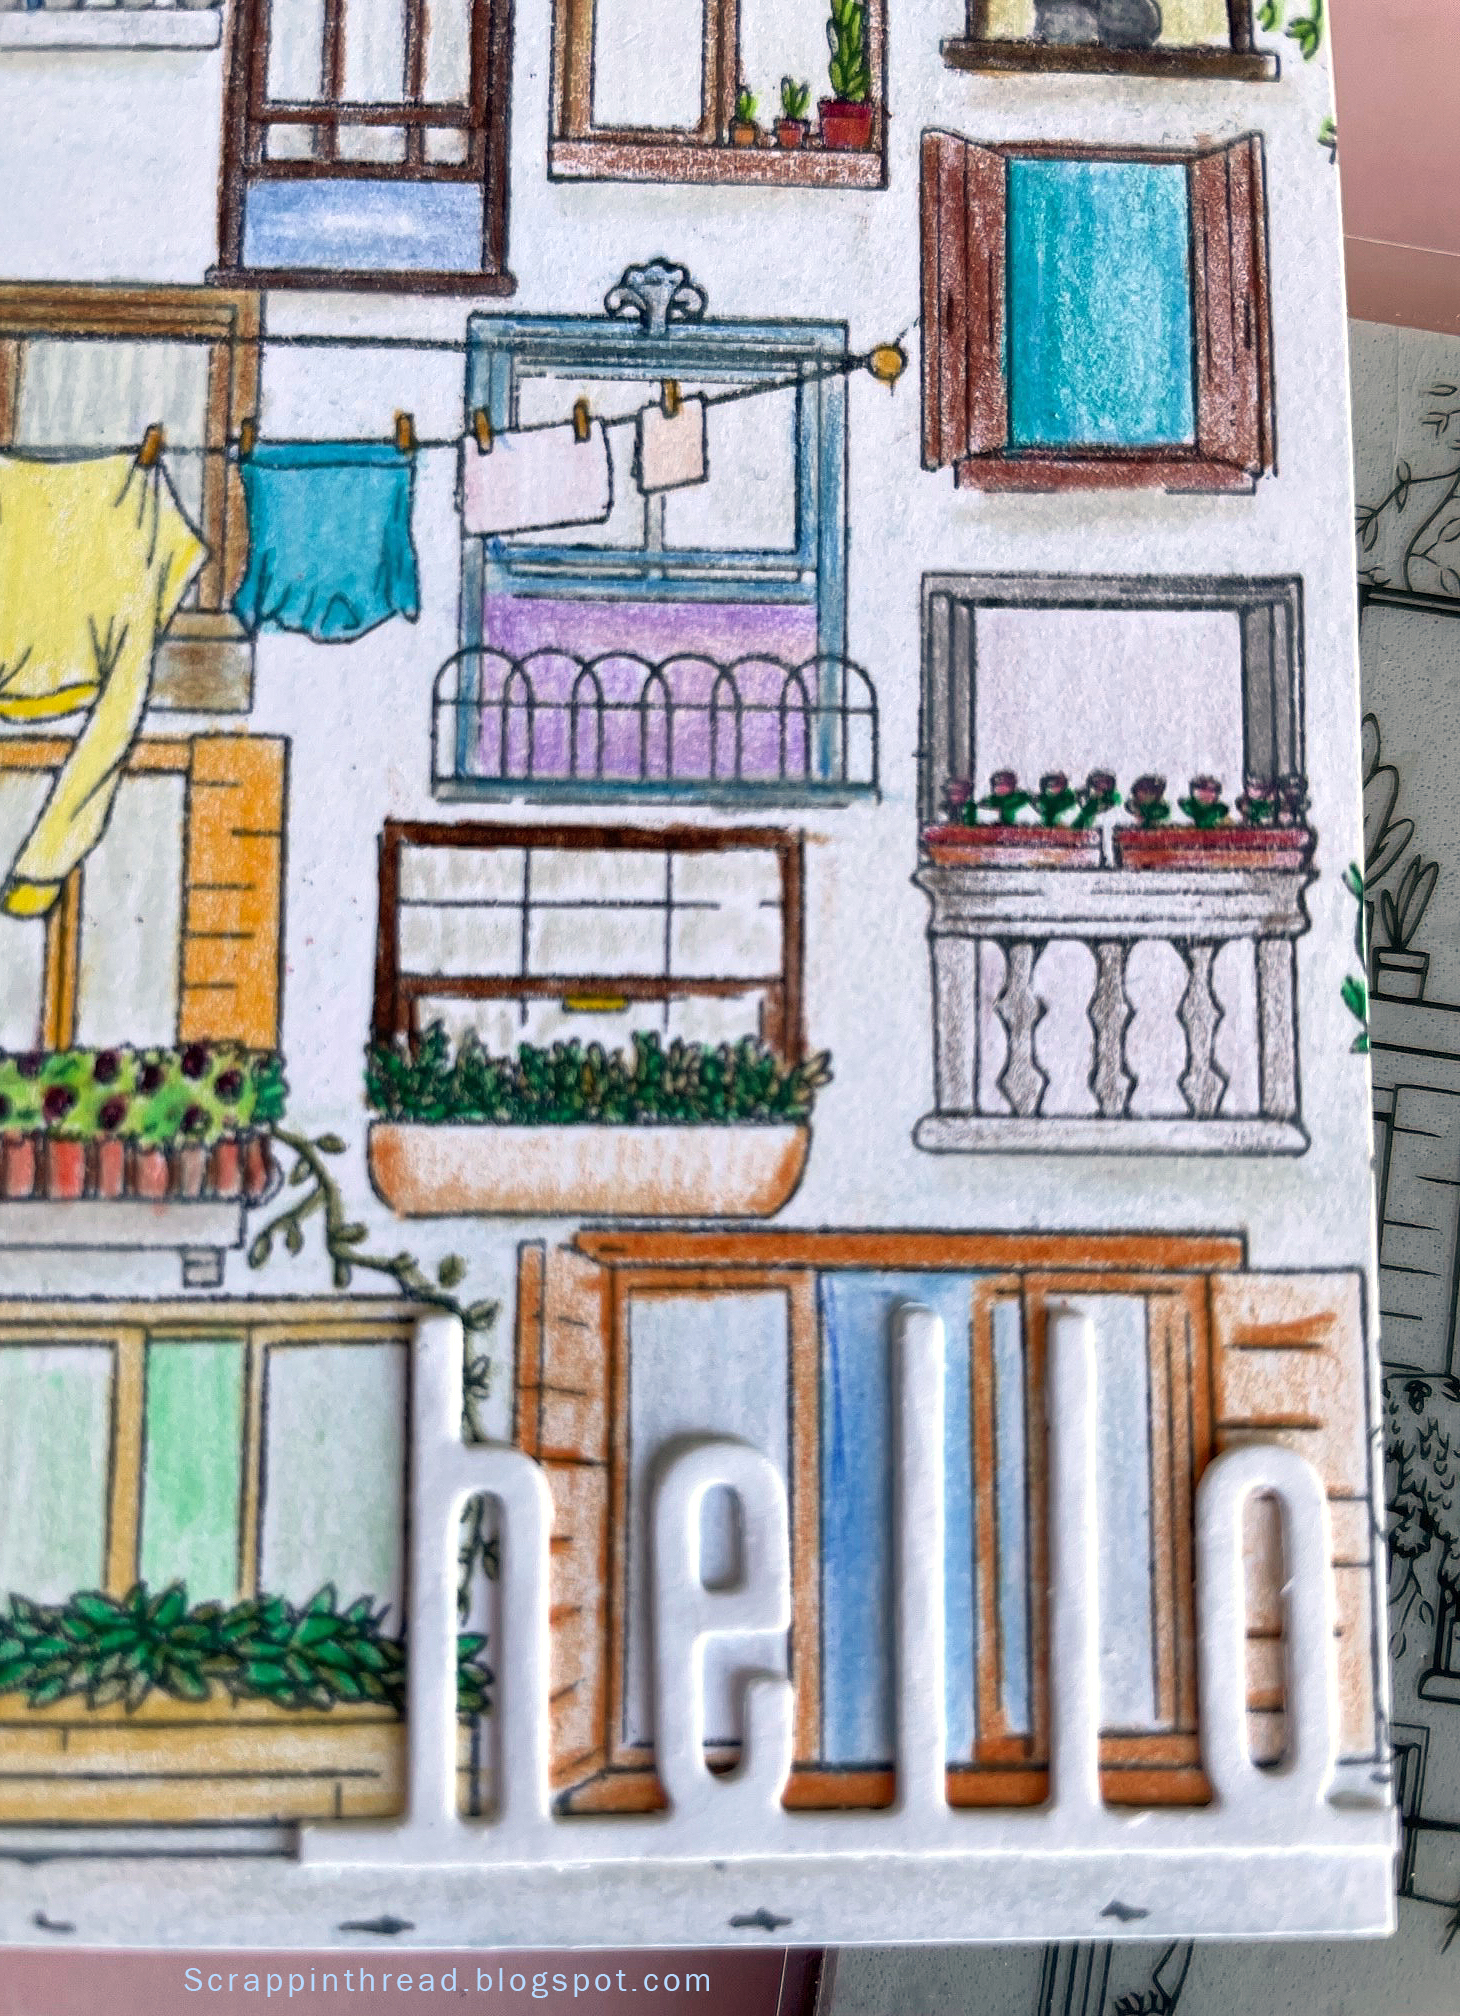
This Hero Arts stamp is an amazingly detailed large stamp that is perfect for many types of coloring techniques. I could have chosen more but stuck with three very different ones to showcase very different looks. And one of them is kind of a failure.


The stamped image is a Venetian neighborhood. I wanted something with an old-world, vintage vibe because Venice has an old-world charm.  And because Venice is known for its canals, the first choice was a water tie-in - watercolor.  This was done on dry paper. If it had been wet on wet, it would look different. Experimenting and playing are part of the process.


Using Prismacolor colored pencils to color this card front took a bit of time. Or it could be that I was coloring while watching tv and I am not as good at multi-tasking as I thought! Coloring can be as time-consuming as you'd like. Many times, I use Gamsol when using colored pencils to blend the color.  This time, I did not use anything to blend. It gives a more cartoony look to the card. That is ok because I wanted to use a very modern-looking Catherine Pooler 'hello" die cut.

Hero Arts Venetian Neighborhood Stamped Image

It is funny how the backdrop to the card can make the card appear to be a different shade. I'm showing both to let you see that photography can trick us into thinking something is not necessarily as it appears in real life. The background of the card is actually a very pale blush-tan color, not pink as it appears above.


The last card was an experiment. I debated showing it because it isn't what I normally want to show on here. But, it is important for me to remember that even 'failures' have merit. The lesson in this card is that tiny lines are difficult to color with pastels if you expect to stay inside the lines. The end result is very messy and sketchy. If that is the look you are after, great! Pastels are messy. They just are. Ultimately, I decided to embrace the mess and accept that this card gives an old-fashioned, found-this-in-an-attic-trunk kind of vibe. To fix the pastels, I used clear gesso. This made the cardstock curl. The front is glued to a side-folding 4.25" x 5.5" card base. The card base helps to tame the curl but, as you can see in the photo below, it still isn't flat.


Whatever materials you use to color your creations, enjoy the process and have fun!


THIS POST MAY CONTAIN AFFILIATE LINKS. BY CLICKING ON THEM AND PURCHASING PRODUCTS THROUGH MY LINKS, I RECEIVE A SMALL COMMISSION FOR THE REFERRAL. THE ITEM WILL NOT COST YOU ANY MORE BY GOING THROUGH THIS LINK.

Sunday, June 25, 2023

A Quick Colorful Card


Sometimes you need to make a card quickly. This colorful card is straightforward to make and only takes a short time to assemble. To make the crisp center square I used the alignment tool's square mask and ink blended all around it. All the die cuts were made with one set of dies, cutting the 'love' and the heart once and the tulip heart shape, twice. Copic markers and a Sakura Gelly Roll pen add the rest of the color and glimmer.

THIS POST MAY CONTAIN AFFILIATE LINKS. BY CLICKING ON THEM AND PURCHASING PRODUCTS THROUGH MY LINKS, I RECEIVE A SMALL COMMISSION FOR THE REFERRAL. THE ITEM WILL NOT COST YOU ANY MORE BY GOING THROUGH THIS LINK.

Friday, April 14, 2023

Honey Bee Hugs Card


Honey Bee Hugs Card

Making a mailable card with dimension

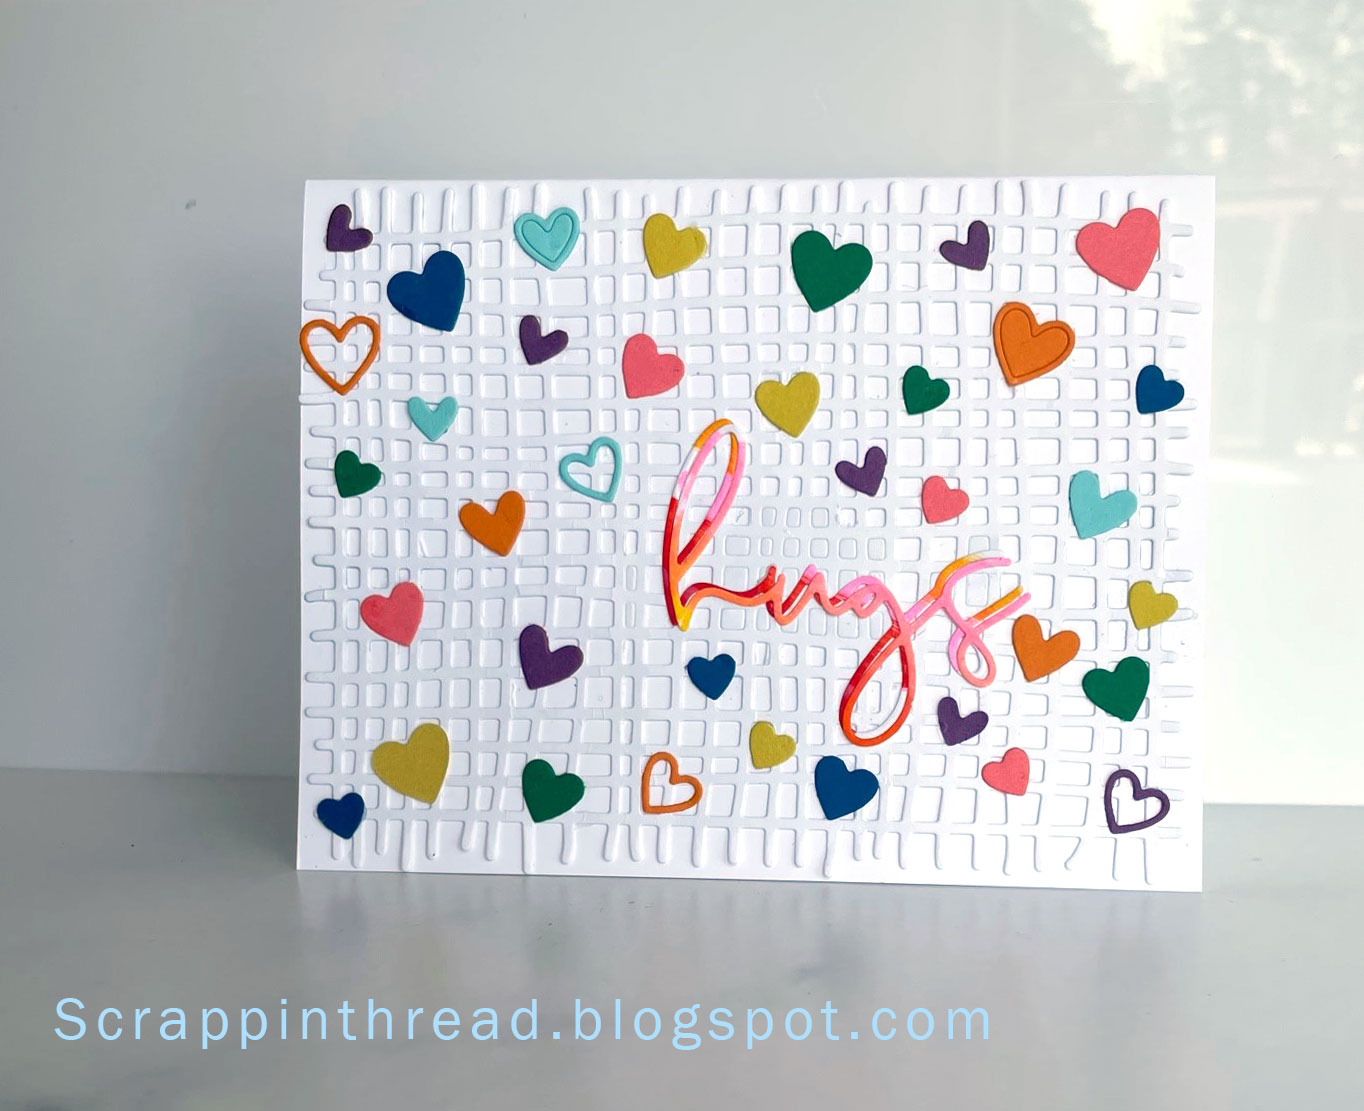
One of my favorite ways to add dimension to a card with almost no effort and little bulk is to use a cover plate die cut for the background. Though the card is layered, it doesn't weigh enough to increase the postage cost. Also, if the die cut is glued directly to the card base it will not be near the 1/4" depth that is a flag to the post office for additional postage. The Burlap A2 Background die from Honey Bee Stamps offers a rustic feel. However, having it glued white on white gives it a clean and modern feel.


Mix and Match Your Dies

Using dies from different sets expands the use of your dies and adds originality to your cards. The 'hugs' sentiment is from a set of four sentiments which is packaged with a slimline die. After using some Pigment Deco Brush markers from Karin to color on a piece of white cardstock, I die-cut the word twice. This was offset a little to give the appearance of a more substantial die-cut and glued atop the burlap die-cut.  Hearts that were left over from a previous project were scattered and glued as a last step.


THIS POST MAY CONTAIN AFFILIATE LINKS. BY CLICKING ON THEM AND PURCHASING PRODUCTS THROUGH MY LINKS, I RECEIVE A SMALL COMMISSION FOR THE REFERRAL. THE ITEM WILL NOT COST YOU ANY MORE BY GOING THROUGH THIS LINK.


Products Used:

Honey Bee Burlap A2 Background Die

Honey Bee Slimline Sentiments Eyelet set 

Karin Basic Colors Pigment DecoBrush Markers

Saturday, December 21, 2019

Last Minute Easy to Make Christmas Cards


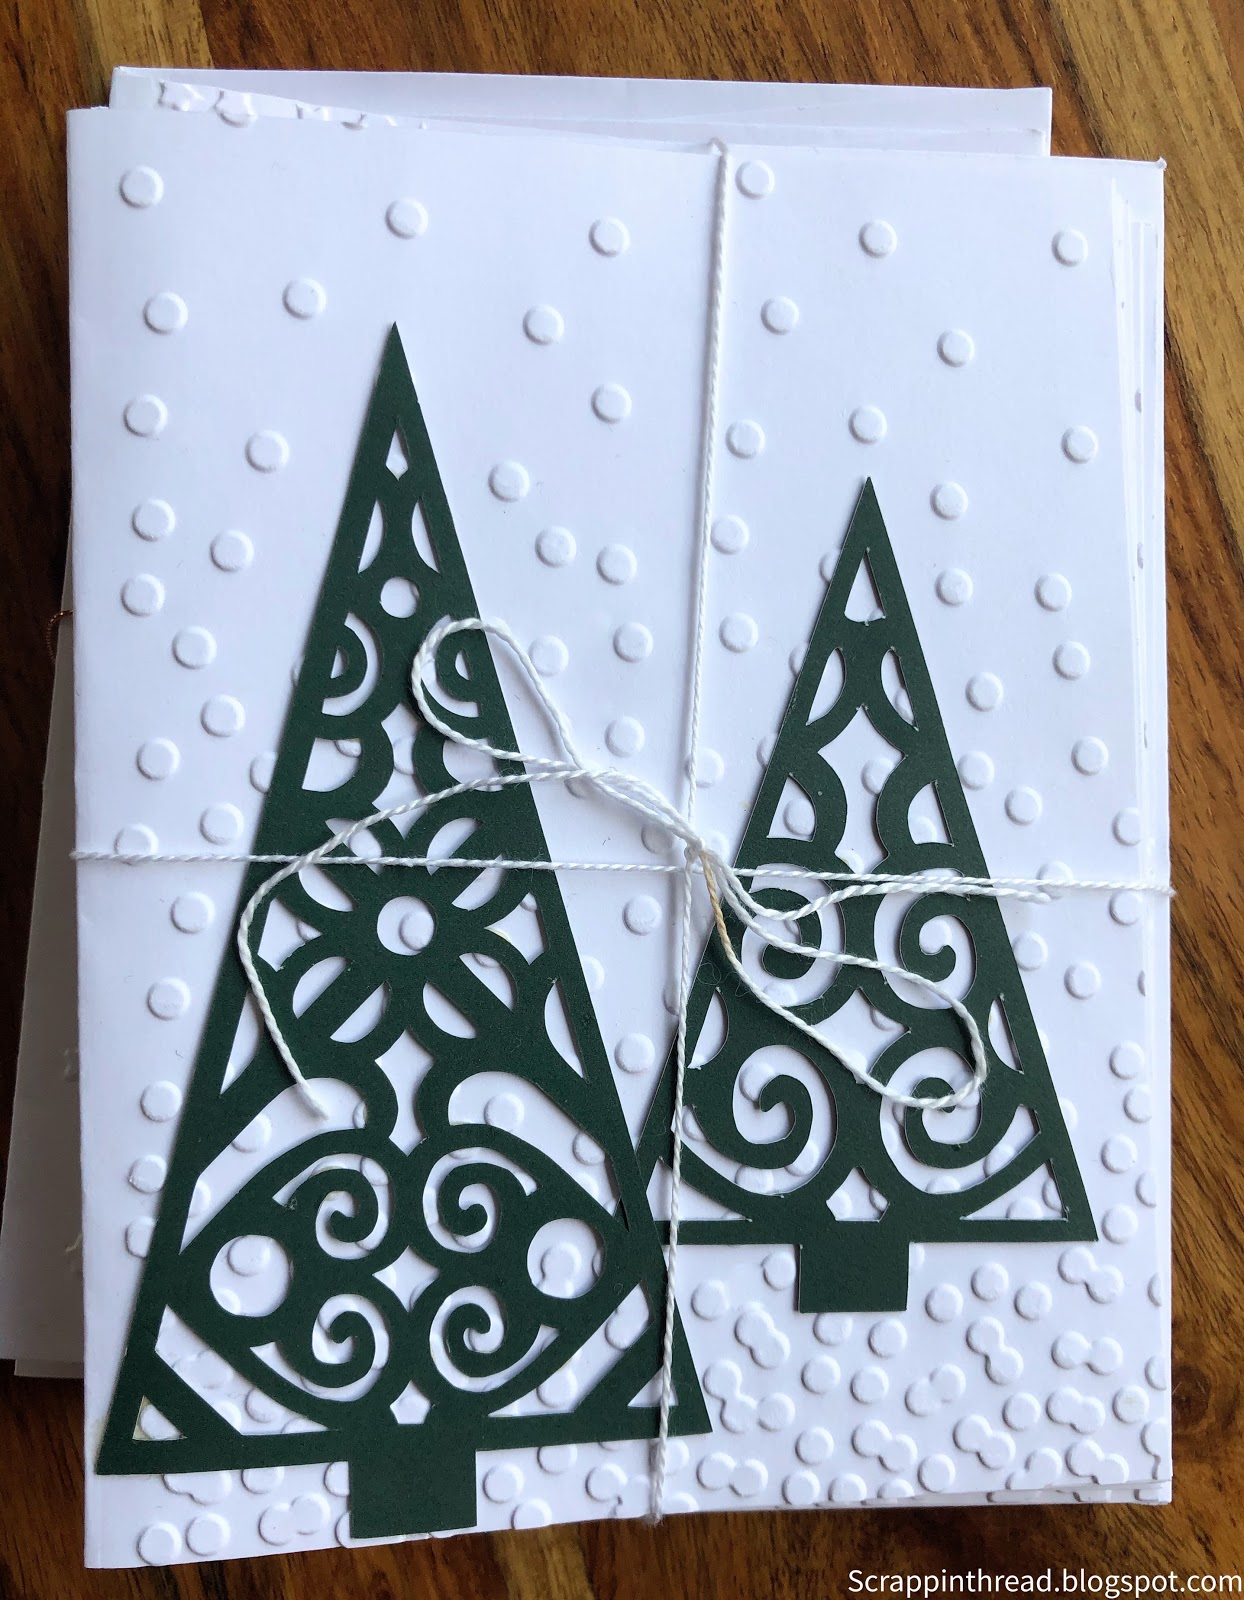
A stack of Christmas cards bundled for a gift to give to someone to send

This post may help if you are still trying to get a handmade card out in the mail for this holiday season. These are very quick, down-to-the-wire, last-minute, easy to make Christmas cards.

1st - Choose an embossing folder that works with whatever stamp or die-cut you are going to use

Another bundle of easy to make Christmas cards to give or sell 

2nd - Embossing a regular 4 1/4 x 5 1/2 card front.

Mailable card

3rd - Adhere a die-cut or stamped sentiment or image to the front. Write a greeting inside and sign the card.


4th - Address an envelope, affix a regular postage stamp and pop it in the mail.


Lastly, here is another quick craft project I made from a gingerbread house mold.  It is melted hard candy.

Pampered Chef Gingerbread Candy House

Tuesday, July 30, 2019

Second Interactive Countdown to Christmas Advent Calendar Card


I had so much fun with the card that I posted here, that I thought I'd make another one.  This second interactive Countdown to Christmas Advent Calendar Card took a little less time because the numbers were cut from washi. Instead of stamping a greeting under each door I thought it would be fun to use the card for a lift-the-flap scavenger hunt. I am going to write a clue under each door so that my daughter can seek out a small treat or gift hidden somewhere in the house.  She will be 15 years old when we do this in December.  Hopefully, she won't think it is too corny!

The other difference on this card from yesterday's is that the numbers were made from washi tape instead of die cuts.  Stickers would work well, too! This is a standard A2 size 4.25 x 5.5 inch card. That means it is easy to mail!

If you have made anything for Christmas, I would love to see it!
Thanks for stopping by today!

As always, if you are in the market for any new goodies, listed below are the currently available supplies from Scrapbook.com. You are not charged anything extra for shopping with them and I make a small commission if you purchase something.  Thank you for supporting a fellow crafter!


Monday, July 29, 2019

Christmas in July - Countdown to Christmas Advent Card

Hero Arts Presents Background Stamp with Peek A Boo Doors Die to create an Advent Calendar Card

On the one hand, I love Christmas so I think it is great to get a headstart on crafting for the holidays as soon as Christmas is over. On the other hand, I feel a bit overwhelmed if I haven't started crafting holiday gifts and cards by this time of the year. Bearing that in mind, I just made my first Christmas item for this year.  It is a Countdown to Christmas Advent Card.

The idea behind this card was actually my 14-year old's as she was watching me stamp, emboss and die cut. She suggested turning the card into an Advent Calendar.  I've made many Advent Calendars over the years and here are some posts with a variety of different kinds of creations, here, here, here, and here. The last post has a list of activities that a child or family could do on each day as they count their way to Christmas.

Tim Holtz Sizzix die for numbers and Christmas Greetings Stamps from Hero Arts

This card was considerably more complicated than most of the ones I have been making this month. However, it was fun! And it really did not take a huge amount of time... just some searching for numbers to die-cut that were the right size.  It would have been easy to use the Cricut or Silhouette, but I had my Vagabond out and wanted to use that if I could.  It turns out the Sizzix Tim Holtz Thinlet Mixed Media set pictured above was a perfect match.  Adhering 4" wide strips of double-sided adhesive to cardstock made it very easy to cut, peel, and stick the numbers to each of the little doors.
Please let me know if you have any questions.

Today is the last day of both Sizzix and Scrapbook.com's Christmas in July sale. I am posting the links to Scrapbook.com for the current products I used in case you are in the market for any of these things and want to hit up a good sale!  Hero Arts Stamps just released their Winter Catalog. You might want to check out their site for inspiration. Here is the list of items that I used:


Sunday, July 28, 2019

Quick & Easy, Clean and Simple Die Cut Cards

Hero Arts Die-Cut Butterflies from Glitter Paper

Are you a fan of Clean and Simple (CAS) cards?  I love that they can be impactful in their beautiful simplicity. These quick and easy die-cut cards did not take very much time to make. However, I don't think they suffered for their ease.

Penny Black Die-Cut Framed Thanks Layered on Vellum
It has been a long time since I have used vellum paper. This is mainly because I sort of forgot about it! The Penny Black Framed Thanks die seems like the perfect cut image to layer over vellum.  I wanted to keep this card all white, but it still needed something a little extra.  The edge-cut lace die from Pinkfresh Studios added the perfect step-up.


This last card took the longest amount of time because I cut tiny pieces of Scotch tape to adhere the lattice looking die-cut onto the red cardstock card base. The dies were cut out of gold glitter paper using a Hero Arts Confetti Die and black cardstock from the Penny Black Love and Miss You set.