Paper and Fiber Arts


Welcome to my mixed media blog. Thanks for stopping by.

Thursday, May 9, 2019

8 One-Layer Cards with Altenew's Multi-Layering Stamps

A lot of pictures in this post!
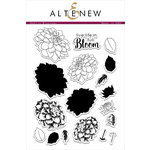
Have you used stamps that are designed to be layered on top of another?  These sets create interest, depth, and color in a quick and easy manner. I bought a few Altenew stamp sets a couple of years ago that I was never able to use. That is because shortly after they arrived, my crafting stuff went into storage for our move and subsequent remodel.  Yesterday was the first time I have been able to stamp (I KNOW!) in over a year and a half!  I chose Altenew's Dahlia Blossoms set to break the stamping-drought. It is such a lovely set and I wanted to create interesting, mailable cards to give to my mother. The 8 one-layer cards are as flat as can be and yet still offer visual interest through Altenew's multi-layered designs.
Altenew Green Fields Ink Set with Dahlia Blossoms


One of the questions I had about using these stamps was, "Would the ink I already own work with these stamps?"  Obviously, Altenew's ink would be great, but I only had one set of their ink pads. I didn't want all of the flowers to be shades of green, which is the set I bought a long time ago.  The other concern was how well they would have held up to storage in Arizona's heat and subsequently in all of the seasons in Oregon. I don't have the re-inkers for the 4 colors in the set. With a little trepidation, I opened the pads.  They were in good shape!

CTMH and Distress Inks with Altenew Stamps
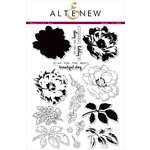
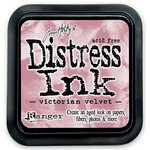
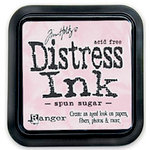
The exact colors and inks are listed below for the products that are still available.  Some of the Close To My Heart inks are retired, so they are not listed. The non-Altenew sentiments are from retired CTMH stamp sets.
Distress Ink, CTMH, and Altenew Inks

Tim Holtz Distress Ink with Altenew Stamps
The card above has two types of silver tape on it.  This will not cost any additional postage because it doesn't add bulk or noticeable weight to the card.  After blending Weathered Wood ink around the edges, I splattered it with water droplets.
Layered stamping without the solid layer for Dahlias

3-layers of stamping surrounded by outline stamped images

CTMH inks with Sakura Glaze penned frame
The card above has a 3/4" white border around the stamped flowers.  This was masked with post-it notes prior to stamping.
Black ink is Altenew with watercolor pencils and Sakura ink on top
 The sentiment, "Sending hugs and happy thoughts" is from Altenew's Beautiful Day stamp set
Yellows are Distress Inks with Sakura Black Glaze pen outlined over the stamped image

All of the inks worked with the stamps. However, the solid images had some bubbling/pitting with all of the inks except for the Altenew. On the list for another day of study/play will be to try the solid images with some other types of ink.  I used Stampin Up! inks to start with and didn't love the results, so I moved on to the CTMH and Distress Inks.
Gelly Roll over stamped text
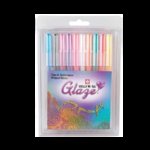
The one thing that gives some of the cards a little bit of pop and sparkle is Sakura's clear Stardust Gelly Roll pen. It is the easiest thing to use to add a bit of ooh la la to any project.
Gelly Roll randomly highlighting stamped image

This stamp set has a coordinating thin-die set.  Since the cards are all flat, I didn't need to cut any stamped images for them. But, using the dies to cut out masks from Post-It notes made it an easy and fast way to create lots of masks.  I store the leftover masks in the package with the stamps.
Use dies to cut on the sticky part for masks

Store leftover masks with stamps
It was great to get back to crafting!  Next time, I hope to have located my acrylic blocks or MISTI. It would have made things a wee bit easier!  But, as the saying goes, "When there is a will, there is a way." It was time to get back to doing something I love and, more importantly, make something from my heart for my mom.  Thanks for stopping by today!
Supplies:

Sunday, April 28, 2019

Time Saving Card Making Ideas


Bridal Shower Invitation
Sometimes, even those of us who love to make things from our hands and heart are too pressed for time or have other obstacles to be able to accomplish all that we want.  Making 25 Bridal Shower invitations a couple of years ago taught me to look for shortcuts when need be.  Last year, I made about 30 Baby Shower invitations through an online print service. When they arrived at my house I added embellishments and then mailed the hand-addressed, hybrid cards. This year, I realized that sometimes I need an even faster way to accomplish something beautiful and meaningful, without giving up all artistic control.


Paperless Post offers invitations, cards, and flyers that are easy to customize for your event.  They have given me store credit for reviewing their product.  My opinion is still mine and I will tell you what I did and did not find to be helpful for my purposes.  They do have some free options!  That is a great way to try something and see if their products will work for you.

Paperless Post Digital Invite
One of the fun things about their customization is choosing an insert for an envelope. Envelopes are not required.  However, when the recipient clicks on the link for their card it takes them to a screen with the card peeking out. Then the card is animated to be drawn from the envelope.  The pretty interior of the envelope is one of the things I like.  Using a photo was pretty easy on the card made below.  But, I tried to make an Easter card a couple of weeks ago and could not get the photo to load. I am not sure if that was a "them or me" problem. Since it worked today, it was probably me.

Cutest grandbaby ever!

The only other difficulty I had was in locating answers to questions that I had.  Surprisingly, when I tried again today, on my phone, it was really easy.  I'm guessing I was just having a bad day the other day when I first went poking around on their website.  I was in a big hurry because I was still sorting through all of the stuff that had been damaged in our storage unit from a leaking roof.  At the time I was feeling anxious because another holiday was fast approaching and I STILL wasn't able to create cards for it from my stash! Honestly, the option to make digital cards was not the first thing that came to mind.  It is a good option, though! I am glad that Paperless Post approached me so that I can send Mother's Day cards to both my mom and my daughter, who is celebrating her first Mother's Day as a new mom.
Screen Shot of Paperless Press Card and Envelope
Both of the cards are scheduled to be sent the morning of Mother's Day.  It is nice to know that they will receive something from me - and on time!  If it turns out that I have time to make them a card and snail-mail it, then they will get two cards!  But, the pressure is off in case I am still working on figuring out what items can be salvaged and what still needs to be tossed. Unfortunately, a lot had to be thrown away due to mold.  Just when I think things are beginning to settle down and I can set up my studio it rains or pours.  Truly, I am thankful that there are bright spots and different approaches to getting things accomplished. Whether you like to hand-make all of your cards, use a hybrid combination of print and hand-crafted, print and snail-mail, or digital, there is a solution for everyone.

Thank you for visiting today!  I hope that things are going well for you with your creative pursuits!
Beverly

Wednesday, February 27, 2019

Tips for Purging Craft Supplies, Tools and Fabric

Tips for purging fabric

Yesterday, I posted here a little about what has been happening with me over the past year and a half or so.  It sort of feels like the theme of this time period has been Purging and Starting Over. Downsizing has taught me quite a few things. To that end, here are suggestions/tips for purging your craft supplies, tools and fabric. 


Tips for Purging Craft Materials and Fabric

Be honest in your assessment

Really look at what you have. Pull everything together that is of the same category.  How many pairs of scissors do you really need and use?  How many markers?  What about straight pins? Rulers? Thread? Paper? Craft and sewing items are hard for me to part with and I am trying to convince myself that I do not need as much as I have. The reality is that all of it will not fit into the allotted space. So, I will have to make some hard choices about what stays. In the end, I would rather have a functioning space with fewer things, than an overcrowded one that feels unwelcoming. Clutter, for me, stifles creativity.


Are you going to live long enough to use it all?

One more thing to give some serious thought to is, what is the likelihood that you are going to get to the project that uses those materials and supplies. In realistically assessing my life expectancy, I can not get everything made for which I have accumulated the supplies. It would be better for those things to be used by someone who will make them into something.

What to do with the items you are removing

Now, here is where some people may not agree with what I am going to say. If you are able to sell your excess stuff, Wonderful!  Give yourself a deadline, though. If you keep it around with the intention of selling it and it has not been sold in six months, donate it. For me, if I haven't sold something in a couple of months, I am not going to sell it.  Truthfully, if I do not sell it immediately, upon deciding to part with it, I am not going to sell it.  Recently, there have been some fundraisers in our area for some neighborhood children who have lost a parent.  Some amazing people organized yard sales for them and I was happy to give away some very nice things that do not fit in this much smaller house. I could not think of a better way for the proceeds to be spent than on children in my community.


Whether you are downsizing or taking stock of what you have, a good purge can be cathartic. It can help you transform your workspace. Maybe even give you more space with which to work! And if you are passing your supplies onto someone else to enjoy, all the better!


Organized office before downsizing 
Do you have any tips or suggestions for downsizing?  I would love to hear them!
In a few days, I will post some before and after pictures of our house and the extensive repair/remodel we have been doing.  My studio isn't ready yet, but some of the storage areas are. Wish me luck in getting the pared-down stash to fit!

Cheers!
Beverly

Tuesday, February 26, 2019

Moved! Starting Afresh!

Door frame growth chart
About a year and a half ago my husband took a new job in a new state. Our large house and, more importantly, several rooms of craft supplies and workspaces had to be packed and moved into less than half of the space.  Downsizing is not easy for most people. But for quilters, paper crafters, and art supply collectors, we may as well be told that we are moving to a deserted island with no Michael's or online shopping opportunities. That is how excited I was, to be giving up my set-up.

Pre-downsizing craft room storage wall

It took a long time to figure out how to effectively store things in that house. After 10 years there, it felt Just Right. Pictured below is one of the areas that worked very well.
Wafer thin metal dies on magnetic sheet on the wall

It is a 24"x 5' long magnet for my thin dies collection. Here is the link to what I bought on  Amazon. All of the Spellbinders, Scrapbook.com, Avery Elle, etc., wafer-thin dies stick on here and are easy to see.  If I see things, I am more likely to use them. And pack them!

Items that almost got left behind!

So the adventure began. Purging and packing. Purging some more. Packing some more. After the moving truck was packed and drove away, I discovered a cupboard that hadn't been packed. I quickly threw the stuff in a box. But knew I'd have a problem with how to move it since my Ridgeline was full. The idea was that I would take valuables, food, and chemicals in my vehicle along with the dog and the 13-year-old kid.  There was no extra room for this box of crap, goodies of metal tins, cards and other papercrafting items. I am not saying that I gave away a box of chemicals to the neighbors so that I could bring my craft items on the 1,400-mile trip. However, that stuff is now stored in my garage waiting to be put away.  What? A year and a half later and you still haven't unpacked? You may be wondering what is going on here! My tale of woe continues. We moved into a house and then it fell apart. More on that another day. With Before and After pictures!

Looking back on these pictures, the only one that really makes my heart constrict is the first one with the growth chart we made in my daughter's closet.  You can see on it that she measured herself (without us knowing) a couple of times over the years.  I wished that we could take it with us. And I'll tell you the truth. I actually shed a few tears when I took that picture. It was the only house she had known and she had many wonderful friends that she was going to miss in Arizona.

Tomorrow, I am going to post some suggestions about purging craft supplies and fabric.  This is mainly for my benefit because I need pep talks periodically and things are finally getting finished here so it is time to purge. Again!

All the best to you! Sorry for the long absence. In all honesty, this has been a pretty rough year and a half for me so I do feel like I need to start anew.


Thursday, January 5, 2017

Quilt Roundup

Blue and White Quilt
I haven't been doing very many paper related projects and quilts take a lot more time before there is anything to show!  This is part of the reason for the gap in my posting. It has been difficult to find a good place to take pictures of the quilts I've made.  But I wanted to share what I have been up to for the last several months. Here are the quilts that I've finished over the last few months.

Disappearing 9-Patch
 All of these were started before 2005 except for the one made completely of leftover scraps shown below (with the dog.)


"Free Quilt" made out of leftovers from previous projects.
 I used a fleece blanket from Target for the backing and did not use any batting.  It makes a nice couch cover for dirty paws.

This Halloween quilt protects the piano from the cat. :-)


 The quilt below is from the book Candy Coated Christmas by Lynette Jensen.


Snowflake - Thimbleberries pattern


My current project is a new quilt to go with my daughter's freshly painted bedroom:


Black, white and aqua-green striped bedroom

I designed a quilt using EQ7 and hope it turns out the way she and I want!  It should be done by the end of the month. Stay tuned... :-)

Thank you for stopping by today.
Beverly

Wednesday, January 4, 2017

Perpetual Calendar with Leftover Embellishments

Most of us have leftover bits and bobs from previous projects.  Items that are too nice to throw away but too few to use on a new layout or set of greeting cards.  Maybe because Christmas was still on my mind, I was thinking about ornaments.  Or maybe I just like dangly things that sparkle.  Regardless, I knew I was going to make something three-dimensional and practical the next time I played with my stash of stuff.


I have been wanting to make a new perpetual calendar for awhile and finally decided to start the New Year with one. It met the criteria of useful with ornament-like attributes.


This is super simple and did not cost me anything since I already had everything!  I love free projects!


The frame came from CTMH. It would be easy to make one, though.  A picture frame and some wire and some way to secure it and voila!  The little hooks to hang each of the dates are from Oriental Trading.  They are called "Artist Safety Pins".  However, it would be easy to just use some wire to make a loop. Or yarn, string, floss, thread, etc., would work as well.  If you have lots of eyelets lying around you might use those up to add stability to the hole.


If I did not already have a frame, I would have used a piece of wood and arranged nails on it in a grid to hang the ornament/dates.


If you decide to make one, I would love to see it! 
Thank you for visiting!
Beverly

Saturday, December 31, 2016

New Year's Resolutions, Goals, Guidelines

Happy 2017!  Sorry for the long gaps in posting. One of my goals for January is to post on a more consistent basis. It may be more along the lines of a guideline rather than an actual resolution!
January 2017 Intentions in Composition Notebook

I no longer make New Year's Resolutions.  It seems like a great idea to make plans to live a better life. So I try to do this on a daily, weekly and monthly basis.  Because I am 'goal oriented', my list is usually formatted as goals or intentions.

Here is an overview list that I made. It is in the back of one of my art journals and I can refer to it when I make a new page of resolutions.  From this big-topic list, I make specific goals.  For example, on my January 2017 Intentions page posted above, I am choosing to be more mindful about my level of exercise.  This is stated with the goal of increasing the difficulty of my exercising throughout the month.  The time that will be spent on the exercise did not change from the previous month but I stated it just so I'd know what I am expecting of myself.  It may sound silly to have to write it down.  However, this helps me to stay focused.  And when it comes to exercise, every bit of focus helps!


Even though this isn't a goal or intention, I thought I would share my meal planning page for the next two weeks.  It is in the back of my regular planner so it is very handy. Meal planning is an ongoing thing that I do and it helps me with shopping and health goals.


Wishing you the very best in 2017!
Beverly