Many years ago I did a few posts about making ornaments from die-cuts. At the time, I made them using Cricut cartridges. These are some of the most-read posts and most frequently pinned. To read more about those ornaments and gift toppers please visit here, here, here, and here. When I saw the Altenew Stained Glass Medallion Die set, I knew I wanted to try making ornaments and gift toppers using them. There are many, many photos!
The center of this ornament is a die cut made out of Sizzix black shrink plastic. There is one on each of the sides, glued onto the ornament with a glue gun.
To make the ornaments, you need several identical die cuts and then fold them in half. The more die-cuts, the fuller the ornament.
Sizzix shrink plastic before heating
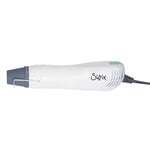
The medallions after shrinking with a heat gun
Making this type of project is one of my favorite crafting things to do. A video will be posted later this week with additional instructions. If you make any ornaments or gift package toppers, please let me know. Happy July!
THIS POST MAY CONTAIN AFFILIATE LINKS. BY CLICKING ON THEM AND PURCHASING PRODUCTS THROUGH MY LINKS, I RECEIVE A SMALL COMMISSION FOR THE REFERRAL. THE ITEM WILL NOT COST YOU ANY MORE BY GOING THROUGH THIS LINK.
Hero Arts Presents Background Stamp with Peek A Boo Doors Die to create an Advent Calendar Card
On the one hand, I love Christmas so I think it is great to get a headstart on crafting for the holidays as soon as Christmas is over. On the other hand, I feel a bit overwhelmed if I haven't started crafting holiday gifts and cards by this time of the year. Bearing that in mind, I just made my first Christmas item for this year. It is a Countdown to Christmas Advent Card.
The idea behind this card was actually my 14-year old's as she was watching me stamp, emboss and die cut. She suggested turning the card into an Advent Calendar. I've made many Advent Calendars over the years and here are some posts with a variety of different kinds of creations, here, here, here, and here. The last post has a list of activities that a child or family could do on each day as they count their way to Christmas.
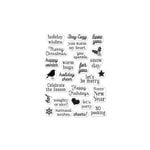
Tim Holtz Sizzix die for numbers and Christmas Greetings Stamps from Hero Arts
This card was considerably more complicated than most of the ones I have been making this month. However, it was fun! And it really did not take a huge amount of time... just some searching for numbers to die-cut that were the right size. It would have been easy to use the Cricut or Silhouette, but I had my Vagabond out and wanted to use that if I could. It turns out the Sizzix Tim Holtz Thinlet Mixed Media set pictured above was a perfect match. Adhering 4" wide strips of double-sided adhesive to cardstock made it very easy to cut, peel, and stick the numbers to each of the little doors.
Please let me know if you have any questions.
Today is the last day of both Sizzix and Scrapbook.com's Christmas in July sale. I am posting the links to Scrapbook.com for the current products I used in case you are in the market for any of these things and want to hit up a good sale! Hero Arts Stamps just released their Winter Catalog. You might want to check out their site for inspiration. Here is the list of items that I used:
I have been busy making more Christmas ornaments. Here are a few more...
Written instructions and pictures will be sent to anyone placing an order this month on my CTMH website or locally through me directly. Along with these projects, I am including several other project ideas for using the leftover pieces from the Avonlea Scrapbooking Workshop on the Go Kit. The photos for these bonus projects will be posted in the next few days. The projects do not have to be used with this kit, in fact they can be made with any of your favorite papers!
This past week feels like it was only half-finished for me. We switched cell phone providers and then had to switch again because there was no signal in our house. Getting this resolved has taken three and a half days!
There is nothing like big objects to make a bold statement. These ornaments are almost a foot tall! Hard not to notice these. Even my husband saw them. Here is a video if you prefer to watch about the project instead of read about it:
The written instructions are posted below.
CTMH Cricut Artiste Cut Shapes Hanging from Mono-filament Thread
This has to be one of the easiest Christmas decorations that I have ever made. The Cricut did almost all of the work. I just glued the lace/filigree layer on top of the coordinating shapes and they were finished! All of the ornaments were cut at 11.5 inches. These shapes are on pages 53 and 79 of the Artiste Handbook. This measurement is the finished size from the top to bottom, not the width. The "Merry Christmas" is on page 80 and was cut at 5 inches.
A simple variation, and also very easy to do, is to cover the top layer with glitter. I used Glitz Glitter Gel on one and Prisma Glitter on another. This is a great way to add some fun and easy sparkle to your decorations!
Ornaments Hung From Patio Door Frame
I loved how beautiful this Merry Christmas cut turned out, so I made an extra one (cut at 4") for a card. After cutting it out of Cranberry cardstock, I ran it face-down through the Xyron to make it completely covered in adhesive. Then I sprinkled it with Prisma glitter. It looks so pretty - and sparkly! It looks lovely layered on Ponderosa Pine on top of Cranberry cardstock.
5 x 7 Card
Thank you for joining my Christmas in July celebration! If you would like to see the previous projects, there was one posted every Friday this month.
Martha Stewart Craft Clay Frame Painted With Pearl Paint Mixed with Reinker
It is hard to find inexpensive, yet pretty home decor pieces. So, I was pretty excited when I found these little stretched canvases at Jo-Ann's on sale for $.50 each! That meant that whatever I made with them would still fall into the low-cost category. The various ribbon pieces, papers, bitty pearls and the small amount of clay cost less than $5 all together. What a great gift this will make!
Three Small Stretched Canvases Transformed Into A Single Piece of Art
By placing the canvases on top of the chipboard and cardstock base this 3-d piece of art already has a lot of depth to it. When adding a clay frame and popped up letters, it makes it even more interesting to look at. There is a lot of detail with big impact on a pretty small piece. The overall dimensions are based on the scrap piece of chipboard I used to mount the three canvases. It is about 9" long and a little less than 5" high. The ribbon lace across the canvases ties them together, yet still allows each one to stand as its own little creation.
Holly Leaves Cut With Art Philosophy Cricut Cartridge
Here is a video tutorial on how to make this triptych inspired Christmas art:
Now that the Fourth of July is over it is time for me to get ready for Christmas! Just kidding. I actually made this advent calendar last winter and I am finally getting around to posting the video tutorial. It has been in the video camera for months!
Here is the tutorial if you would like to follow along as I show you the steps that I took to make this.
This wreath is made with wedding favor tins. Inside can be placed candies or little messages. Over the years I have made a few Countdown To Christmas/Advent Calendars. Here is one that I made last year with some ideas posted about what I was enclosing inside.
Wilton Wedding Favor Tins - For Christmas Advent Calendar
It would have been yummy to have sampled lots of different sized candies for the tins, but I am trying to set a good example about "every once in awhile treats." So, in order to show the relative size of these little tins I used candy that was already in the house. This could also be interpreted as "candy that is not to my liking." Which is why it is still in the house. ;-)
This is a great project that my family will enjoy using for many years. I hope you get a chance to make one, too!
Please visit again next Friday for another Christmas in July project. I hope to have a new Christmas project posted every Friday this month.