Paper and Fiber Arts


Welcome to my mixed media blog. Thanks for stopping by.

Friday, July 14, 2023

Kraft, Black, and White Medallion Card


Kraft, black, and white are a gorgeous combination. It is gender-neutral, striking, and fun to use for card-making. Actually, I also used it when scrapbooking and still use it in my journaling and mixed media projects. It is a good go-to combination. Adding a pop of color takes it up a notch - see the green die-cut sentiment on the card at the bottom of the post for an example.

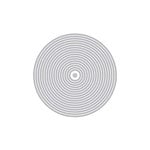
The medallion is sold with a suggested illustration of layering the three die cuts. I did that but added additional layers and turned the die a bit for a more robust, stacked design. The card above has a stamped and heat-embossed sentiment from the Altenew Tranquility Rose set.

When determining the layout of a card I audition the components prior to adhering them. I think this configuration works well because there are three sections to the card front. The heaviness of the two medallion shapes is balanced by a large sentiment, even though the lettering is thin.  I love this modern font. Unfortunately, "sending hugs" is a retired CTMH die. Do you have a favorite die?


THIS POST MAY CONTAIN AFFILIATE LINKS. BY CLICKING ON THEM AND PURCHASING PRODUCTS THROUGH MY LINKS, I RECEIVE A SMALL COMMISSION FOR THE REFERRAL. THE ITEM WILL NOT COST YOU ANY MORE BY GOING THROUGH THIS LINK.

Scrapbook.com

Altenew - Clear Photopolymer Stamps - Tranquility Rose
Scrapbook.com

Master Layouts Dies - Gina K. Website


Thursday, July 13, 2023

Stenciling Two Ways For Beautiful Card Backgrounds


Both of the cards shown today are made using the same stencil and ink colors. By stenciling them two different ways, you can create interesting and beautiful card backgrounds. The first card is ink blended by holding the stencil in place and overlapping the ink. Because the colors are on the cool side of the color wheel, it almost makes an ombre effect. For true ombre you would just blend a little more to have more subtle gradation. 

After stenciling the 4.25" x 5.5" cardstock piece, I Zentangled the closed circles with a variety of shapes. This is a really fun technique. If you'd like to see another card made this way, visit here.

Even though it looks really cool as it is, I decided to use the negative cuts from the next card to create a circle around the black 'hello'. 

The sentiment is an inset circle shape that I cut out of the surrounding circle with scissors. This is then inset into the negative cutaway pieces of the other stenciled card which is shown below.

The last picture shows how I used the leftover ink on the ink blending brushes and the stencil which was turned 90 degrees after ink blending over the top of the cardstock as done on the first background. It made a great background for another card and there was no additional mess to clean afterwards!


Both card fronts were cut and layered using the two large dies from Gina K's Master Layouts 1 set. On the second card, the black piece is the smaller cut shape and layered under the stenciled piece to let the 'hello' be the focus. I used two nesting circle dies to make the black frame around the circle. The finishing touch is the little silver half pearls glued to the black cardstock under the 'hello' sentiment die cut.

THIS POST MAY CONTAIN AFFILIATE LINKS. BY CLICKING ON THEM AND PURCHASING PRODUCTS THROUGH MY LINKS, I RECEIVE A SMALL COMMISSION FOR THE REFERRAL. THE ITEM WILL NOT COST YOU ANY MORE BY GOING THROUGH THIS LINK.


Wednesday, July 12, 2023

Peek-A-Boo Bookcase Card

 Have you seen the stamps and dies that make peek-a-boo interactive cards? This post from four years ago shows the Presents Background stamp set in action here. Today's post uses the same Peek-A-Boo Doors die. The bookcase stamp set has many wonderful images on a gigantic stamp and also lots of little stamps to position behind the doors. After ink blending with Altenew's Almond Butter ink for a vintage bookshelf look, I used Prismacolor pencils to color the stamped images.


The die is placed in position over the stamped and colored 4.25" x 5.5" card front. The die creates fold lines for the doors and crisply cuts the other three sides when run through the die-cutting machine. I used most of the small stamps from the set to make hidden images or sentiments behind the doors. The images are also colored with Prismacolor pencils.
Pictured above is the stamp set next to the card front. Notice how big the set is? The small images and sentiments can be used on other cards and papercraft items. If you prefer to leave the bookshelf image intact, you do not need to use the die to make an interactive card. It is the perfect cover stamp for a book lover's card.

You can see a little bit of the peek-a-boo images with this side-angle photo. A few of the images were stamped twice - under two different doors. This gave me an opportunity to change the color choices. For example, the mice are holding different colored books.
Do you enjoy making interactive cards? People love receiving them and there are usually a lot of oohs and ahhs when they see them.

THIS POST MAY CONTAIN AFFILIATE LINKS. BY CLICKING ON THEM AND PURCHASING PRODUCTS THROUGH MY LINKS, I RECEIVE A SMALL COMMISSION FOR THE REFERRAL. THE ITEM WILL NOT COST YOU ANY MORE BY GOING THROUGH THIS LINK.

Tuesday, July 11, 2023

Vellum and Kraft Card

 This is a 5" x 7" top folding card made mainly with kraft card stock. The vellum overlay layer softens the sharp lines of the medallion die cut. And it also tempers the busyness of all of the stars. I got a bit carried away when gluing the little stars. These would have normally been trash because they are the off-cuts from the larger die cuts - but they are perfectly usable.


The 'hello' sentiment is from my scrap pile and I can't locate the die to let you know from where it came! It is great to use up scraps from other projects or from die-cutting marathons, but not very helpful when trying to remember the origin!


THIS POST MAY CONTAIN AFFILIATE LINKS. BY CLICKING ON THEM AND PURCHASING PRODUCTS THROUGH MY LINKS, I RECEIVE A SMALL COMMISSION FOR THE REFERRAL. THE ITEM WILL NOT COST YOU ANY MORE BY GOING THROUGH THIS LINK.

Monday, July 10, 2023

Stained Glass Medallion Cards

This card came about because I wanted to make the medallion from the Stained Glass Medallion die set look as close to stained glass as possible. Using a high gloss glue over the ink-blended cardstock gives a shiny, almost glass-like look.
 
Ink blending within the parameters of the shapes keeps the focus on the pretty die-cut design. Two layers of die-cuts are adhered together to form a well for the shiny glue to be poured into. 
The final touch was to add some of the shrink plastic die cuts as embellishments. The photo, below, is an auditioned cardstock background color. It is as good a choice as the green pictured above. Color is a personal choice, there is no right or wrong.

The second card is the same process without a die-cut sentiment or additional embellishments. Using black cardstock for the die-cuts to be framed upon makes for a bold card front. It looks almost like wall art.


Both the Glossy Accents from Ranger and Spellbinders Glaze 'N Glue work equally well in creating the shiny stained glass look. They also work well for adhering the die-cut pieces in place once the surface is dry.


THIS POST MAY CONTAIN AFFILIATE LINKS. BY CLICKING ON THEM AND PURCHASING PRODUCTS THROUGH MY LINKS, I RECEIVE A SMALL COMMISSION FOR THE REFERRAL. THE ITEM WILL NOT COST YOU ANY MORE BY GOING THROUGH THIS LINK.


Products Used:


Sunday, July 9, 2023

Red and White Hugs Card


This card is easy and very quick to make because it is just layering/stacking die-cuts. Using two high-contrast colors makes a bold statement in a clean and simple way. Red and white are always a good combination. Do you have two favorite colors to try this technique?


THIS POST MAY CONTAIN AFFILIATE LINKS. BY CLICKING ON THEM AND PURCHASING PRODUCTS THROUGH MY LINKS, I RECEIVE A SMALL COMMISSION FOR THE REFERRAL. THE ITEM WILL NOT COST YOU ANY MORE BY GOING THROUGH THIS LINK.